7:17:00 PM

(0) Comments

Cool Photography Layout

design


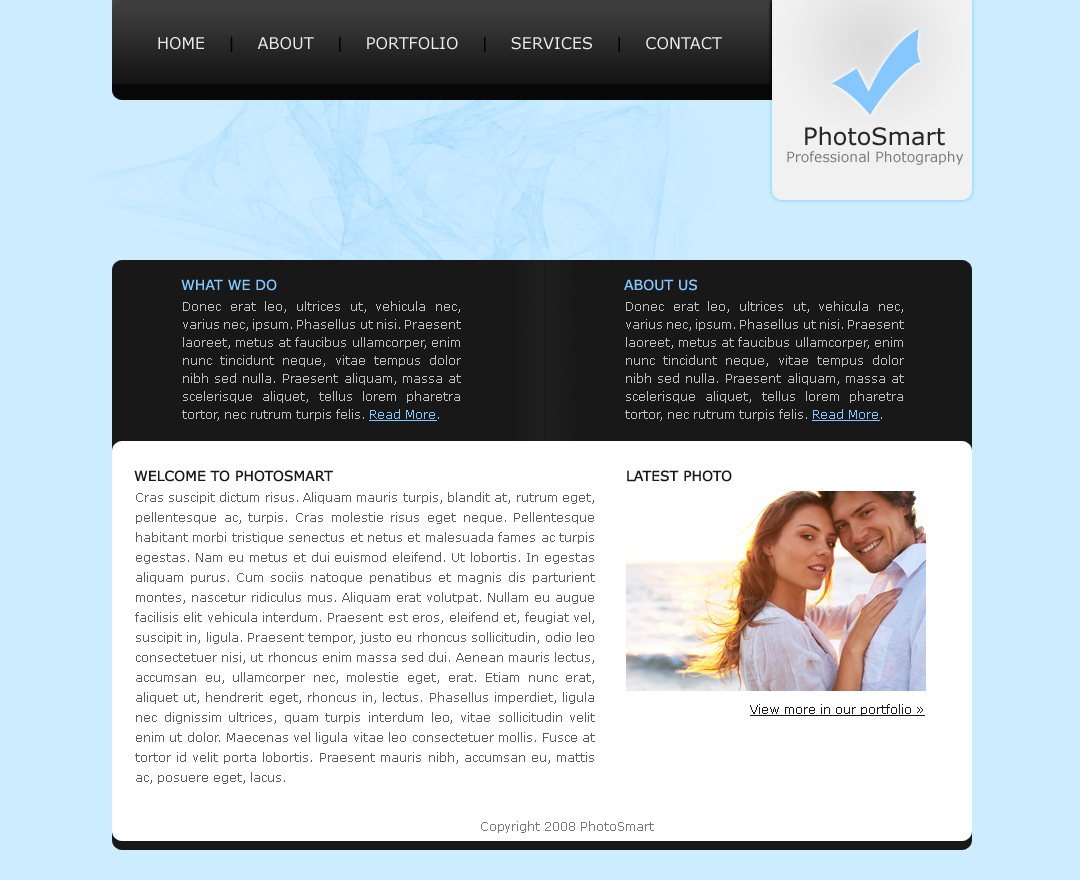
In this Photoshop tutorial, you will learn how to design a simple blue layout with Photoshop by combining shapes and layer styles.


Step 1

First of all create a new document with the dimensions: 1080 by 880 pixels. Now we are going to fill in the background with a solid colour by going Edit > Fill, and use the colour #CDECFF.

step1

Step 2

We are now going to be creating the navigation background. Create a new layer (Layer > New > Layer) and using the rounded rectangle tool make a selection (860 by 120 pixels) in the center, at the top of the document so that only the bottom curves are showing (hide the top ones outside the document by moving the selection up). Fill (Edit > Fill) the selection with the colour #151515 using the same method we used in the first step.

step2

Step 3

On the navigation background layer go Layer > Layer Styles > Gradient Overlay and enter in the settings below. Clicking on the picture beside "Gradient:" brings up the window on the top.

step3a

Now your navigation should be looking like this:

step3b

Step 4

Now we are going to be adding in some text links to act as the navigation for the site. Select the text tool from the tool box and add in some names of pages that you'd have for a photography site. I've chosen home, about, portfolio, services and contact. The font I've used is Verdana (16pt) and the colours are #EAEAEA for the links and #010101 for the bars between the links.

step4

Step 5

Next up we are going to be adding in the logo / header for the site. So create a new layer and using the rounded rectangle tool again make a selection of about 200 by 240 pixels (with a radius of 10 pixels) on the right hand side of the navigation, and using the technique we used for the navigation background make it so that only the bottom curves are showing (not the top ones). Select the gradient tool and set it to radial. Set your foreground colour to #E0E1E1 and your background to #F1F1F1, fill the selection with a gradient (left click somewhere near the top center and drag to the bottom and release).

step5

Step 6

Now we are going to be adding a layer style (an outer glow) to the logo background. To do this we go Layer > Layer Styles > Outer Glow. I've used the settings below.

step6a

Your layout should now be looking like this.

step6b

Step 7

Using the text tool add the name of the site and a small description underneath. I've made up a name "PhotoSmart" for the site and the description is "Professional Photography" - alliteration :) The colorus I have used are #272727 (for the darker colour) and #7b7b7b (for the lighter colour).

step7

Step 8

Now we are going to be doing the actual logo of the logo ;) If you don't want to make a shape from scratch for your logo, just use a custom shape from Photoshop. I've filled my tick with the colour #85c7ff and added a small white outer glow (Layer > Layer Style > Outer Glow).

step8

Step 9

Create a new layer (Layer > New > Layer) for the top content background area. Using the rounded rectangle tool make a selection of 860 by 590 pixels and fill (Edit > Fill) with #181818.

step9

Step 10

Create another new layer and make a rounded selection of 860 by 400 pixels at the bottom of the background (leave a 10 pixel margin at the bottom). Fill this selection with white (#FFFFFF).

step10

Step 11

Add in some fill in text for the top content area. The colour I have used for the titles is #85C7FF.

step11

Step 12

Now we are going to be adding a divider between the two paragraphs. On a new layer make a selection of 40 by 180 pixels (however high it is between the top and bottom of the black section). Fill the selection with a linear gradient from #181818 to #1e1e1e using the gradient tool.

step12

Step 13

Duplicate the divider layer and go Edit > Transform > Flip Horizontally. Move the duplicated layer to the right so there is a one pixel gap between the original and the duplicate.

step13

Step 14

Add in some fill in and footer text in the white content area and you are complete.

step14

Final Results

Add some finishing touches, maybe a brush in the background underneath the navigation and you're complete. Click on the image below to see the full version.

step15-full

ReadMore...

10:02:00 AM

(0) Comments

E3: Final Fantasy XIV Online Announced for the PlayStation 3 and PC

design

Online games are among the most profitable genres of videogames on the market as they can squeeze profit from their loyal fans by using a big number of ways, from subscription fees to unique content or items.


That is why when Square Enix revealed a few years ago Final Fantasy XI Online, the first MMO take on a Final Fantasy game from the company, it became extremely popular. Recently, the Japanese company, in order to heal Sony's wounds after revealing that Final Fantasy XIII would be coming to both its PS3 and its archrival the Xbox 360, revealed Final Fantasy XIV Online.

But even though it will be console exclusive for the PlayStation 3, the online game will also appear on the PC, in order to bank in on the massive number of MMO players using that platform for their online gaming needs.

Set in the magical realm of Eorzea, Final Fantasy XIV promises to take players on a truly spectacular journey, some adventures and quests in order to transform them into heroes. Sadly, no concrete information about gameplay, story or other such things has been offered but the game has already been pegged for a worldwide release in 2010, and it will come with language support for Japanese, English, French and German players, guaranteeing a large fan base.

Out of the staff that is working on the game we find the producer of Final Fantasy XI Hiromichi Tanaka, as well as the director of the same title, Nobuaki Komoto. The art of the game will be handled by Final Fantasy XII Art director Akihiko Yoshida.

Overall, Final Fantasy XIV seems to be a very interesting take on the online JRPG genre, one which, if we take into account the large popularity that its MMO predecessor FF XI has been enjoying, will go on to be a best seller.

As quoted from : softpedia.com


ReadMore...

8:40:00 AM

(0) Comments

Artisteer – The Automated Web Designer

design

With Artisteer YOU immediately become a Web design expert, editing and slicing graphics, coding XHTML and CSS, and creating Web Design Templates, joomla templates, drupal themes and wordpress themes - all in minutes, without Photoshop or Dreamweaver, and no technical skills.

Artisteer is the first and only Web design automation product that instantly creates fantastic looking, unique website templates and blog themes.


- Design awesome WordPress Blogs, professional Joomla! and Drupal templates, and cool Website designs in Minutes

- Easy to Use

- No need to learn Photoshop, CSS, HTML or other technologies

- Export as Wordpress Theme or CMS Template

Top 10 reasons to use Artisteer

  1. 1. Generate cool Web design ideas.
  2. 2. Adjust generated designs to create great looking Web and Blog templates.
  3. 3. Create perfectly correct, validated HTML and CSS that conform to Web standards.
  4. 4. You don't need to learn Photoshop, CSS, HTML and other Web technologies to create great looking designs, including images and buttons.
  5. 5. If you are a Web designer, generate ideas, prototypes and quick Websites for your clients and friends.
  6. 6. Choose and use many included design elements, from backgrounds to photo objects and buttons.
  7. 7. Automatically solve problems with image aliasing, Web browser compatibility and other details requiring time and knowledge.
  8. 8. Learn how to create professional HTML and CSS code.
  9. 9. Save money on Wordpress Themes and Web design templates.
  10. 10. If you don't have the time, hire your kids to create great looking web design for you.

Trial Version : Download


ReadMore...

2:18:00 PM

(0) Comments

Digital Display

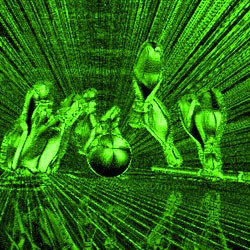
Turn an image into a high-tech digital art. From a distance, it will look like a LED display image but viewing up close will reveal the tiny details. Note: Make sure that the image is in RGB color mode. To switch to RGB color mode, click on RGB Color under the Image> Mode menu.


Prepare the Image

Step 1

Open an image you would like to edit. Or, you may use the image used in this tutorial (from iStockPhoto). Using a low-resolution image is fine.

Bowling Pin Photo

Step 2

If you're using a low resolution image, use the Image Size tool to increase the dimensions. We recommend at least 2000 pixels wide and tall for better clarity in the final result.

Tip: Ensure that the "Resample Image" checkbox is checked to allow scaling the actual pixel dimensions.

Photoshop Image Size Tool


Convert Image into a Grid of Circles

Step 3

Add a Mosaic filter (Filter> Pixelate> Mosaic) with a cell size of 8 square.

Photoshop Mosaic Filter

Step 4

Apply a Find Edges filter (Filter> Stylize> Find Edges)

Find Edges Filter Applied

Step 5

To warp the edges into circles, we'll use the Median filter. Apply a Median filter (Filter> Noise> Median) with radius of 2 pixels.

Photoshop Median Filter Tool

Step 6

Select the Magic Wand tool (W) and apply these settings:
Tolerance: 8
Anti-Alias: Checked
Contiguous: Checked

Magic Wand Settings

Step 7

Use the Magic Wand tool to click on a white area. Inverse the selection (Select> Inverse or Shift+Ctrl+I)

Step 8

Apply another Median filter (Filter> Noise> Median) but with a Radius of 3 pixels.

Photoshop Median Filter

Step 9

Deselect (Select> Deselect or Ctrl+D) and apply an Auto Levels (Image> Adjustments> Auto Levels or Shift+Ctrl+L)

Auto Levels Applied

Step 10

Invert the current layer (Image> Adjustments> Invert or Ctrl+I)

Inverted Image

Step 11

Duplicate the current layer (Layer> Duplicate Layer or Ctrl+J), change the blending mode of the new layer to Overlay, then Merge the layers (Layer> Merge Layers or Ctrl+E).

Create Outlines

Step 12

Duplicate the background current layer (Layer> Duplicate Layer) and change the blending mode of the new layer to Screen.

Duplicated Layer

Step 13

Apply a Find Edges filter (Filter> Stylize> Find Edges).

Photoshop Find Edges Filter Applied

Step 14

Invert the current layer (Image> Adjustments> Invert or Ctrl+I).

Inverted Layer

Colorize

Step 15

Add a new Hue/Saturation adjustment layer (Layer> New Adjustment Layer> Hue/Saturation). For this step, I will use these settings:
Colorize: Checked
Hue: 100
Saturation: 100

Tip: This step is optional and may be skipped if you do not want to colorize the image.

Photoshop Hue/Saturation Adjustment Layer


Final Results

Multicolor version

Rollover the image below to see the before and after effect.

Final Results

100% crop

Final Results 100%

Colorized Version

Rollover the image below to see the before and after effect.

final-results-2-full

Image when printed

Printed Final Results

use the Median filter. Apply a Median filter (Filter> Noise> Median) with radius of 2 pixels.
{mosimage}
  • Select the Magic Wand tool (W) and apply these settings:
    Tolerance: 8
    Anti-Alias: Checked
    Contiguous: Checked
    {mosimage}
  • Use the Magic Wand tool to click on a white area. Inverse the selection (Select> Inverse or Shift+Ctrl+I)
  • Apply another Median filter (Filter> Noise> Median) but with a Radius of 3 pixels.
    {mosimage}
  • Deselect (Select> Deselect or Ctrl+D) and apply an Auto Levels (Image> Adjustments> Auto Levels or Shift+Ctrl+L)
    {mosimage}
  • Invert the current layer (Image> Adjustments> Invert or Ctrl+I) {mosimage}
  • Duplicate the current layer (Layer> Duplicate Layer or Ctrl+J), change the blending mode of the new layer to Overlay, then Merge the layers (Layer> Merge Layers or Ctrl+E).
  • Create Outlines

    1. Duplicate the background current layer (Layer> Duplicate Layer) and change the blending mode of the new layer to Screen.
      {mosimage}
    2. Apply a Find Edges filter (Filter> Stylize> Find Edges).
      {mosimage}
    3. Invert the current layer (Image> Adjustments> Invert or Ctrl+I).
      {mosimage}

    Colorize

    1. Add a new Hue/Saturation adjustment layer (Layer> New Adjustment Layer> Hue/Saturation). For this step, I will use these settings:
      Colorize: Checked
      Hue: 100
      Saturation: 100
      {mostip image=tipon}This step is optional and may be skipped if you do not want to colorize the image. {/mostip} {mosimage}
    {mospagebreak title=Final Results}

    Final Results

    Final Results
    Final results
    (Rollover the image with your cursor to see the image before the Digital Photoshop effect was applied. )
    Final Results 100%
    Final results closeup

    final-results-2-full
    Colorized final results
    (Rollover the Image with your cursor to zoom in. Click to view full image)
    Printed Final Results
    Final results when printed


    ReadMore...

    1:46:00 PM

    (1) Comments

    Circuit Board

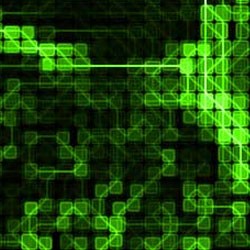
    Transform a regular photo into a high-tech artwork made up of blocks and connectors resembling a circuit board.


    Creating the Blocks

    First, we'll create convert the image to blocks using a combination of Photoshop filters.

    Step 1

    Open a photo you would like to edit. We recommend using a high resolution image of at least 1000x1000 pixels. It is also fine to upscale a low resolution image before using this effect.
    This photo will be used to create the Circuit Board Photoshop effect.

    Step 2

    Duplicate the layer (Layer> Duplicate Layer or Ctrl+J).
    Duplicated Layer

    Step 3

    Activate the top layer and apply a Mosaic filter (Filter> Pixelate> Mosaic) with a cell size of 16 square.
    undefined

    Step 4

    Apply a Find Edges filter (Filter> Stylize> Find Edges).
    Find Edges filter applied.

    Step 5

    Apply a Median filter (Filter> Noise> Median) with a radius of 2 pixels.
    The Median Filter

    Step 6

    Apply a Minimum filter (Filter> Other> Minimum) with a radius by 4 pixels.
    The Minimum Filter

    Step 7

    Finally, invert the current layer (Image> Adjustments> Invert or Ctrl+I).
    Inverted Layer

    Adding an Outline to the Blocks

    Now that we have the blocks created, we'll add a simple outline around them.

    Step 8

    Duplicate the top layer (Layer> Duplicate Layer or Ctrl+J) and change the blending mode of the new layer to Screen.
    Layer duplicated and blending mode set to Screen.

    Step 9

    Apply a Find Edges filter (Filter> Stylize> Find Edges).
    Find Edges filter applied.

    Step 10

    Invert the current layer (Image> Adjustments> Invert or Ctrl+I) and the outline should blend into the image. One last thing to do is to reduce the opacity

    Creating the Connectors

    We're almost done with the effect. All we need to do now is add the connectors. This is a simple process using a few Photoshop filters.

    Step 11

    Duplicate the Background layer (Layer> Duplicate Layer or Ctrl+J) and move it to the top.
    Layer inverted and opacity set to 25%.

    Step 12

    Apply a Mosaic filter (Filter> Pixelate> Mosaic) with a cell size of 16 square.
    Layer duplicated and moved to top.

    Step 13

    Activate the new top layer and apply a Median filter with a radius of 8 pixels.
    The Median Filter

    Step 14

    As you might have guessed, we'll now apply a Find Edges filter (Filter> Stylize> Find Edges).
    Find Edges filter applied.

    Step 15

    Finally, invert the current layer (Image> Adjustments> Invert or Ctrl+I) and change the blending mode to Screen.
    Layer inverted and blending mode changed to Screen.

    Colorizing the Final Results

    This step is optional. If you would like to colorize the final results, follow this step:

    Step 16

    Add a new Hue/Saturation adjustment layer (Layer> New Adjustment Layer> Hue/Saturation) as the top layer. Checkmark Colorize and apply your desired color settings. Here are the settings I've used for this step:
    Colorize: Checked
    Hue: 100
    Saturation: 100
    Lightness: 0
    The Hue/Saturation Tool

    Final Results

    Rollover the images below to see the before and after effect.

    Circuit Board final-results-full Circuit Board


    ReadMore...