

3:38:00 PM
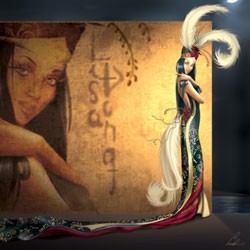
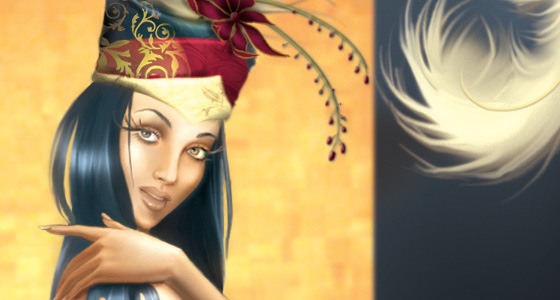
Find out what Photoshop techniques were used to create this painting. In this Photoshop tutorial, we will walk you through several painting techniques to get you started with painting.
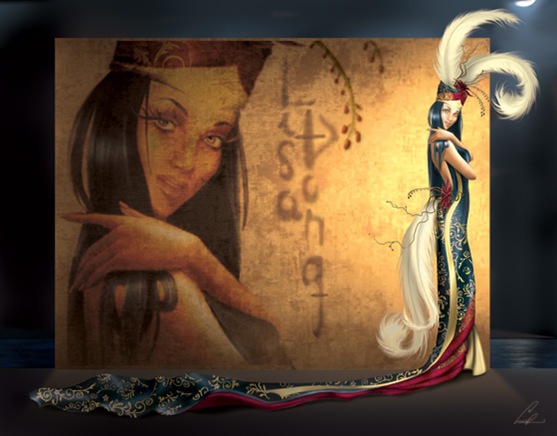
Exotic Fashion Photoshop Tutorial
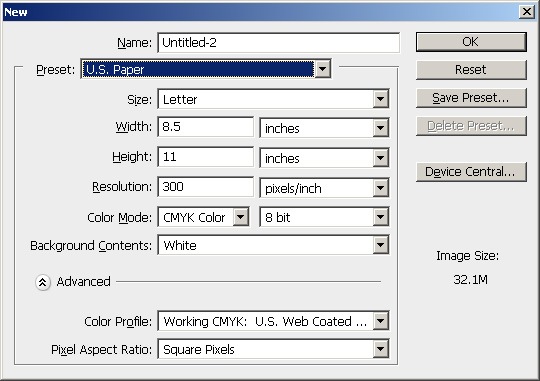
Setting the canvas
The first step is to create a new canvas; most important and overlooked. Choose what you want your output size to be. The larger the canvas dimensions, the more time and effort will be required to complete the painting. If you're not entering the width and height in pixels, make sure that you set the resolution to 300 pixels/inch. If you plan on printing this, make sure that you have the color mode set to CMYK color. You should also choose to use 16 bit color if you will not be using many filters and if your computer can handle it.
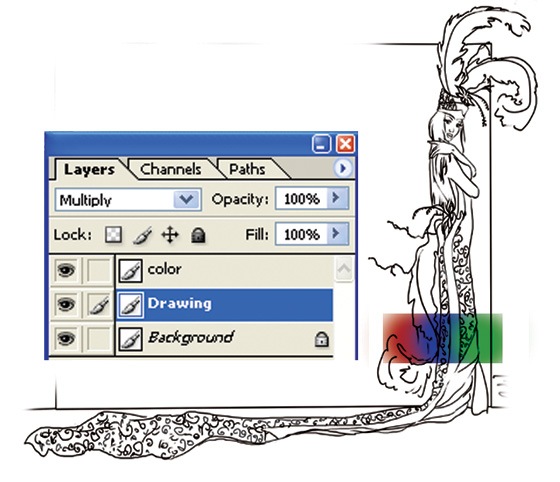
Creating the layers
Before you paint anything, you'll need to create two additional layers with the blending mode on Multiply. One of the layer will be used to hold the drawing or sketch and the other will be used for the color and painting. This is the most basic layer setup and is recommended for beginners who just want to get started with painting in Photoshop. More advance users will have groups of layers for each part of the painting.
Painting
When painting, it is very helpful to have a pen tablet such as the Wacom Bamboo. A pen tablet will allow you to create brush strokes that are pressure sensitive.
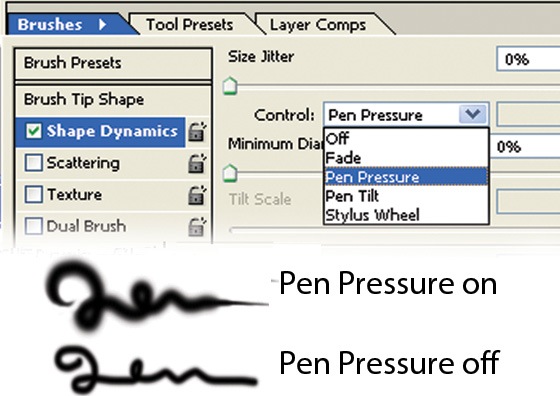
Enable Pen Pressure
First, select the Brush tool and click on the "Enable Airbrush Capabilities" button in the option bar near the top of your Photoshop window. In the Brush palette, set the control to Pen Pressure or Pen Tilt (if you have a tilt sensitive pen tablet). If you're using a mouse, set the control to Fade. Fade will simulate natural brush strokes by making the brush size smaller as according to the stroke length.
Face
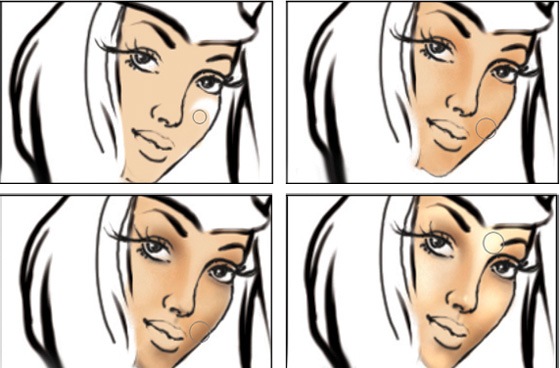
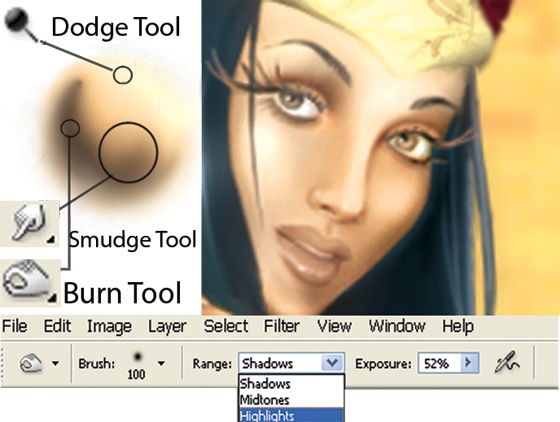
Painting the face is a simple process using the brush, dodge, and burn tool.
First, use the brush tool to paint a base color. Then, use the burn tool to burn the edges. Finally, select the dodge tool to dodge the highlights.
When you're done, you can use the Smudge tool to refine the edges between the highlights and shadows. In the option bar, you can specify if you only want to smudge the shadows, midtones, or highlights.
Hair
The hair can be created with almost the same technique as the one used for the face. Except this time, you'll be using the smudge tool to create the texture of the hair.
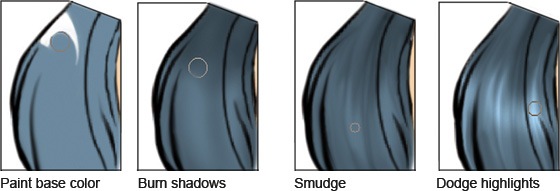
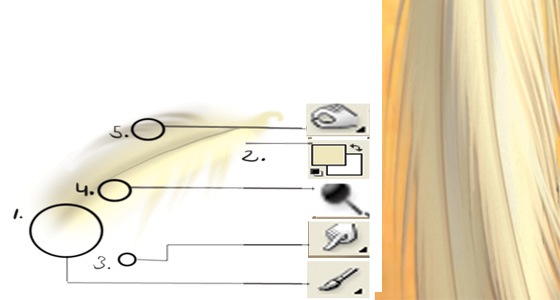
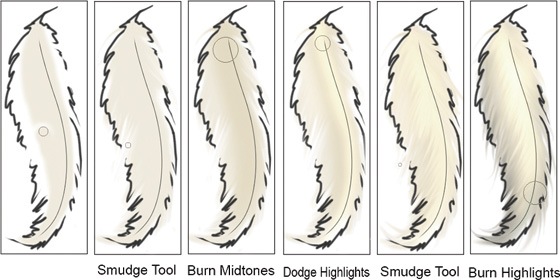
Feathers
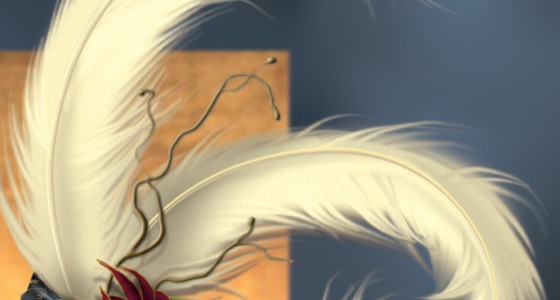
Creating the feathers is more complicated. Begin by choosing a base color for the feather. Then, draw the shape of the feather. Using the Smudge tool at 80% strength, smudge from the center out to create the individual feathers. Finish it with the Dodge and Burn tool to create shadows and highlights.
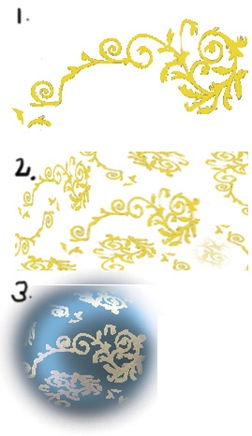
Dress pattern
To create the pattern for the dress, draw a design on a separate layer. Then, duplicate and rotate the pattern to form other shapes.
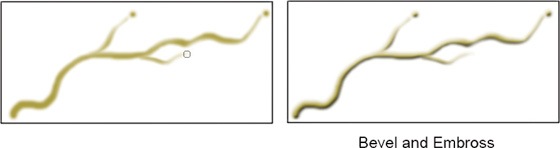
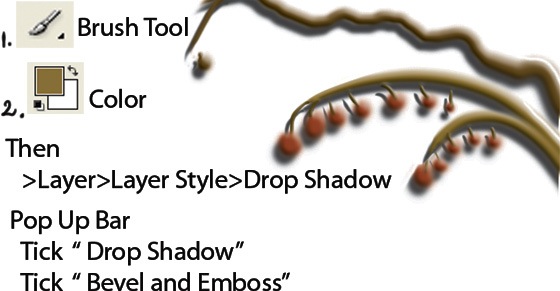
Twigs

Creating the twigs is simple. Draw the twigs with the brush tool then apply bevel and drop shadow layer styles make it look three dimensional.
Final Results
ReadMore...
3:28:00 PM
Learn how to use the tools of Photoshop to create a scrapbook cover. In this beginner Photoshop tutorial, you will learn how to draw scrapbook elements such as tapes and thumbtacks.
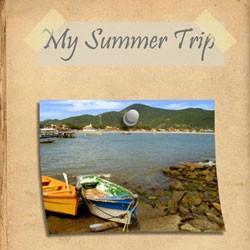
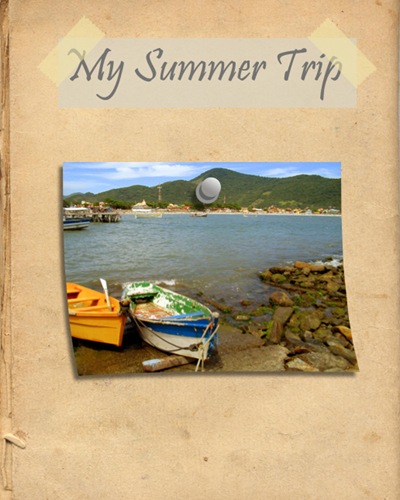
Scrapbook Cover Photoshop Tutorial
Step 1: The Background
Open a wallpaper or image that resembles a book or report cover. Make sure to choose one that will look good with text and images stuck on to it.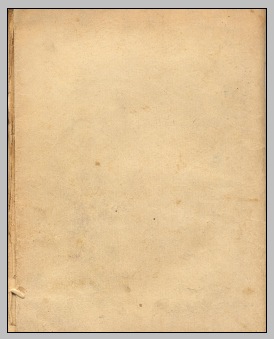
Step 2: Creating a Title
Type out a title, make it a big text size, I used 60pt. The font I used was Pristina. Now create a new layer called ‘background’ and in the layer panel move it below the text layer you just created. Change your foreground colour to a colour that contrasts the title’s colour. I used #d9d3c1. Using the Rectangular Selection Tool create a selection that fits behind the title. Now right click inside the selection and click Fill. Select ‘Foreground Color’, then Ok. Give this layer about a 75% opacity. It should now look something like this:

Step 3: Creating the Tape
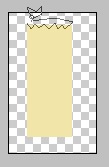
Create a new layer called ‘tape’. Change your foreground colour to #f1e5a9, you may have to tweak it to look good with your background. Using the rectangular selection tool make a long rectangle shape. Right click in the rectangle selection and click Fill. Select ‘Foreground Color’ and then Ok. Now make cuts into the top and bottom of the rectangle using the Polygonal Lasso tool. To finish it off give the layer 60% opacity. It should now look some what like a piece of tape.
Step 4: Mount the Title using the Tape
Rotate, move, and resize the ‘tape’ layer until it looks like it is holding the left side of the title up. Duplicate the ‘tape’ layer and do the same process but so the tape is holding up the right side.

Step 5: Creating the Thumbtack
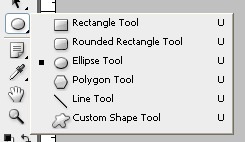
Now we are going to create a thumbtack. Select a foreground colour for the colour of the thumbtack. I used #94938f. Now create a small circle using the Ellipse Tool.
Now make another smaller darker coloured circle and move it to the upper right corner of the first circle. Next make circle a bit bigger than the previous one and the same colour as the first one. Move this circle so it is overlapping the previous circle.
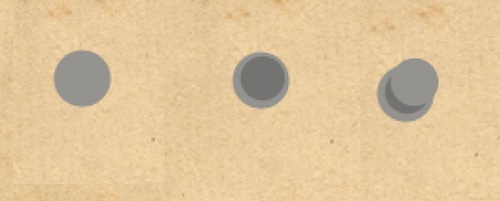
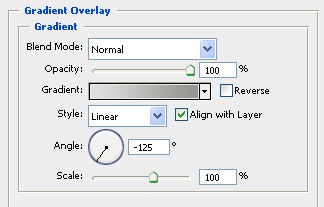
Change the foreground colour to #e1e1e0 and the background colour to #94938f. Now bring up the layer effects window for this layer (The last circle you created). Go down to ‘Gradient Overlay’ and input the following settings.
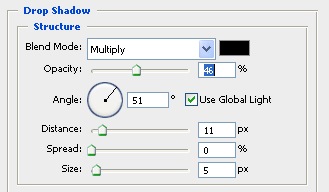
Once you are happy with the shape and colours of the thumbtack layers merge the layers and call the layer ‘thumbtack’. Next bring up the layer effects window for this ‘thumbtack’ layer and apply a drop shadow with these settings.
Step 6 – Creating the Peeling Image
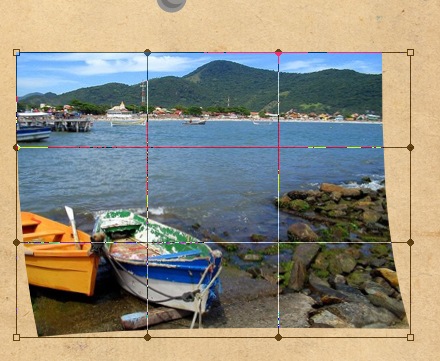
Open an image that you would like to be pinned to the book. Name this layer ‘photo’. Now to add some depth to this image, warp it so it looks like it is bending off the page. Edit > Transform > Warp. Pull the bottom corners out a bit
Step 7: Adding the Drop Shadow
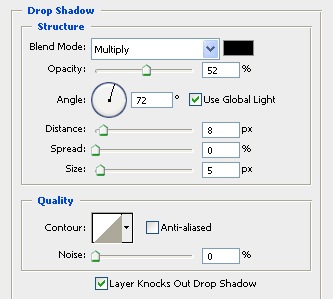
Go to the layer effects window and add a drop shadow to the ‘photo’ layer. Adjust it until you think it looks good, I used these settings.
Make sure this ‘photo’ layer is below the ‘thumbtack’ group. Now drag the thumbtack overtop, it should now look as if the thumbtack was holding the image on.
Final Result
With my final result I tweak the colors in the ‘photo’ layer to bring out more of the orange in the picture. Image > Adjustments > Color Balance. This effect may not apply to your image.
2:32:00 PM
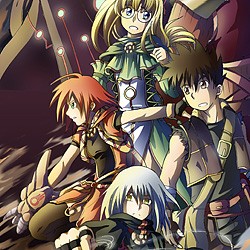 Learn step by step how this painting was created. You will get a good understanding of how to create anime images with beautiful lighting and learn techniques that will help you in many types of drawings.
Learn step by step how this painting was created. You will get a good understanding of how to create anime images with beautiful lighting and learn techniques that will help you in many types of drawings.
Preview of Final Results

How to Create an Anime Artwork in Photoshop
Step 1 – The Outline
Most people draw the outline on paper then use a scanner to load the outline into Photoshop.Begin by opening the outline image into Photoshop.

- Use the Levels tool (Image > Adjustments > Levels) to correct the contrast of the outline. You can do this with the Levels tool by moving the black and white input sliders towards the center of the histogram. Make sure that the background is 100% white and the outline is 100% black with smooth edges.
- To begin, you’ll need to unlock the Background layer. To do this, double-click on the Background layer in the Layers palette and click OK in the New Layer window.
- Now that the layer is unlocked, you can change the blending mode to Multiply. This will make the white background in the layer transparent.
Tip: Ensure that there are no broken lines. You will be using the Magic Wand tool often and broken lines will slow you down.
Step 2 – Separating the Outline
In this step, you’ll learn how to separate the outline and the background into two layers. This will also make the outline slightly thinner. You’ll also learn how to dissect the outline without any jagged edges using the Load Selection from Layer command.

In the above image, you can see the difference between using the Magic Wand tool and the Load Selection from Layer command. The Magic Wand tool produces jagged edges that become apparent when placed on a colored background. Instead of using the Magic Wand tool, use the Load Selection from Layer command to produce smoother outlines that blend well with any background.

- In the Channels palette (Window > Channels), click on the
 button. This will create a selection using the tonal information from the layer. Press the Delete button on your keyboard to delete the white background.
 - Add a new layer below the outline layer and fill the layer with white.
- Change the blending mode of the layer to Multiply.
Step 3 – Base Color
Now that we have the outline and white background separated, we can add the base color.

- Add a new layer below the white layer.
- Select the Magic Wand tool and, in the option bar, set the Tolerance to 50.
- In the option bar, checkmark the Contiguous and Sample All Layers options.
- With the Magic Wand tool selected, click where you want to add color.
- Expand the selection by 3 pixels using the Expand command (Select > Modify > Expand). If you are using Windows, you can press Alt, S, M, E on your keyboard to quickly access this menu item.
- Use the Paint Bucket tool to fill the selection with a color of your choice. Use the same technique (Create a selection with the Magic Wand tool then fill with the Paint Bucket tool) for the entire image.
Step 4 – Adding Shadows
In this part, you’ll learn how to add shadows to the image. One important technique from this step is how to select the correct color.

- Create a new layer and position it between the white layer and the base color layer.
- Select the Magic Wand tool and set the tolerance to 1 (so that it will only pick one color) and uncheck the Contiguous and Sample All Layers options.
- Select the Brush tool and set the hardness to 100%. This will give the brush a sharp edge.
- In the Tools palette, click on the foreground color. This will bring up the Color Picker window. Select the base color from where you want to start. This will give us the hue of the color. Move the slightly off the area to change the saturation and brightness of the color.
- Paint the shadows. Be sure to pay attention to where the light is coming from to get proper looking shadows.
Step 5 – Dodge and Burn
The Dodge and Burn tool will be used to give a gradient tone effect to the solid colors.

- Duplicate the layers with the base color and shadow then position them above the original base color and shadow layers. The new layers will be used for dodging and burning while the old layers will be used to load selection with the Magic Wand tool. Select the layer with the base color and use the Magic Wand tool to create a selection of an area that you want to edit. In the image above, we created a selection of the hair.
- When using the Dodge or Burn tool, turn on the “Other Dynamics” option in the Brushes palette (Window > Brushes).
- Also, in the Dodge or Burn tool options, set the range option to Midtones.
- When using the Dodge or Burn tool, set the hardness to 0%.
- Select the top shadow layer (shade 2 in the screenshot). You will be using the Dodge and Burn tool to create a gradient in the shadows. Start with the Burn tool to darken the areas in a smooth motion on the lower part of the shadow.
- On the same layer, select the Dodge tool and lighten the upper part of the shadow.
- Select the duplicated layer with the base color. Use the Dodge tool to lighten the upper area of the base color.
- Use the Burn tool to burn the lower area of the base color.
Step 6 – Adding Reflected Light
In this step, you’ll learn how to add light reflected from the ambient light.

- Use the same setting as previously used for the Magic Wand tool.
- Turn on the “Other Dynamics” setting in the Brush palette (Window > Brushes).
- Set the Brush hardness to 0%.
- For this image, a dark purple color was used to shade the area with no reflected light. The light source is from the left of the image so the right side of the characters were painted with dark purple.
- A light yellow color was used to shade the areas facing the ambient light.
Step 7 – Coloring the Outline
Coloring the outline will add more detail to the final image and it’s easy to do.

- Leave the brush presets on.
- In the Layers palette, select the layer with the outline then lock the transparent pixels by clicking on the button.
- Use the Brush tool to color the outline using a color that is close to the outline.
- Keep using the Eye Dropper tool to select the color beside the outline.
Step 8 – Creating the Smokes
Now you’ll learn how the smoke swirling around the characters were created.


- Create a new layer for the clouds. Use the Brush tool with a hardness of 100% and paint some zigzag shapes for the smoke.
- Use the Smudge tool to smudge it in the motion shown above.
- Use the Dodge and Burn tools to create volume on the smoke so that it looks 3D.
- Load the selection (Select > Load Selection) of your smoke layer. Choose Select > Modify > Contract and enter an amount that will make the selection half its size. You may have to undo and try this several times to get the correct amount.
- Create a new layer for the smoke highlights. Use the Brush tool and paint inside the smoke with yellow orange.
- Select the Move tool and nudge the layer up by pressing the up arrow on your keyboard.
Step 9 – Creating the Cloudy Sky
Creating the cloudy sky uses a similar process as the previous step.


- Create a new layer for the sky and name the layer “sky”. Use the Gradient Tool to create a gradient like the image above (#1).
- Create a new layer above the sky layer and name this “clouds”. Use the Brush tool and paint some lines to create the shape of the cloud.
- Use the Smudge tool to smudge the cloud layer in the motion shown (#3).
- Load the selection of the clouds layer (Select > Load Selection). Choose Select > Modify > Contract and contract the selection like you did when you were creating the smoke. The selection should be close to half of what it was. You may have to try this more than once to get the right value.
- Create a new layer and mane this layer “clouds 2”. Position it above the clouds layer. Select a color that it slightly darker than the color you used to create the clouds. It should still have the same hue and saturation. Paint the selected area with this color.
- Use the Dodge and Burn tools to add volume to the clouds so that they look 3D.
- Use the Dodge and Burn tools on the sky layer to create a light source.
Step 10 – Adding Light

- Create a new layer and name this layer “light”. Move the layer to the very top so that it is above all the other layers.
- Select the Brush tool. In the Brushes palette (Window > Brushes), checkmark the Other Dynamics option.
- Set the brush hardness to 0% for soft edges.
- Select white as the foreground color then paint the areas where you want the light to appear. The image above shows the areas that were painted.
Step 11 – Tinting With a Gradient
This step will show you how to create more realistic colors by warming the areas closest to the light source and cooling the areas away from it.


- Create a new layer and position it above all the other layers.
- Load the selection of the characters then use the Gradient tool to create a orange to blue gradient. Because the light source of the drawing used for this tutorial is from the left side, I will draw a gradient from the left to right. This will make the left side warmer and the right side cooler.
- Change the blending mode of the current layer to Color.
- Lower the opacity to about 10-20%.
Final Results
