5:05:00 PM
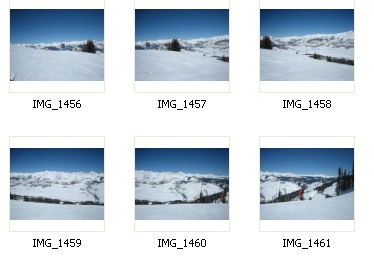
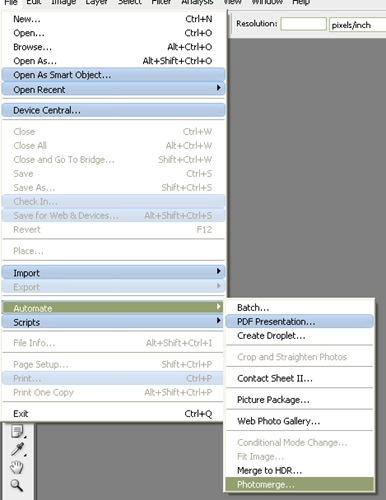
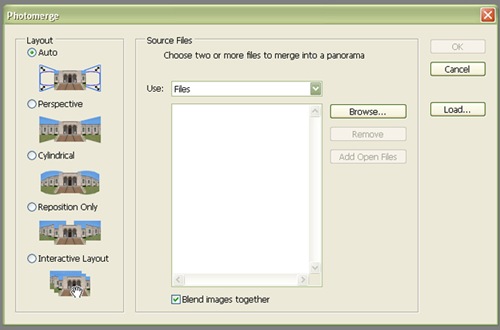
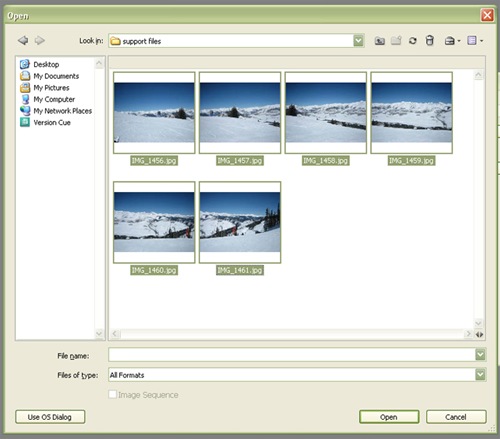
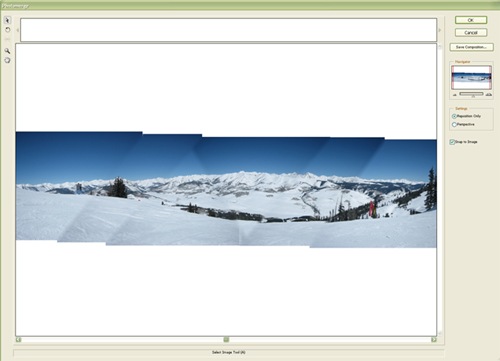
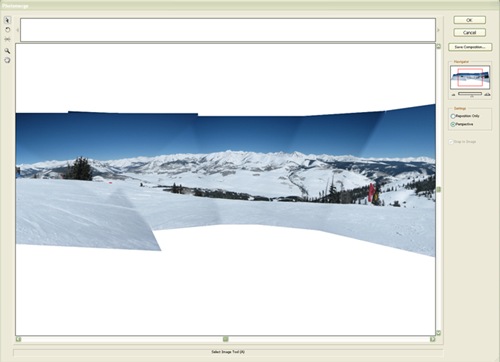
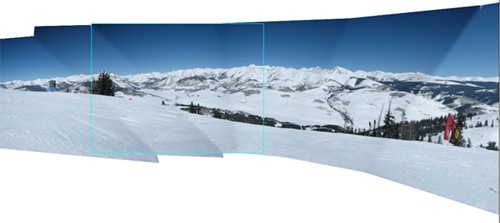
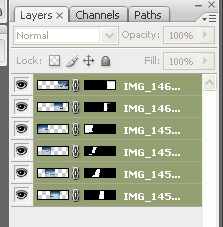
My wife and I went to Crested Butte, Colorado, recently for spring break. We snowboarded for a few days and enjoyed the outdoors, taking a few photos along the way. One sure thing to do when enjoying the outdoors is to take panoramic shots. You don’t need a wide-angle lens to capture the vast expanse of outdoor landscapes photography. A technique I and many other photographers utilize is to take overlapping shots of a landscape and merge them later in Photoshop. Photoshop CS3 has a few new features and options to consider. First, let’s go over some tips for when shooting these types of photos. Before we start, download this file that contains six images that you will use to follow this tutorial. Now let’s get started. For this example, I didn’t use my SLR camera, because I didn’t feel like lugging up the bigger Canon Rebel while snowboarding, especially since it’s more expensive than the one I brought, a Canon Powershot. I can put the Powershot in my pocket while snowboarding, so it was more convenient. But using an SLR is ideal for the reasons listed above. Go ahead and start up Photoshop CS3. Here’s there six images that we’ll be using from the support files. Go to File>Automate>Photomerge. A dialog will open that lists a few different options. “Auto” tells Photoshop to choose the best setting and apply it. It has less flexibility, but is quick and to the point. “Perspective” sets the image in a perspective that includes less barrel distortion, while “Cylindrical” has more barrel distortion. “Reposition Only” simply does that—repositions the images but doesn’t change the perspective. “Interactive Layout” allows a few more options, so let’s choose that. Click Browse and select the images from the support files by clicking-and-dragging over them in the dialog. Click OK and the images will now be listed in the dialog. If we had already had the files open, they would already be listed there. Click OK to merge the photos. The Reposition Only option shows how the photos would look like if they were just copied and pasted next to each other. Clicking the Perspective option on the right adds perspective to the photo, rather than a “flat” look. The tools on the left side let you select and move the photos (the selection tool), move the view around (the move view tool), and the rotate and zoom tools let you rotate and zoom into the photos. The other one is the set vanishing point tool, which can be used when perspective is selected. Click somewhere to set the vanishing point. This example shows moving the vanishing point to the side of the photo. I pressed Ctrl-Z (Mac: Cmd-Z) to undo that tool. Select either perspective or reposition only and press OK to merge the photos. Notice how each layer is a partially-masked photo. Select the crop tool and crop out the empty pixels. Using the photomerge tool is a great way to create breath-taking landscape photos. Here’s a few more examples (Click on images to enlarge). Photoshop features a powerful stitching tool to create panoramas from a series of photographs. In this Photoshop tutorial, you will learn how to use the Photomerge tool in Photoshop CS3 to stitch a series of photos into a panorama.
Photomerge Photoshop Tutorial
Support Files
Step 1:
Step 2:
Step 3:
Step 4:
Step 5:
Step 6:
Step 7:
Step 8:

Step 9:
Step 10:

 ReadMore...
4:34:00 PM
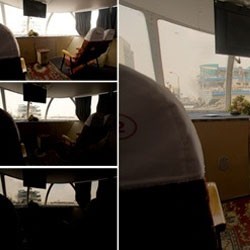
Explore high dynamic range imaging in Photoshop. This Photoshop guide will show you how to photograph for HDR, view 32-bits/channel HDR images, and compress them into 8- or 16-bpc images. More about HDR and Photoshop after the click.
High dynamic range
In the real world, the dynamic range far exceeds what our eyes are capable of seeing and what our monitors and printers are capable of displaying. With high dynamic range (HDR) images, you can create images that can store a larger dynamic range.
In the example below, a single exposure photograph doesn't capture enough dynamic range to display all the details; no exposure setting could display the correct dynamic range. Photoshop was used to merge three exposures to capture more dynamic range.
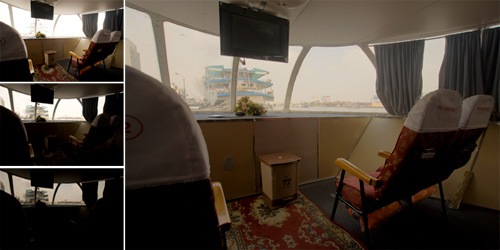
Unlike 8 bits/channel or 16 bits/channel images, HDR images in Photoshop contain 32 bits of data per channel; more than what can be displayed on your monitor. In the latest version of Photoshop, you can create layered documents and several tools, filters, and commands for 32 bits/channel. Many of those tools, filters, and commands you normally see when working on 8-bits/channel images will be unavailable.
Most likely, your camera cannot capture 32 bits/channel images. However, with Photoshop, you can use the Merge to HDR command to combine photos with different dynamic range into a single HDR photo. For example, you can shoot a landscape three times with three different exposure to capture a wider dynamic range and merge them into Photoshop to create a single HDR photo.
Photograph for HDR
If you want to shoot photos and use the Merge to HDR command in Photoshop to create a HDR photo, remember the following tips:
- The images must be of the same scene. Place the camera on a tripod before shooting.
- Shoot at different exposure settings to capture the full dynamic range in the scene. You will need at least three photos to use the Merge to HDR command but we recommend at least five for best results.
- Set your camera to Manual mode and adjust the shutter speed to create images with different exposure. You can sometimes get away with using the auto-bracket in your camera but the exposure changes are usually too small. Do not adjust the aperture or ISO because those will alter the depth of field, noise, or vignette in the photo.
- The exposure difference between the photos should be at least one or two EV steps apart. If you are using a camera with low dynamic range, such as a point and shoot camera with a small sensor size, the photos should be one EV step apart. On higher quality cameras such as DSLR's with larger sensors and wider dynamic range, the images can be two EV steps apart. There is usually no benefit to using smaller EV steps.
- The scene in all the images should be identical. Do not photograph moving objects such as cars, people, or landscapes on a windy day. If you use flash, make sure that you use the same flash output for all the images.
- Shoot in RAW mode instead of JPEG for better dynamic range.
Merge to HDR command
The Merge to HDR command in Photoshop lets you combine several of the same scene with different exposures into a single HDR 32-bpc (bits-per-channel) image. First, you'll need to have three images taken at different exposures. Run Photoshop and choose File > Automate > Merge to HDR.
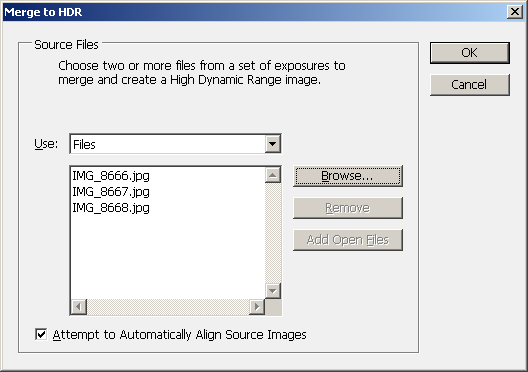
In the Merge to HDR window, click the Browse button and browse for the the three images with the same exposure. If the Attempt to Automatically Align Source Images option is enabled, Photoshop will try to align the image in case the images are not perfectly aligned. Usually, you would leave this option enabled and only disable it if misaligns or causes artifacts. Click OK when you are ready.
After you click OK, Photoshop will process the images and after, you should see a window that looks like the image below.
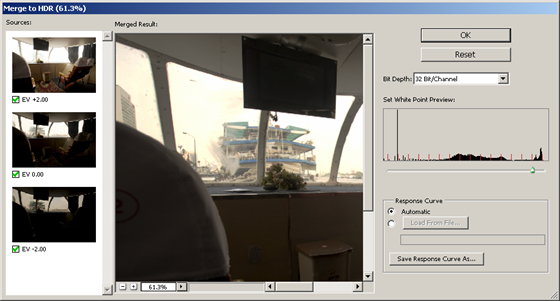
In the second Merge to HDR window, you need to choose the bit depth to use: 32 bpc, 16 bpc, or 8 bpc. If you want to capture the entire dynamic range, choose 32 Bits/Channel. The other options almost always do not have enough room to store the entire dynamic range but you will have access to more tools, filters, and commands. You can uncheck the checkbox below the thumbnails on the Sources filmstrip to choose which image you want to include in the final merged image. The Merged Results shows a preview of the final output with the current settings. Adjust the slider in the Set White Point Preview histogram to get the exposure that you desire. Click OK and Photoshop will create a HDR image based on your settings.
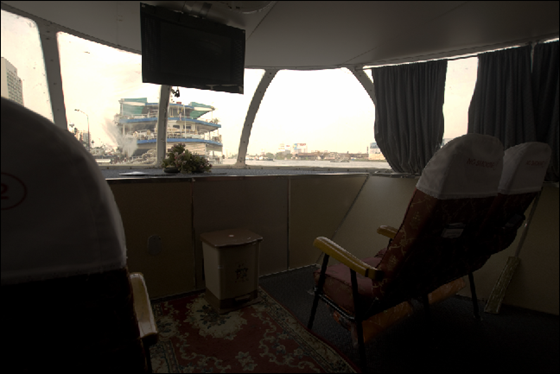
Viewing HDR images
When you look at a HDR image in Photoshop, the colors can look dark or washed out. This is because 32 bits/channel images have a dynamic range that monitors are not capable of displaying. If your monitor was capable of displaying such range, the image would look a lot more dynamic. Currently, there are no consumer-grade monitors that can display the dynamic range of 32 bits/channel image.
In Photoshop, you can adjust the preview to see the details in the highlights or shadows that are washed out on your monitor. The preview does not affect the image information; it is only used for previewing. To adjust the preview, choose View > 32-Bit Preview Options.
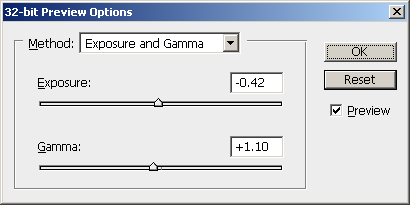
Choose one of the two methods:
- Use the Exposure and Gamma method to adjust the brightness and contrast. Adjust the sliders to adjust the image brightness and contrast then click OK.
- Use the Highlight Compression method to compress the highlights so that they do not look overexposed. There are no settings to adjust with this method. Simply click OK.
You can also adjust the exposure quickly using the slider on the status bar of the bottom of the document window.
![]()
Remember, while your image may look different after adjusting the 32-bit preview options, the image information has not changed. It only looks different to aid you in editing because your monitor cannot display the dynamic range of 32-bits/channel images.
Converting an image to an 8 or 16 bpc workspace
For photography purposes, most of the time you will want to tone map your 32-bpc image into a 8- or 16-bpc image. This lets you create a 8- or 16-bpc image with details that would normally be hidden. For example, an overexposed sky can be restored by tone mapping.
First, make sure that you have a 32-bpc image opened then choose Image > Mode > 16 Bits/Channel or 8 Bits/Channel.
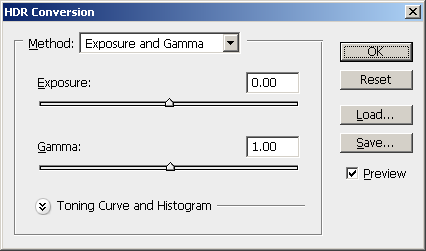
In the HDR Conversion window, you can choose one of four different methods to convert the image into a lower bit depth:
- Exposure and Gamma lets you adjust the brightness and contrast. To use Exposure and Gamma, adjust the Exposure slider to get the correct brightness then adjust the Gamma slider to get the correct contrast.
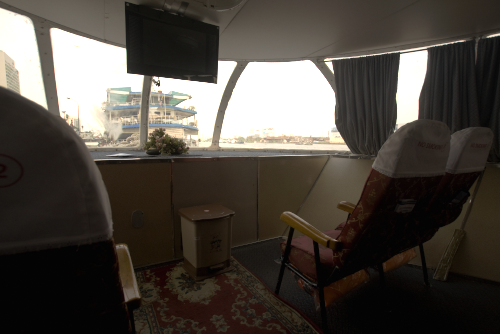
- Highlight Compression will compress the highlights to prevent overexposed areas. For example, if you had a bright sky that looked white on your monitor, the Highlight Compression method will make the sky darker to reveal the details. There are no settings to adjust in this method.
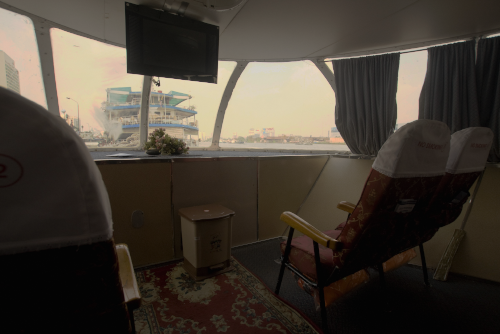
- Equalize Histogram compresses the entire image (both highlights and shadows) to reveal the maximum details. There are no settings to adjust in this method.
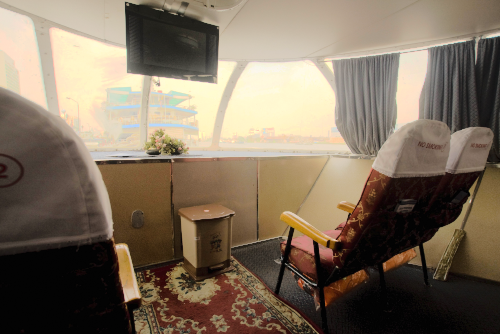
- Local Adaptation is the most popular method to use to reveal hidden details in high-contrast images. This method uses a special algorithm to adjust the tonal values so that the most details can be seen. To use Local Adaptation, adjust the Radius slider to adjust the size of the local brightness regions to get the correct contrast between the edges. Then, adjust the Threshold slider to specify the sensitivity of the Radius setting. You can also expand the Toning Curve and Histogram area to adjust the toning curve.
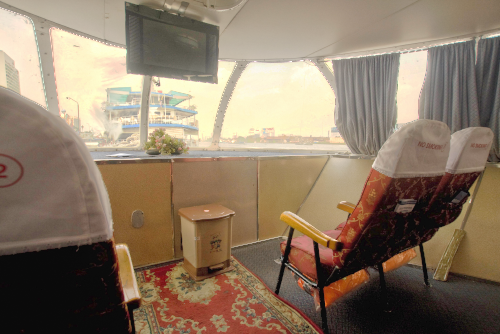
Click OK and your image will be converted to the bit depth that you chose earlier.
3:53:00 PM

Combining two photos to create a new look is a fun way to learn various techniques. We’ll learn how to use the Circular Marquee tool from the center, adjusting the opacity of a layer, creating a path from a selection and adding text along it in the process. Let’s get started.
Preview of Final Results

Combining Two Photos Photoshop Tutorial
Step 1
Open the support file in Adobe

Step 2
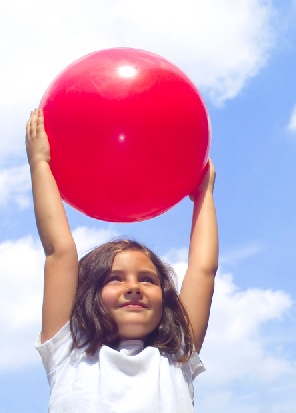
Open an image of a person holding a circular object, such as a ball. This one is by Ronald Bloom and available through iStock at http://www.istockphoto.com/file_closeup.php?id=277310.
Step 3
Now in the earth photo, click-and-drag a ruler guide from the top and bottom, halfway across so it’s in the middle. In the earth photo, subtract the entire length by 2 to get where the cursor needs to be exactly. Note: if rulers aren’t showing, press Command-R (PC: Control-R).
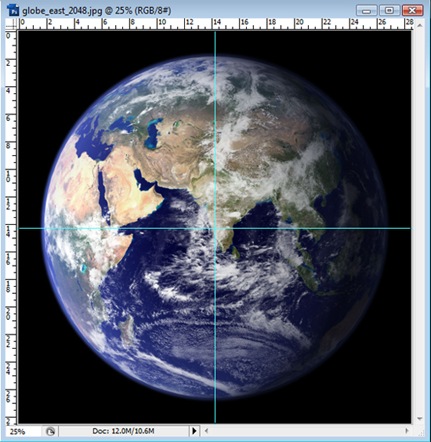
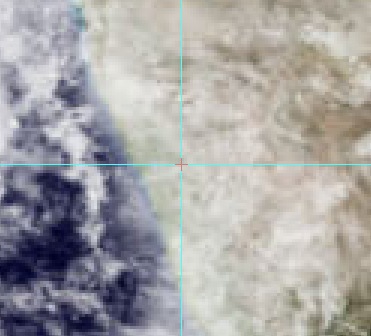
After drawing the ruler guides, hover the cursor over the center of the photo, where the two guides cross. Hold Option (PC: Alt) and click-and-drag the mouse. Hold Shift to maintain proportion. Once the Elliptical Marquee tool is around the earth, release the mouse button then the keys.
Step 4
It should look like this.
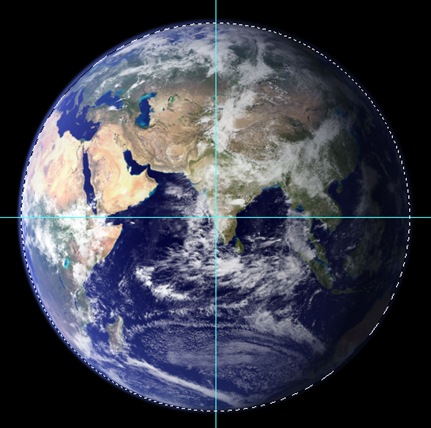
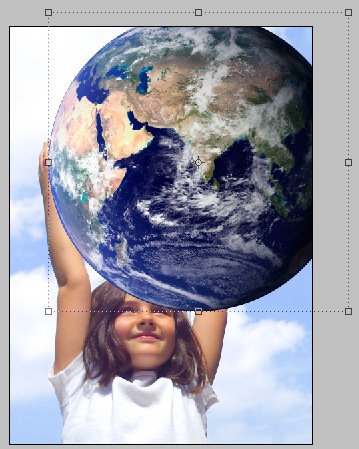
With the Move tool, click-and-drag the earth photo selection onto the other photo.
Step 6
Click-and-drag a corner of the earth layer. If there's no transform controls on the corners, make sure Show Transform Controls is checked in the Control palette. Lower the opacity of the earth layer in the Layers palette to be able to make it the correct size.
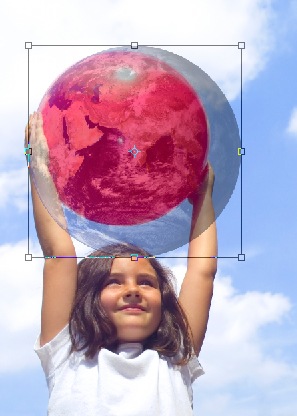
Step 7
The earth needs to be a little bit bigger than the red ball here, since the ball isn't completely round.
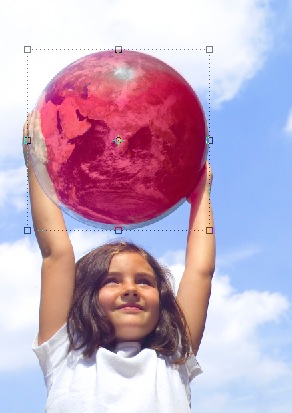 {mospagebreak}
 Step 8
Raise the opacity of the layer back to 100% in the Layers palette.
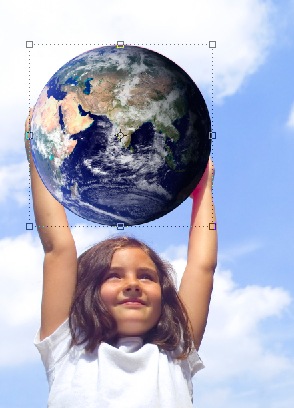
Step 9
Click and Eye icon next to Layer 1, the earth layer to turn its visibility off for now. Use the Quick Selection tool and select the area that overlaps the earth and where we'll need to bring in front of the earth.
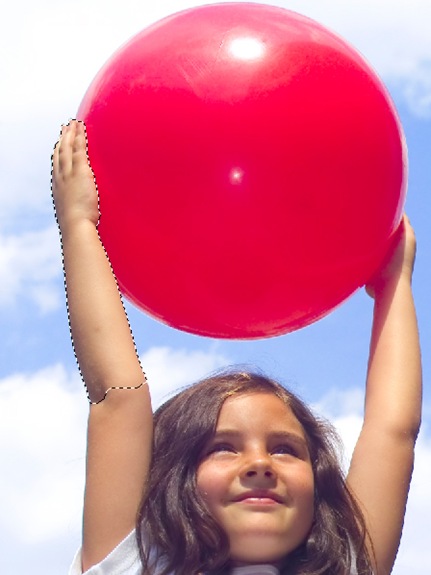
Step 10
Click the Eye icon next to Layer 1 again to make it visible. Go to Select>Inverse.

Step 11
Now we need to mask out the area of the earth photo where the arm is. We mask out the area instead of erasing so that if we mess up, the pixels can be brought back instead of removing them. With Layer 1 selected, click the Add Layer Mask icon on the Layers palette.
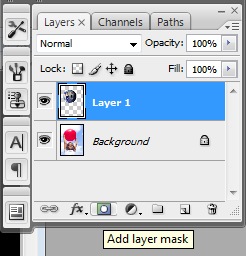
Step 12
The mask automatically masked out where we had a selection.

Step 13
Now for a few touch-ups. The levels seem off on the photo of the girl, so go to Image>Adjustments>Levels. Drag the black arrow to 34 as shown here.
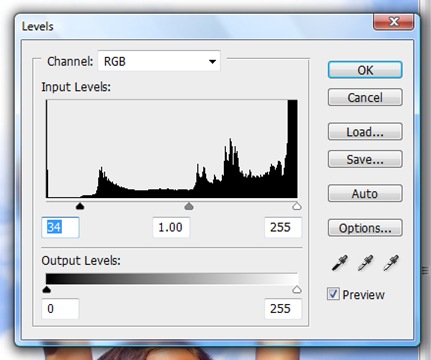
Step 14
Now the color levels are a bit richer and better adjusted.

Step 15
Now let's add a text on a path to the photo. Command-click (PC: Control-click) the thumbnail preview of the Layer 1 on the Layers palette. This will create a circular selection around the pixels in the earth layer.
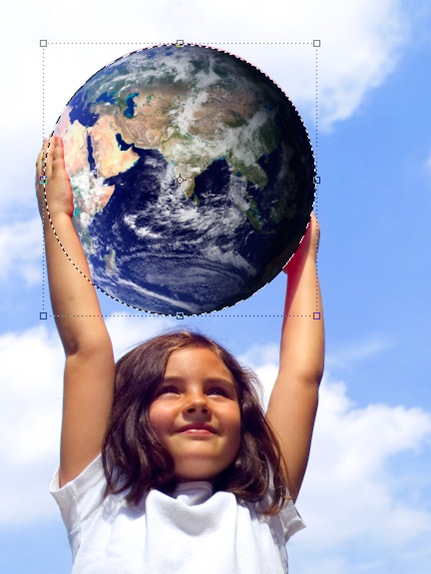
Step 16
Click the Paths palette tab and click the Make Work Path from Selection icon on the bottom of the Paths palette.
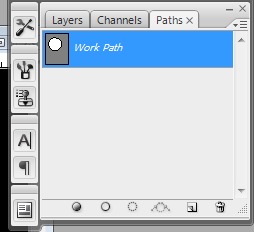
Step 17
With the Text tool, click on the left top side of the path we just made.

Step 18
Type in some text that matches the photo.

Step 19
With the Move tool, click-and-drag a corner of the text area and expand it so there's some room between the earth and the text. Now we have a combined photo with some text.

ReadMore...
3:45:00 PM

Want to save some time so you’re not doing repetitive things in Adobe Photoshop? Look no further than the Actions palette. Let’s say you to need to adjust settings, add a filter, resize, or any of the other many options in Photoshop to a large number of photos. Instead of having to go through each photo one at a time, applying effects, resizing, or adjusting levels for example, it’s much easier to edit one photo and record the actions. Then, we can apply that action to an entire folder of images.
Preview of Final Results

Automating Actions Photoshop Tutorials
Step 1
Go ahead and get a bunch of photos and place them into a folder. Open one of the photos in Photoshop. Select one which we’ll edit and record the changes for the action. Go to Window>Actions to open the Actions palette.
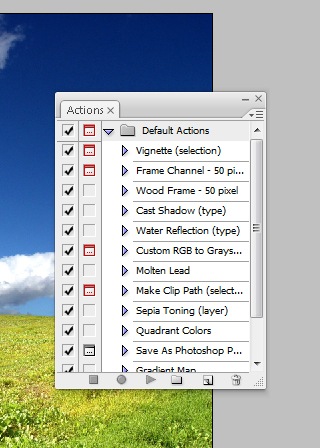
Step 2
Click the Create New Action icon on the bottom of the Actions palette.
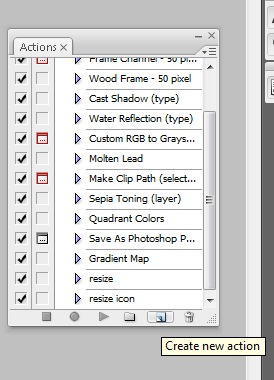
Step 3
Name is “Black and White Thumbnail” and click Record. There are some other options, such as assigning a Function Key or changing the set of actions it’s placed, but leave those for this example as we don’t want to assign a function key and want to keep it in the default actions set.
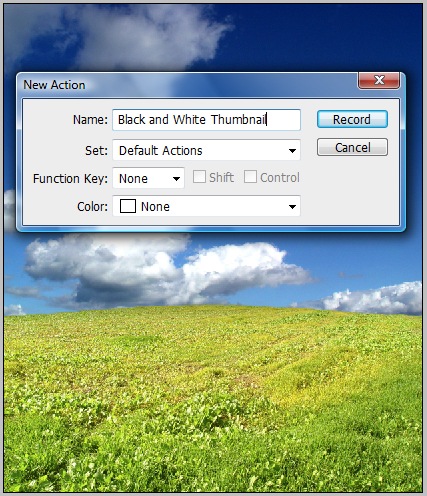
Step 4
Everything we do next will be recorded as a step in the action. While there are many ways to convert an image to black and white, such as going to Image>Adjustments>Black and White, let’s do a simple desaturation for this example. Go to Image>Adjustments>Hue/Saturation and drag the saturation to the left and click OK.
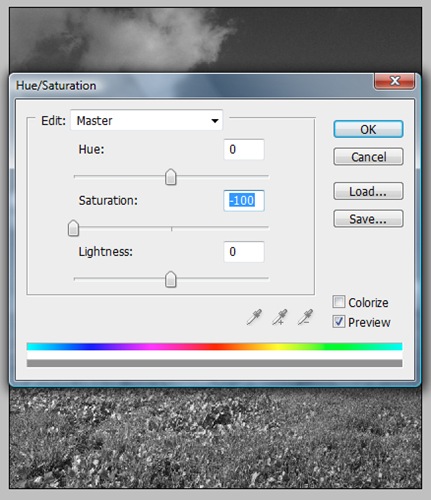
Step 5
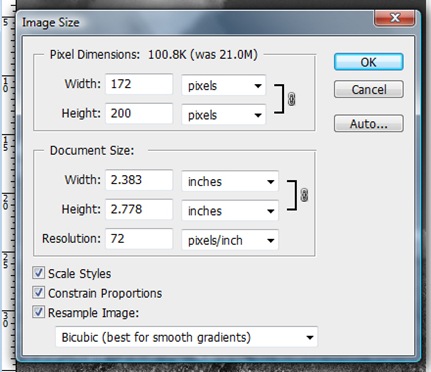
Go to Image>Image Resize and change the Height to 200. As long as the Constrain Proportions is checked, the Width should resize automatically. Click OK.
Step 6
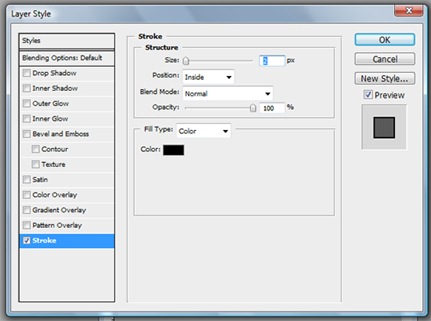
Now that it’s black and white and resized to a thumbnail, we need to add a border. Double-click the Background layer in the Layers palette and click OK to make it a normal layer that we can apply layer styles to. Go to Layer>Layer Style>Stroke. Change the Position to Inside, the Size to 2 and click OK.
Step 7
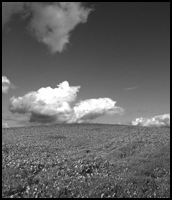
Now we need to save it with certain settings. Go to File>Save As and save it as a JPEG to a new folder named Thumbnails. Finally, click the Stop Playing/Recording icon on the bottom of the Actions palette. Now we have created an action that converted a color image to a black and white, resizes it to a thumbnail, adds a 2-point interior stroke, and then saves it as a JPEG. Close the file and don’t save changes so we don’t erase the original file.
Step 8
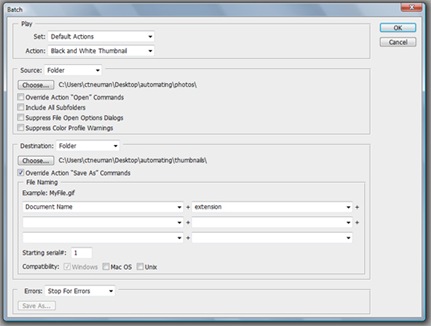
Now that we’ve created the action titled Black and White Thumbnail, go to File>Automate>Batch. Set the Action to Black and White Thumbnail. Click the Choose button near the source folder setting and find and select the folder of images to apply the action to. Click the Choose button near the Destination folder setting and find and select the folder to save the thumbnail images to. I set the source folder to one called Photos and I set the destination folder to one called Thumbnails. Also make sure to check Override Action “Save As” Commands since we already have a save command in the action.
Step 9
Now all seven photos from the source folder, originally full color and large size, have been saved as black and white thumbnails with a border in a separate folder. Remember, instead of editing photos one at time, when we want to edit many of them with the same effects, try actions instead.

ReadMore...


