

11:36:00 AM

Adding a stroke to some text in Adobe
Preview of Final Results

Double and Triple Strokes Photoshop Tutorial
Step 1
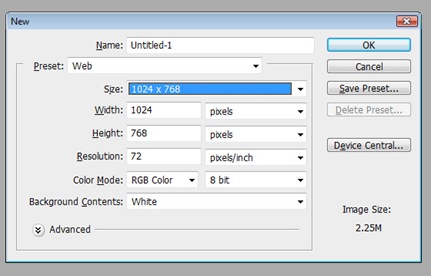
Open Photoshop and go to File>New for a new file at this size and click OK.
Step 2
Click the Text tool in the toolbar and click anywhere and type in some text. Don't click-and-drag a text box, but instead just click once and then type so we can click-and-drag a corner to resize it later. I set the color of mine to #4891dc by highlighting the text and then clicking the color on the Options palette.

Step 3
Change the font to something that will look good with strokes, such as an san serif font (arial or verdana instead of times new roman). I set it to Maiandra GD. Then click the Move tool and click-and-drag a corner to make it a little bit bigger. Remember to hold Shift to maintain proportion. After resizing, press Return (PC: Enter) to apply resize.

Step 4
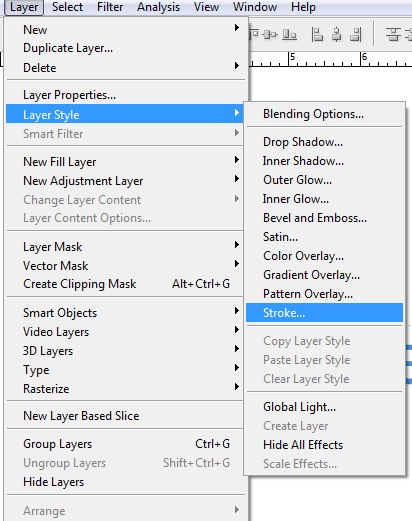
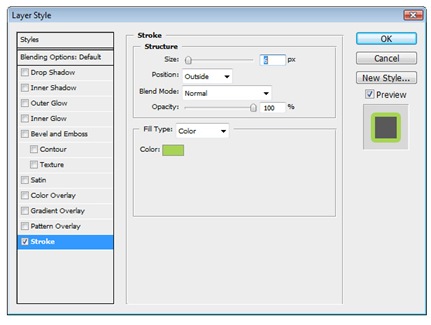
Go to Layer>Layer Style>Stroke.
Step 5
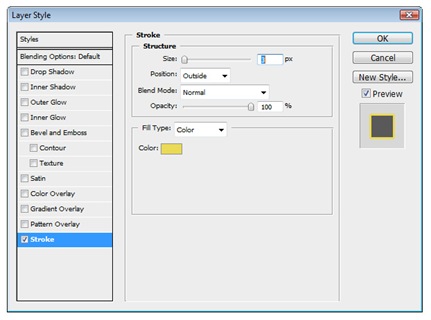
The Position should be set to Outside and set the size to 3. Change the color to one that looks good with the original text color.
Step 6
It should look something like this, depending on the colors you selected.

Step 7
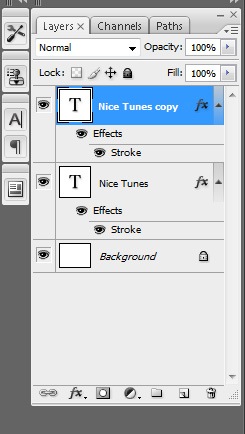
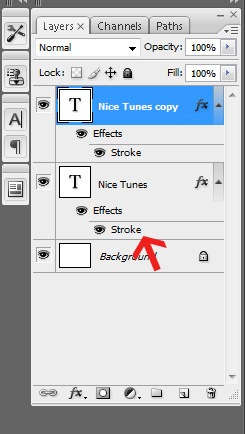
Now if we went to Layer>Layer Style>Stroke again, we'd just bring up the options to edit the original stroke. Instead, click-and-drag the text layer to the New Layer icon the Layers palette (or press Command-J (PC: Control-J)). This duplicates the text layer.
Step 8
Now we need to edit the stroke on the lower, original text layer to make it larger. Double-click on the Stroke effect listed on the bottom text layer.
Set the size to something larger, such as 6 pixels, and change the color to something that looks good with the other two colors. You could use Adobe
Step 10
It should look something like this.

Step 11
Repeat the steps of duplicating a layer and changing the size and color of the stroke to add a third, fourth, or fifth stroke. Remember to edit the lower layer when wanting to make the stroke larger to show past the layer on top of it. Click-and-drag a layer below another if they get arrange in the wrong order. In this example, I gradually went from a royal blue to a different hue blue, creating a retro gradient.

Step 12
Of course, each stroke doesn't have to have a color, just one to hide the color behind it. Try setting the first stroke to white, and then setting the second stroke to the same color as the text by hovering over the text when selecting the color (it will convert to an Eyedropper tool).
11:24:00 AM

DICOM is the industry standard format for medical scans. Learn how DICOM files are used with Adobe
Opening DICOM Files
To open DICOM files, open the File menu and choose Open. Browse for the DICOM file and click Open.
Open.
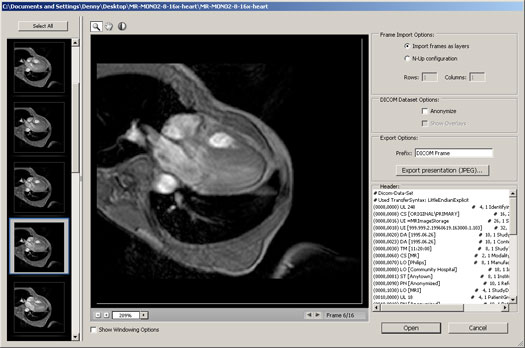
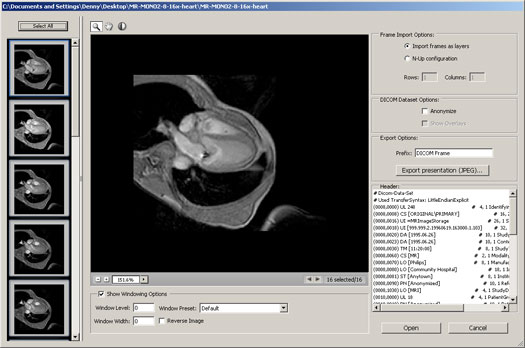
Once you click Open, a window will appear with settings you can modify.
Options
Frames
On the left, you can select which frame to view and open. To open a single frame, select the frame and click open. To select more than one, hold the CTRL key and click. To select all the frames, click the Select All button.
DICOM Dataset Options
There are two options in this area you can modify
Anonymize
Checking this option will anonymize the file by replacing all patients metadata with "anonymize".
Show Overlays
If your file has overlays such as annotations, curves, or text, you can check this box to display those overlays.
Windowing
Windowing lets you adjust the brightness and contrast of the image. To view all the Windowing options, check the Show Windowing Options checkbox located below the image.
Presets
There are 5 presets you can choose from:- Default
- Lung
- Bone
- Abdomen
- Full
Manual Adjustments
Or, you can manually adjust the settings using your mouse:
- Click on the
 button to select the Window Level tool.
 - Click on the middle of the image and drag the tool up or down to adjust the level.
- Drag the tool left or right to adjust the width.
Reverse Image
To reverse the image, simply check the Reverse Image checkbox.
Frame Import Options
This area lets you choose how you would like to open the images.
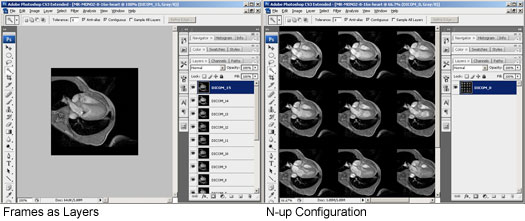

Import frames as layers
This option will import frames into layers. This option is useful for manipulating the image or creating an animation.
N-up Configuration
This option will tile the frames onto one layer. Select this option if you would like to print the frames onto transparencies.
{mospagebreak title=Creating an Animation}Creating an Animation
Step 1
Open a DICOM file. Open the File menu and select Open. Browse for a DICOM file (.dc3, .dcm, .dic, or no extension) and click OK
Step 2
Press the Select All button to select all the frames. In the Frame Import Options, choose Import frames as layers. Apply any other settings needed then click OK.
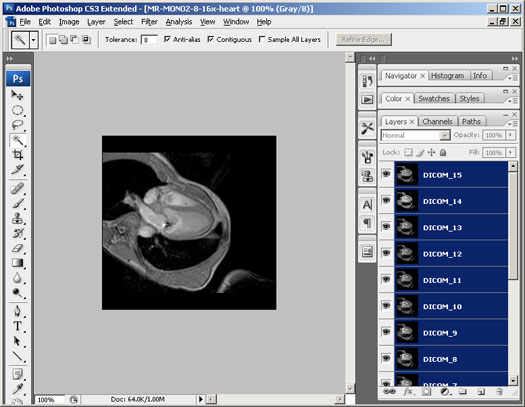
Step 3
You should now have each frame as layers. Select all the layers by pressing Alt+Ctrl+A or going into the Select menu and choosing All Layers.
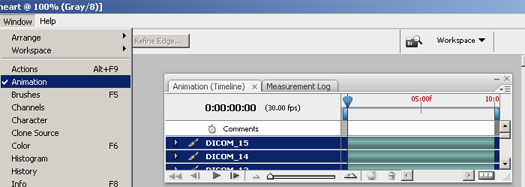
Step 4
Open the Animation window by going into the Window menu and selecting Animation.
Step 5
In the Animation pallet, click on the ![]() button located near the top right to open the flyout menu. In the flyout menu, select Make Frames From Layers.
button located near the top right to open the flyout menu. In the flyout menu, select Make Frames From Layers.
Step 6
If the Animation window is not in Frame view, press the  button to convert the animation into a frame animation. If it's already in frame view, you can skip this step.
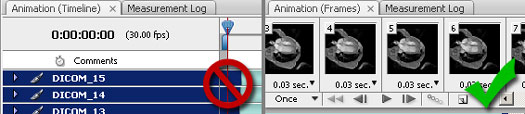
Step 7
Now we need to set how many times it should loop. Click on the bottom right menu to select how the animation should loop. To have the animation loop forever, select Forever.
Step 8
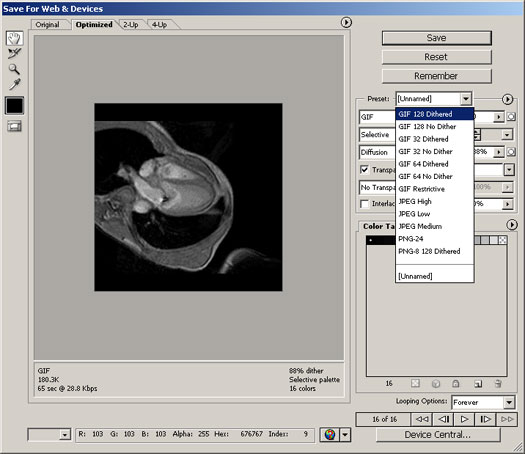
To save the animation as an animated GIF file, use the Save for Web & Devices tool. To open the Save for Web & Devices tool, press Shift+Ctrl+S or open the File menu and select Save for Web & Devices. In the Save for Web & Devices tool, Select a GIF preset and modify the settings if necessary. Click the Save button when you are ready to save.
Final Results
Measuring
We can use the measurement tool to measure parts in the medical image.
Step 1
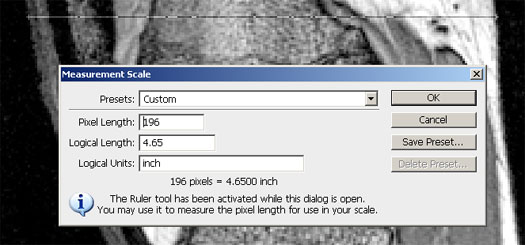
First, we need to set the measurement scale. To do this, we need to know the measurement of one part in the image. For this photo of a knee, the thickness of the knee was measured as 4.65 inch. To set the measurement scale with this data, go into the Analysis>Set Measurement Scale menu and select Custom. When the Measurement Scale window appears, draw a line on the image to indicate the area you would like to set the measurement for. For this image of a knee, I drew a horizontal line across the entire width of the knee. Next, enter in the Logical Length and Logical Units field the measurement. For this image, the knee was measured to be 4.65 inch so I entered 4.65 in the Logical Length field and inch in the Logical Units field. Click OK when done.
Step 2
Open the Measurement Log window by going into the Window and selecting Measurement Log.
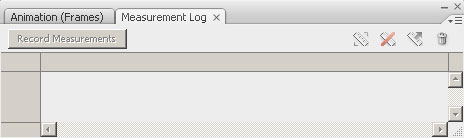
Step 3
Now, select the Measurement tool from the tool bar or by going into the Analysis menu and selecting Ruler Tool. Draw a line indicating the area you would like to measure and click the Record Measurements button in the Measurement Log window. The data is now recorded in the Measurement Log.

