

9:40:00 PM
 fun way to learn the Clone Stamp tool (as well as adding a virtual drop shadow) is to create an invisible man or woman. We can transform an ordinary portrait or action shot to make the person disappear, leaving floating clothes around a space. Adding shadowed wrinkles also adds realism.
Preview of Final Results

Floating Clothes Photoshop Tutorial
Step 1
Open a photo of a person, preferably one that includes the entire body. Choose one with a simple background that can either be cut out or cloned for a more realistic look. For each step, work on a separate layer to reduce the risk of having to start over.
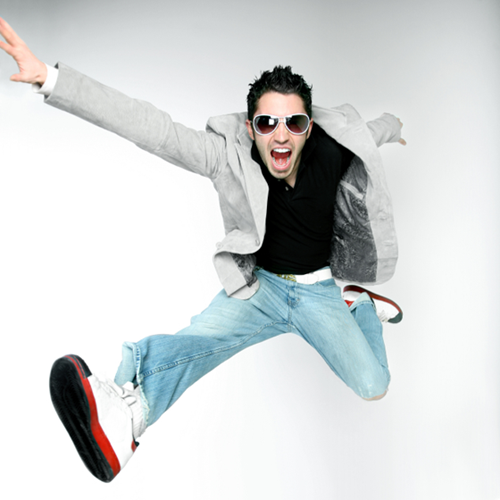
CREDIT: ©ISTOCKPHOTO/TYLER STALMAN
Step 2
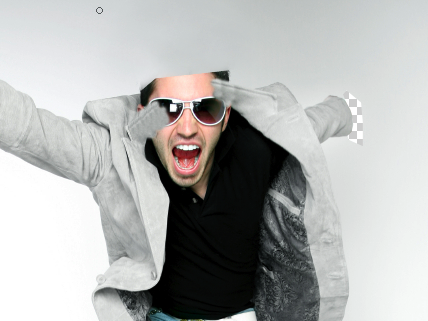
Zoom in to the areas of the person where their skin is showing (Hold down the Cmd and then press + or - (PC: Hold down the Ctrl and then press + or -)). Select the Clone Stamp tool and use it to erase the areas not too close to the clothing. To do this, hold down Option (PC: Alt) and click an area to clone, then release the key and click-and-drag over the area to paint, replacing the pixels with the source pixels. If you have a completely solid background, just select the areas with a Selection tool and press Delete (MAC: Backspace).
Step 3
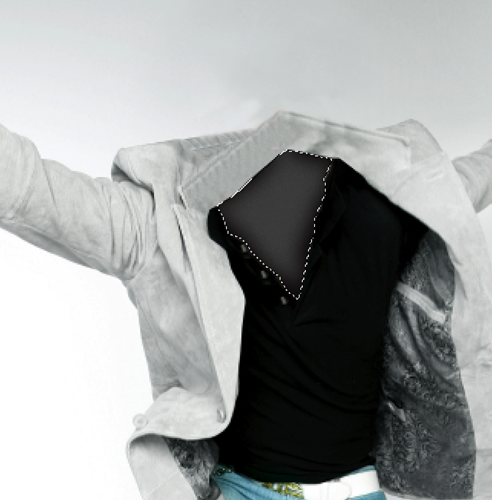
Once the pixels behind the hands, feet and head that would normally be the background are replaced using the Clone Stamp tool or the Selection tool, we need to redraw what the inside of the clothes would look like. Using a Selection tool, draw around each area and fill it using the Paint Bucket tool. Rarely does a solid color look real, so add shadows by keeping the area selected and using a large, soft brush with the Brush tool, click-and-drag around the edges to create shadows for depth.
Step 4
For the areas that need deeper shadows, first start by filling the area on a separate layer as usual with a solid color, perhaps taken using the Eyedropper tool from nearby areas. Then, add some noise to this layer, at a very low setting such as 1 (Filter>Noise>Add Noise). This adds to the realism and makes it less sterile looking. Then using the Clone Stamp tool, Alt-click (MAC: Option-click) in a nearby source area and then release and click-and-drag in the new area to create the correct look. Use the same technique as earlier to create shadows on some of the edges (use a large, soft brush on the edges of the selection).
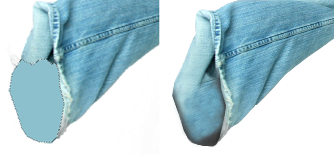
Step 5
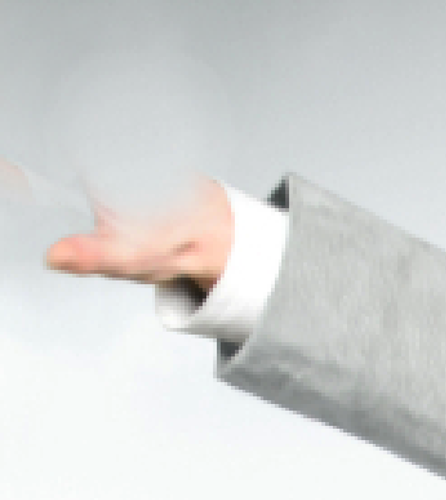
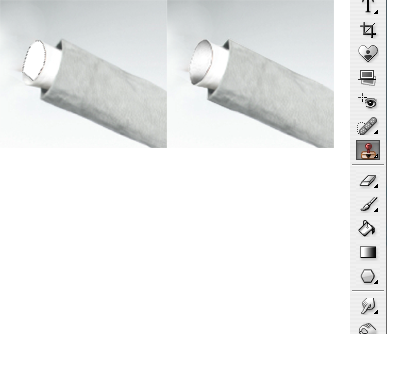
Use the Clone Stamp tool again to extend any areas of clothing that would naturally move that way. For this example, I used the Clone Stamp tool to extend the collar to meet in the back.
Step 6
The clothing opening that face the front would have a different shadow than the pant legs and sleeves. Instead of having a shadow on the bottom or on the sides, the shadow would be along a large portion of it to show depth. You can optionally add some noise to make it more realistic. Here I added a shadow while the area was selected by using the same technique (painting with a large, soft brush) to give the sweater some depth. The illusion is that the sweater is still filled out but empty.
CREDIT: ©ISTOCKPHOTO/john rawsterne (DECORATION)
Final Results
9:36:00 PM
 Sometimes a print or online project needs an outline-type silhouette instead of an actual photo, in order to illustrate a project. By using the Threshold tool and the Gradient tool, we can make a few unique effects to complement a print of online design.
Preview of Final Results

Silhouettes and Gradients Photoshop Tutorial
Step 1
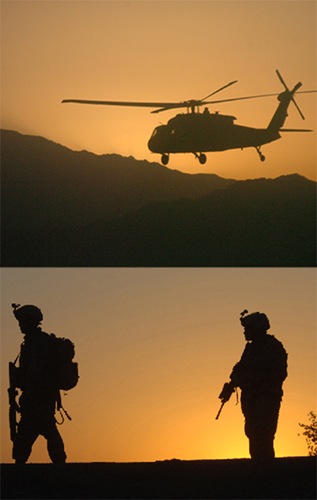
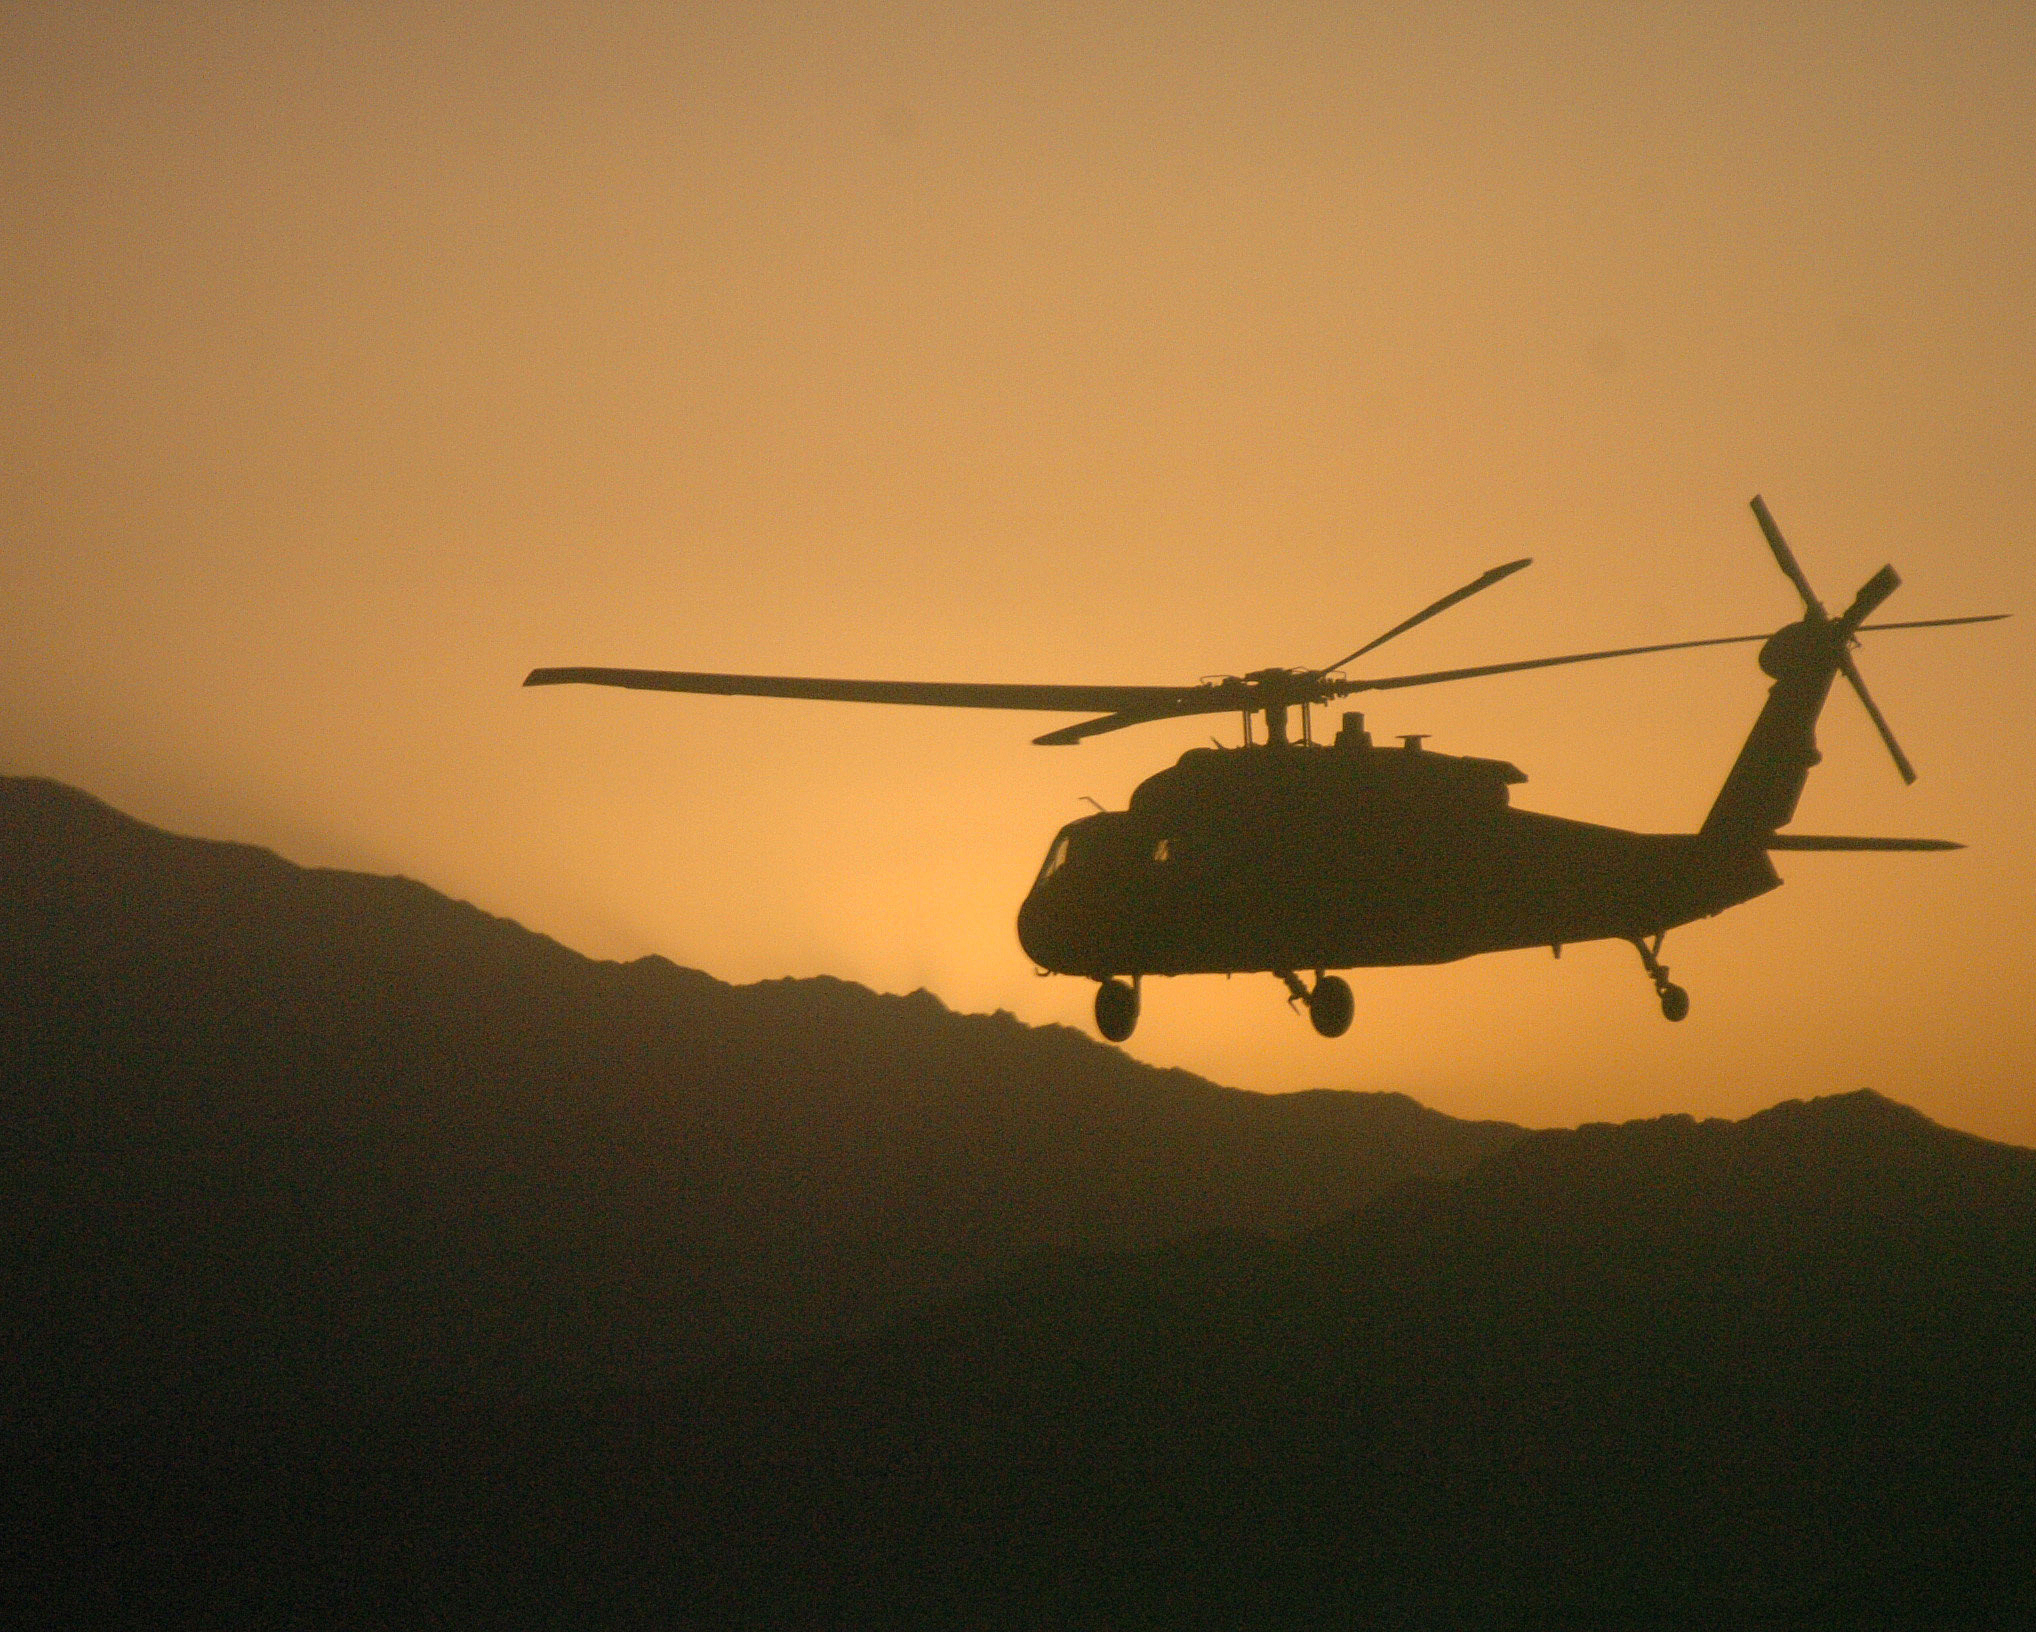
Open up an image that has a clearly-defined outline that differentiates elements within the photo. Download one of these two support files to follow along with these examples, which are in the public domain.
Support Files
Step 2
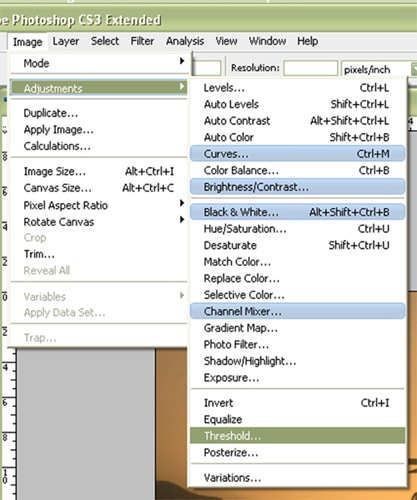
Go to Image>Adjustments>Threshold.
Step 3
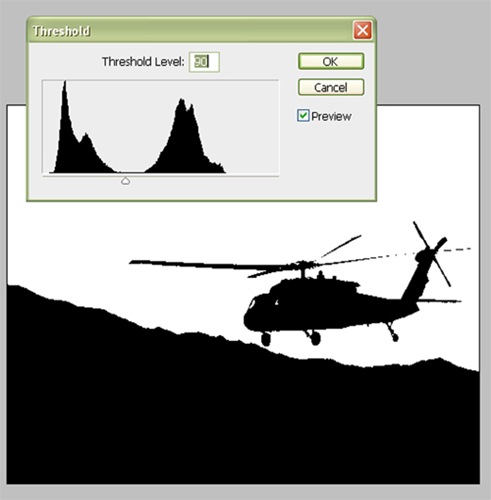
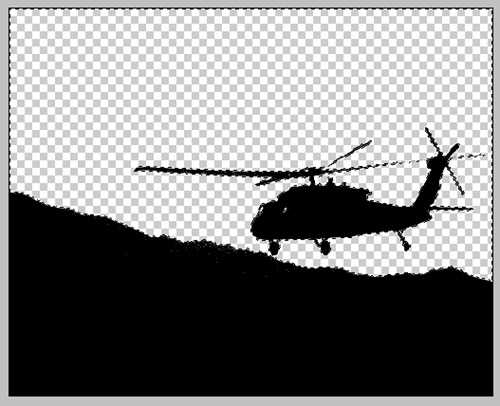
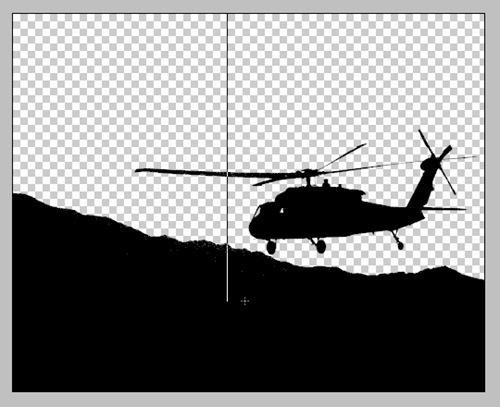
Drag the arrow so that the subjects in the photo and other areas we want to be visible are black. For the helicopter photo, place the arrow between the two areas of pixels. For this example, I set it to 90. Press OK.
Step 4
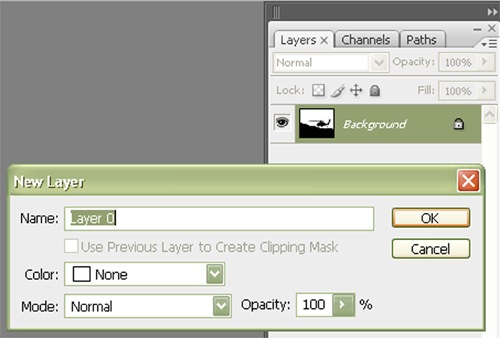
We need to make the Background layer a normal layer in order to remove the white pixels. Double-click the Background layer and click OK to name it its default name, Layer 0.
Step 5
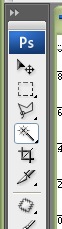
There are many ways to select the white pixels, but let’s just use the simple Magic Wand tool.
Step 6
Set the Tolerance to 0 and make sure Contiguous is unchecked. This will ensure that the white pixels that are not adjacent to, or contiguous to, the white area of pixels that we click will still be selected.
![]()
Step 7
Click somewhere in the white pixels and press Backspace to delete them
Step 8
Next, click on the New Layer icon on the bottom of the Layers palette to create a new layer. Click-and-drag this layer so it’s below Layer 0.
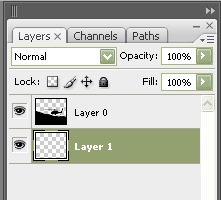
Step 9
With the Marquee Selection tool, click somewhere on the image to de-select the pixels, if they are still selected. Select the Gradient tool.
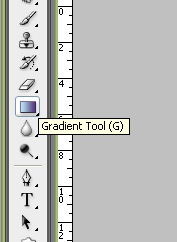
Step 10
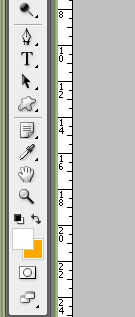
With Layer 1 selected in the Layers palette, and the Gradient tool selected, double-click on the Foreground Color selector near the bottom of the toolbar. Set it to White. Double-click the Background Color selector and set it to an orange hue. I set mine to #ffa800. This sets the color of each side of the gradient.
Step 11
Click-and-drag from the top of the image to about a fourth from the bottom. Press Shift to maintain a straight vertical line.
Step 12
It should look something like this.
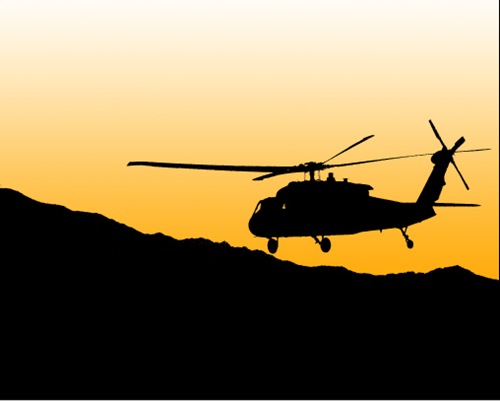
Step 13
For another example, repeat steps 1-11 but with the photo of the soldiers. But before going to step 11, set the gradient type to Radial.
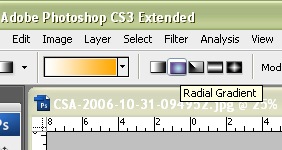
Step 14
Switch the orange and white by clicking double-sided arrow near the bottom of the toolbar. Click-and-drag from behind the second soldier to simulate an area of sunshine. Crop out the extra black pixels we don’t need.
Now we can use this technique to create illustration-like outlines and silhouettes for print and online designs.
9:10:00 PM
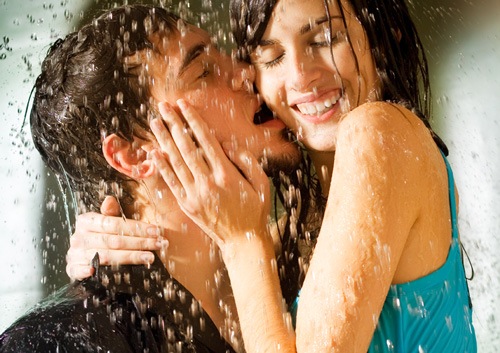
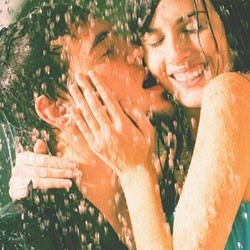 You may have noticed that many clothing stores use images with the same photo effect that looks somewhat like Lomography. In this Photoshop tutorial, we'll show you how to add the washed out Lomo effect to your photos using all adjustment layers.
Preview of Final Results

Fashion Lomo Photoshop Tutorial
Step 1
Open any photo into Photoshop.
Step 2
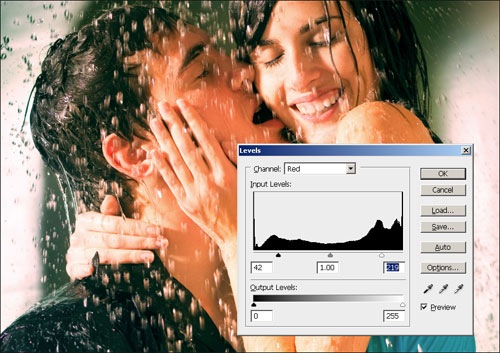
First, we'll compress the histogram in the red channel to add more contrast to the reds. Choose Layer > New Adjustment Layer > Levels. In the Channel drop down menu, select Red. Drag the black and white input slider towards the middle to increase the contrast in the reds.
Step 3
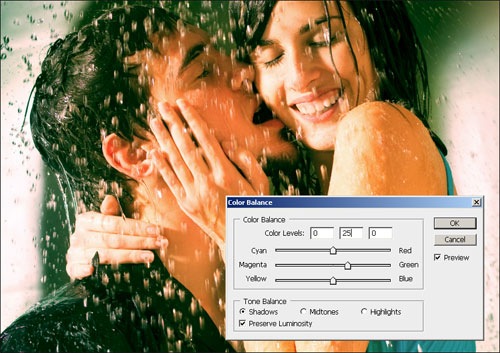
Now we're going to add a green tint to the shadows and red tint to the highlights. The Color Balance tool is the perfect tool for this. Choose Layer > New Adjustment Layer > Color Balance. In the Tone Balance option, select Shadows then enter in 0, 25, 0 in the color levels settings.
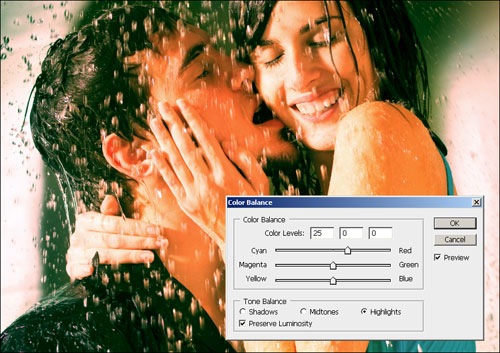
Now select Highlights on the tone balance options and enter 25, 0, 0 in the color levels settings.
Step 4
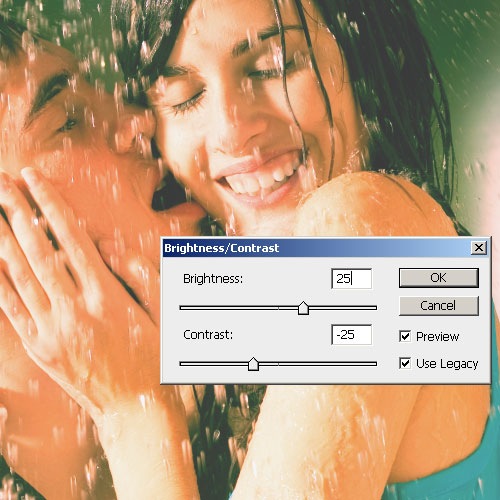
We now have the lomo effect completed and to finish it off, we'll add a Brightness/Contrast adjustment layer to add the washed out look. Choose Layer > New Adjustment Layer > Brightness/Contrast. If you are using Photoshop CS3, checkmark the "Use Legacy" option. Set the brightness to 25 and contrast to -25 then click OK.
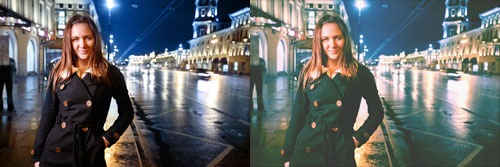
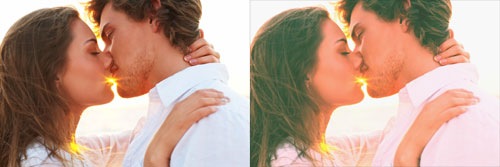
Final Results
Other Examples

Fashion Lomo Photoshop Action
 The Fashion Lomo Photoshop action lets you apply this semi-lomo photo effect to your photos with a single click. To use the Photoshop action:
 - Download the Fashion Lomo Photoshop action and save it to your computer.
- Run Photoshop and choose Window > Actions. Click on the Actions palette menu near the top right of the Actions palette and choose "Load Actions".
- Browse for the file you downloaded then click OK.
- In the Actions palette, open the "PhotoshopTutorials.ws" folder and select "Fashion Lomo". Click on the play button near the bottom of the Actions palette and watch Photoshop apply the Fashion Lomo effect.
8:57:00 PM

Make your photos look like old printouts with washed out colors and stained paper. This photo effect is a great way to add a unique twist to your photos. Click to find out how to apply this photo effect with Photoshop.
Preview of Final Results

Old Printouts Photoshop Tutorial
Step 1
Begin by opening any photo into Photoshop.

Step 2
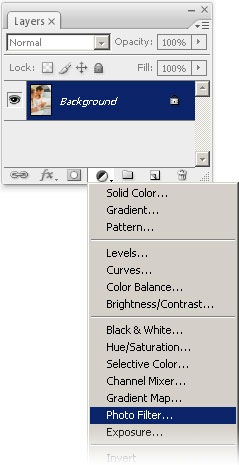
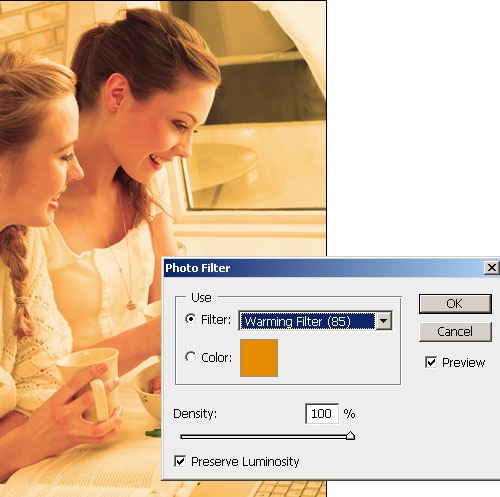
To create this photo effect, we'll be using two Photo Filter adjustment layers. One will alter the color in the shadows and the other in the highlights. First, we'll start off by creating a Photo Filter adjustment layer that will affect the highlights of the image. In the Layers palette, click on the New Adjustment Layer button then choose Photo Filter.
Step 3
In the Photo Filter settings, use the same settings as the image below.
Step 4
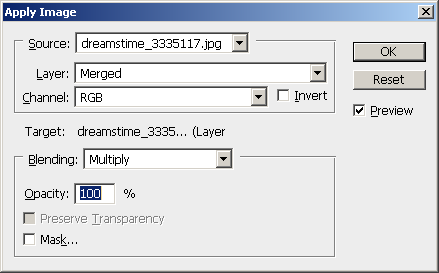
Make sure that you have the Photo Filter adjustment layer selected then choose Image > Apply Image. We will use the Apply Image tool to copy the image into the layer mask. This technique makes the layer only visible in the highlights and produces better results than altering the Blend If options in the layer style settings.

Step 5
We're done creating the first Photo Filter layer for the highlights. Now we'll create one for the shadows. To do this, select the Photo Filter adjustment layer and press Ctrl+J to duplicate the layer. Then, select the new layer (should be the top layer), and choose Image > Adjustments > Invert to invert the layer mask. Inverting the layer mask will make this layer affect only the shadows.

Step 6
Double click on the top Photo Filter adjustment layer icon to edit the settings. Change the filter to Cooling Filter (80). This will give the shadows a blue tint.
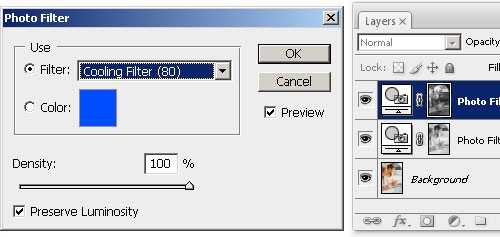
This is what the image looks like so far. It looks like an old printout now, but the effect isn't very desirable. In the next step, we'll adjust the blending mode of the two adjustment layers to create an image that is more useable.

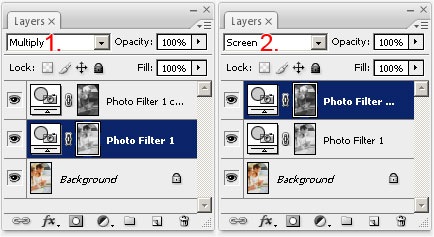
Step 7
Change the blending mode of the middle layer to Multiply and the top layer to Screen.
Final Results
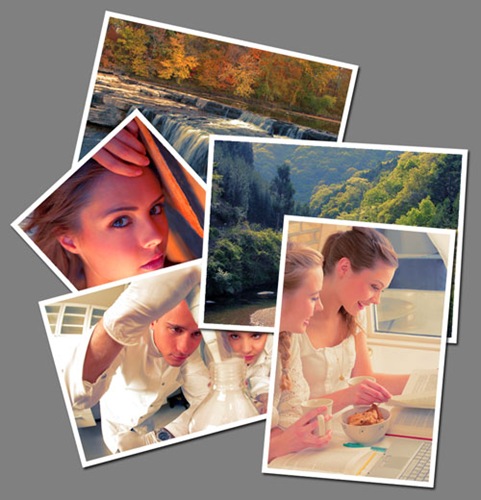
Other Examples
If you would like to know how to create the photo collage like the image below, please read the Glossy Photos Photoshop tutorial.
8:44:00 PM
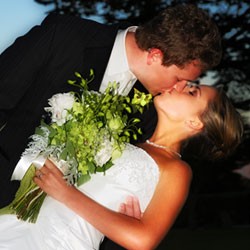 Overlay diffusion is one of the most popular photo effects used. It makes photos look dreamy and vivid but it can also hide details in the shadows and highlights. In this Photoshop tutorial, you will learn how to apply overlay diffusion without losing details.
Preview of Final Results
Masked Overlay Diffusion Photoshop Tutorial
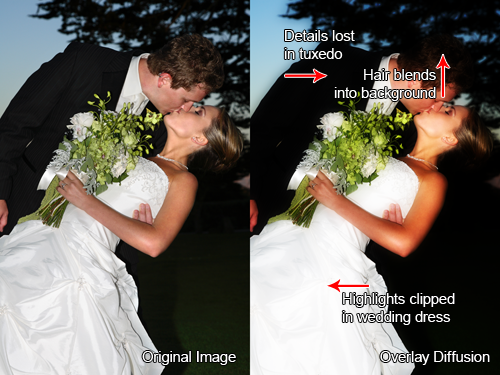
The overlay diffusion photo effect is a problem for wedding photographers. It hides the details in the groom's tuxedo and bride's dress. Losing detail in the groom's tuxedo may be fine sometimes, but the photo should always show the details in the wedding dress. In this tutorial, we'll show you how to apply overlay diffusion without affecting the highlights and shadows. This Photoshop technique can also be used on other photo effects to protect the highlights and shadows.
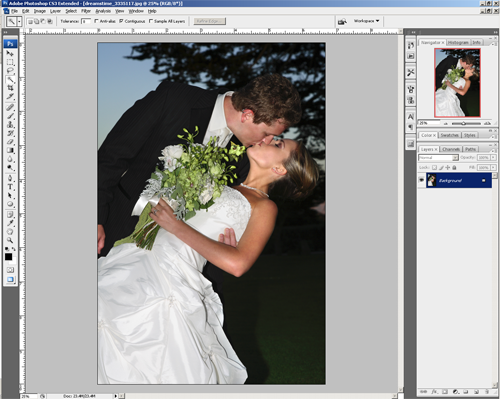
Step 1
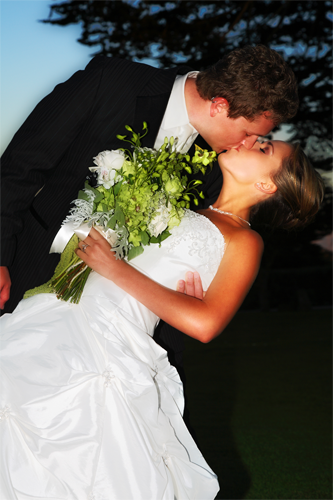
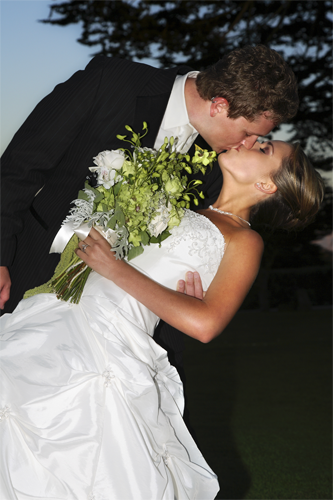
Open a photo that you would like to apply the overlay diffusion effect to. It is best to try this with a wedding photo because you will be able to see how this technique protects the deep blacks in the tuxedo and bright whites in the wedding dress.
Step 2
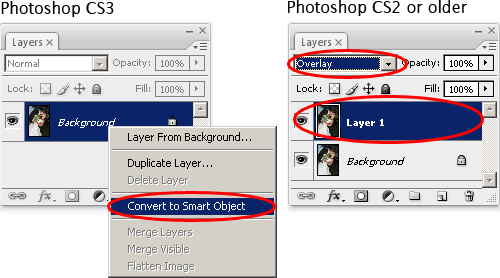
To begin, we'll prepare the layers for the overlay diffusion effect. For Photoshop CS3 users, you can utilize Smart Filters to practice non-destructive editing and to keep the file size small. For Photoshop CS2 or older, you will need to create a duplicate layer.
- If you are using Photoshop CS3, right mouse click on the layer in the Layers palette then choose Convert to Smart Object.
- If you are using Photoshop CS2 or older, choose Layer > Duplicate then change the blending mode of the new layer to Overlay.
Step 3
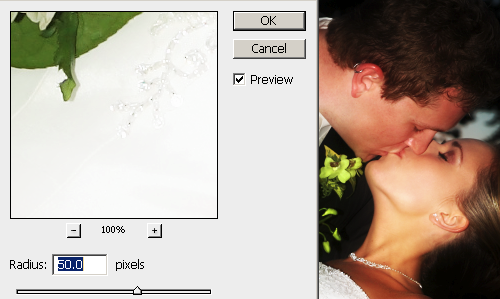
Apply a Gaussian Blur filter. Choose Filter > Blur > Gaussian Blur.
- Photoshop CS3 users: Leave the default settings then click OK; we'll go back to editing the settings after we change the blending mode of the Smart Filter. Double click on the blending options icon in the Layers pallete then change the blending mode to Overlay. Click OK and double-click on the Gaussian Blur smart filter (the Gaussian Blur text) to readjust the Gaussian Blur settings.
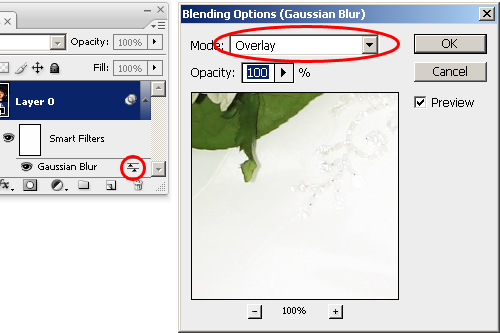

- Photoshop CS2 or older users: Adjust the settings to get the results that you desire.
Step 4
Now you'll learn the Photoshop technique that will protect the details in the shadows and highlights.
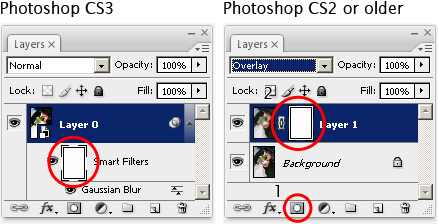
- Photoshop CS3 users: Click on the Smart Filters layer mask in the layers palette.
- Photoshop CS2 or older users: Click on the add layer mask button in the layers palette. You should now have a layer mask. Make sure that the layer mask is selected by clicking on the layer mask thumbnail in the Layers palette.
Step 5
Choose Image > Apply Image. With this tool, we'll paste a copy of the image into the layer mask. Use the default settings, which should be the same as the settings in the image below.
Your layer mask thumbnail should be an black and white copy of the image you're working on. This layer mask means that the layer is masked out where the shadows in the images are.

Step 6
With the layer mask still selected, choose Filter > Stylize > Solarize. This will seem to darken the image in the layer mask. What the Solarize filter did was make the highlights in the image black as well so that the highlights are masked out as well. This leaves only the midtones white so that the layer only affects the midtones.

The problem now is that the overlay diffusion effect is hardly visible. In the next step, we'll make the effect more visible by increasing the contrast and brightness in the layer mask.
Step 7
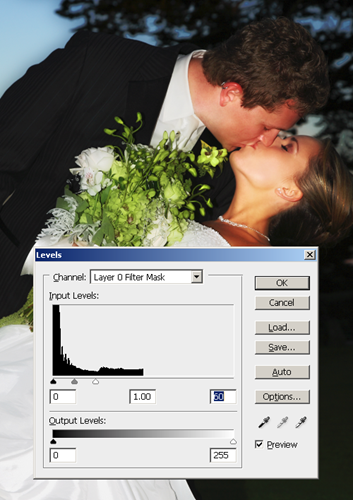
With the layer mask selected, choose Image > Adjustments > Levels. Using the Levels tool, move the white input slider towards the left. This will increase the contrast and brightness in the layer mask. The more you move the slider to the left, the more visible the effect will be. Click OK when done.
Final Results
Here is the final result. The image now has the overlay diffusion photo effect but the shadows and highlights are still detailed. You can preview the effect by holding the Shift key on your keyboard and clicking on the layer mask thumbnail in the Layers palette.
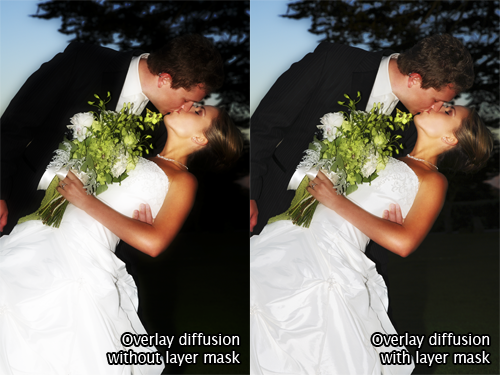
Here is a comparison of the overlay diffusion effect without and with a layer mask. With the layer mask that we applied, the details in the dress is visible and the groom's hair doesn't blend into the background anymore.
And finally, here's the before and after results.

ReadMore...
