

8:44:00 PM
 Overlay diffusion is one of the most popular photo effects used. It makes photos look dreamy and vivid but it can also hide details in the shadows and highlights. In this Photoshop tutorial, you will learn how to apply overlay diffusion without losing details.
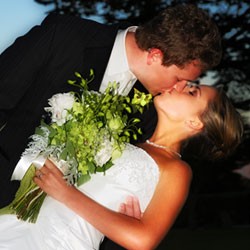
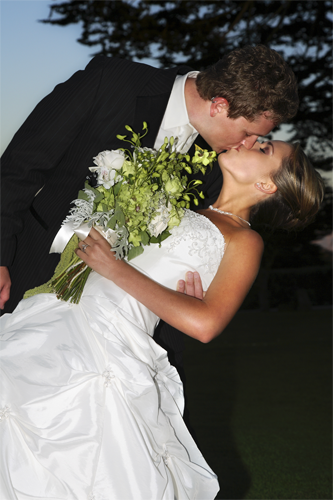
Preview of Final Results
Masked Overlay Diffusion Photoshop Tutorial
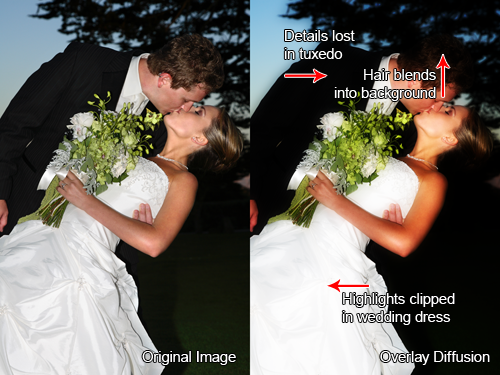
The overlay diffusion photo effect is a problem for wedding photographers. It hides the details in the groom's tuxedo and bride's dress. Losing detail in the groom's tuxedo may be fine sometimes, but the photo should always show the details in the wedding dress. In this tutorial, we'll show you how to apply overlay diffusion without affecting the highlights and shadows. This Photoshop technique can also be used on other photo effects to protect the highlights and shadows.
Step 1
Open a photo that you would like to apply the overlay diffusion effect to. It is best to try this with a wedding photo because you will be able to see how this technique protects the deep blacks in the tuxedo and bright whites in the wedding dress.
Step 2
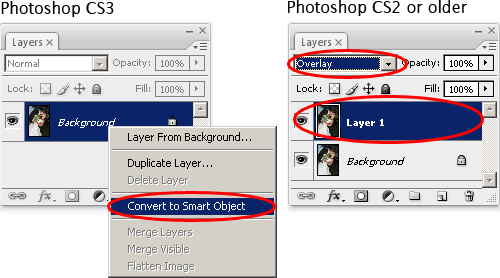
To begin, we'll prepare the layers for the overlay diffusion effect. For Photoshop CS3 users, you can utilize Smart Filters to practice non-destructive editing and to keep the file size small. For Photoshop CS2 or older, you will need to create a duplicate layer.
- If you are using Photoshop CS3, right mouse click on the layer in the Layers palette then choose Convert to Smart Object.
- If you are using Photoshop CS2 or older, choose Layer > Duplicate then change the blending mode of the new layer to Overlay.
Step 3
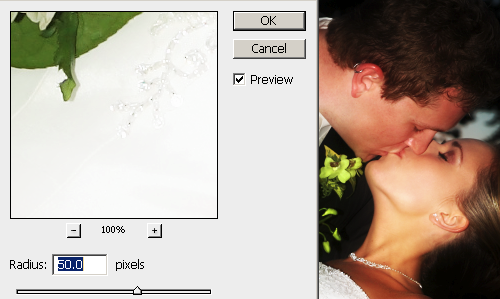
Apply a Gaussian Blur filter. Choose Filter > Blur > Gaussian Blur.
- Photoshop CS3 users: Leave the default settings then click OK; we'll go back to editing the settings after we change the blending mode of the Smart Filter. Double click on the blending options icon in the Layers pallete then change the blending mode to Overlay. Click OK and double-click on the Gaussian Blur smart filter (the Gaussian Blur text) to readjust the Gaussian Blur settings.
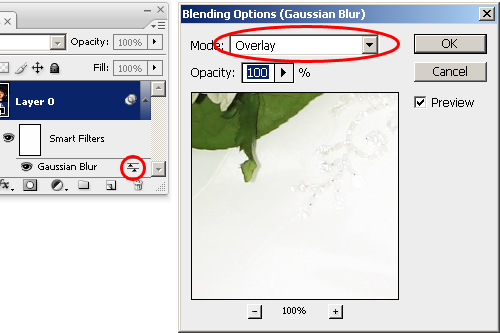

- Photoshop CS2 or older users: Adjust the settings to get the results that you desire.
Step 4
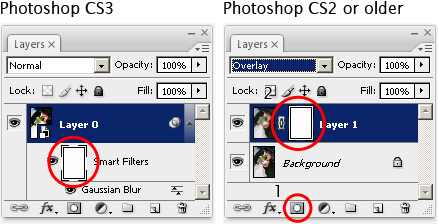
Now you'll learn the Photoshop technique that will protect the details in the shadows and highlights.
- Photoshop CS3 users: Click on the Smart Filters layer mask in the layers palette.
- Photoshop CS2 or older users: Click on the add layer mask button in the layers palette. You should now have a layer mask. Make sure that the layer mask is selected by clicking on the layer mask thumbnail in the Layers palette.
Step 5
Choose Image > Apply Image. With this tool, we'll paste a copy of the image into the layer mask. Use the default settings, which should be the same as the settings in the image below.
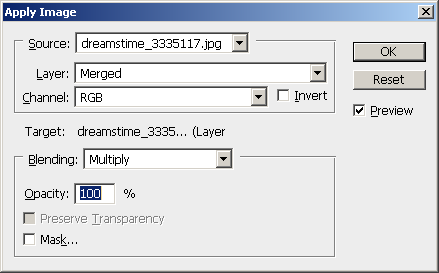
Your layer mask thumbnail should be an black and white copy of the image you're working on. This layer mask means that the layer is masked out where the shadows in the images are.

Step 6
With the layer mask still selected, choose Filter > Stylize > Solarize. This will seem to darken the image in the layer mask. What the Solarize filter did was make the highlights in the image black as well so that the highlights are masked out as well. This leaves only the midtones white so that the layer only affects the midtones.

The problem now is that the overlay diffusion effect is hardly visible. In the next step, we'll make the effect more visible by increasing the contrast and brightness in the layer mask.
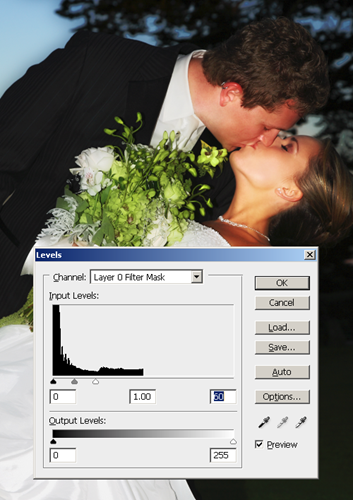
Step 7
With the layer mask selected, choose Image > Adjustments > Levels. Using the Levels tool, move the white input slider towards the left. This will increase the contrast and brightness in the layer mask. The more you move the slider to the left, the more visible the effect will be. Click OK when done.
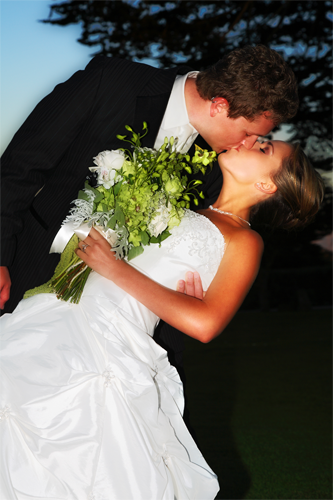
Final Results
Here is the final result. The image now has the overlay diffusion photo effect but the shadows and highlights are still detailed. You can preview the effect by holding the Shift key on your keyboard and clicking on the layer mask thumbnail in the Layers palette.
Here is a comparison of the overlay diffusion effect without and with a layer mask. With the layer mask that we applied, the details in the dress is visible and the groom's hair doesn't blend into the background anymore.
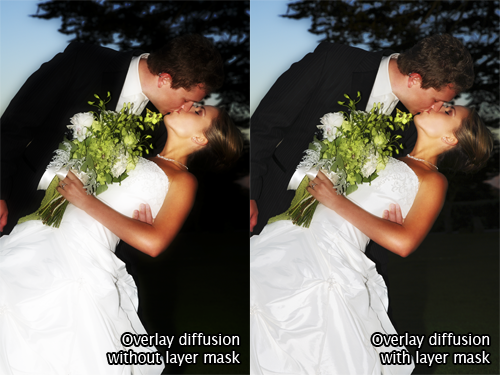
And finally, here's the before and after results.


Post a Comment