

3:45:00 PM

Want to save some time so you’re not doing repetitive things in Adobe Photoshop? Look no further than the Actions palette. Let’s say you to need to adjust settings, add a filter, resize, or any of the other many options in Photoshop to a large number of photos. Instead of having to go through each photo one at a time, applying effects, resizing, or adjusting levels for example, it’s much easier to edit one photo and record the actions. Then, we can apply that action to an entire folder of images.
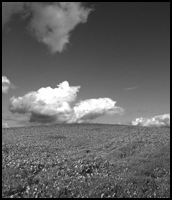
Preview of Final Results

Automating Actions Photoshop Tutorials
Step 1
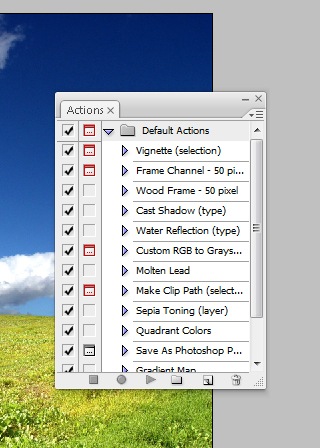
Go ahead and get a bunch of photos and place them into a folder. Open one of the photos in Photoshop. Select one which we’ll edit and record the changes for the action. Go to Window>Actions to open the Actions palette.
Step 2
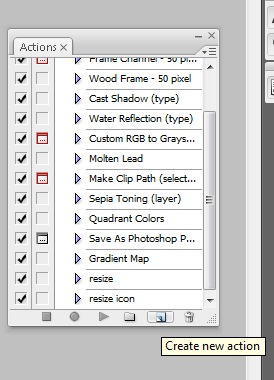
Click the Create New Action icon on the bottom of the Actions palette.
Step 3
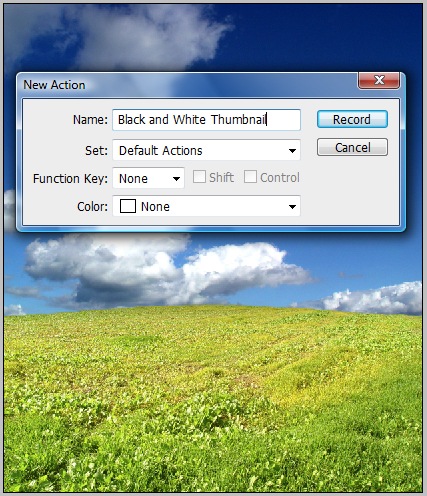
Name is “Black and White Thumbnail” and click Record. There are some other options, such as assigning a Function Key or changing the set of actions it’s placed, but leave those for this example as we don’t want to assign a function key and want to keep it in the default actions set.
Step 4
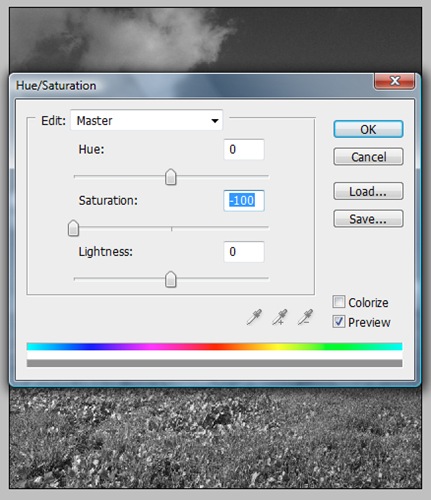
Everything we do next will be recorded as a step in the action. While there are many ways to convert an image to black and white, such as going to Image>Adjustments>Black and White, let’s do a simple desaturation for this example. Go to Image>Adjustments>Hue/Saturation and drag the saturation to the left and click OK.
Step 5
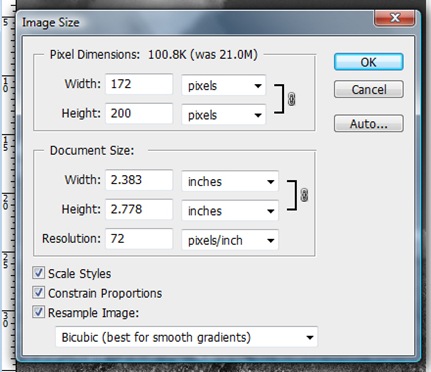
Go to Image>Image Resize and change the Height to 200. As long as the Constrain Proportions is checked, the Width should resize automatically. Click OK.
Step 6
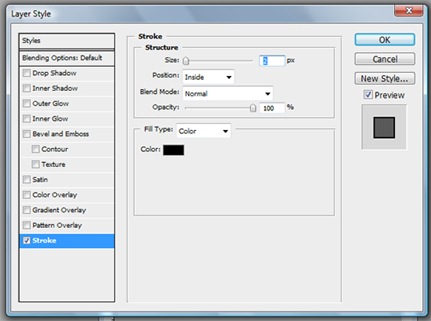
Now that it’s black and white and resized to a thumbnail, we need to add a border. Double-click the Background layer in the Layers palette and click OK to make it a normal layer that we can apply layer styles to. Go to Layer>Layer Style>Stroke. Change the Position to Inside, the Size to 2 and click OK.
Step 7
Now we need to save it with certain settings. Go to File>Save As and save it as a JPEG to a new folder named Thumbnails. Finally, click the Stop Playing/Recording icon on the bottom of the Actions palette. Now we have created an action that converted a color image to a black and white, resizes it to a thumbnail, adds a 2-point interior stroke, and then saves it as a JPEG. Close the file and don’t save changes so we don’t erase the original file.
Step 8
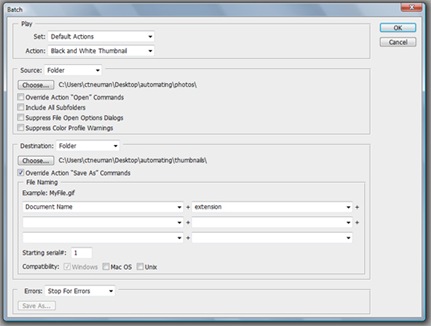
Now that we’ve created the action titled Black and White Thumbnail, go to File>Automate>Batch. Set the Action to Black and White Thumbnail. Click the Choose button near the source folder setting and find and select the folder of images to apply the action to. Click the Choose button near the Destination folder setting and find and select the folder to save the thumbnail images to. I set the source folder to one called Photos and I set the destination folder to one called Thumbnails. Also make sure to check Override Action “Save As” Commands since we already have a save command in the action.
Step 9
Now all seven photos from the source folder, originally full color and large size, have been saved as black and white thumbnails with a border in a separate folder. Remember, instead of editing photos one at time, when we want to edit many of them with the same effects, try actions instead.

Post a Comment