

8:54:00 PM
It’s almost Christmas time and time to send greeting cards to all your friends and relatives. In this tutorial you will learn to make a Christmas tree that you can use on your own Christmas card.
Step 1

Step 2
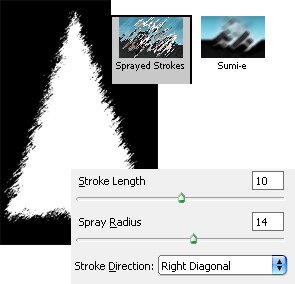
Now go to Filter->Brush Strokes->Sprayed Strokes. Here set everything like in the image and your tree will start looking like a Christmas tree.
Exit Quick Mask Mode (Q) and deselect the shape. Fill the shape with #36541e. Now make sure the layer with the tree is selected and go to Filter->Stylize->Extrude.
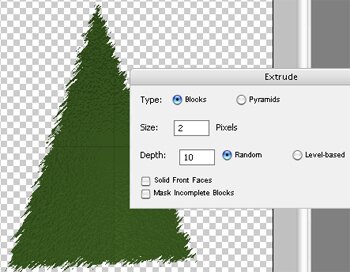
You can see you have two small black lines. You can fix that with Clone Stamp Tool (S). This way the tree will look more real.
Step 3
In this step we will decorate the tree. I will use only red ribbon, because it gives a warm look. The red ribbon I used is this:

After the ribbon is time to add some presents under the tree. I used these two pictures.


Before adding the present go to Layer 1 and fill it with white. This way the present will look better.
Here is what I come up with.


Post a Comment