

12:30:00 PM
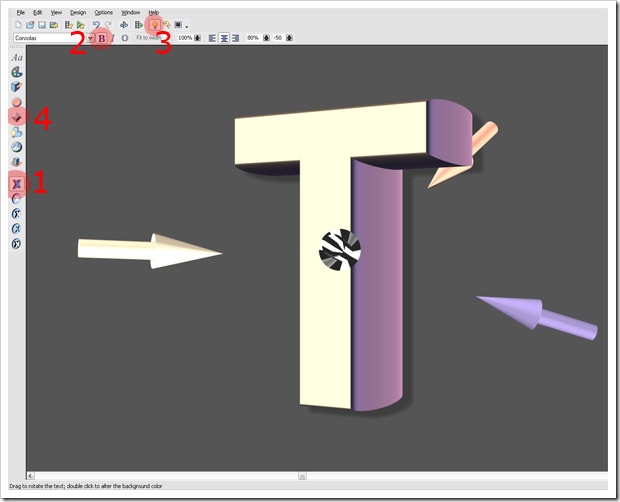
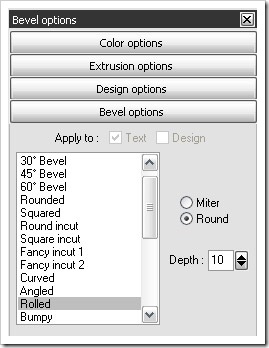
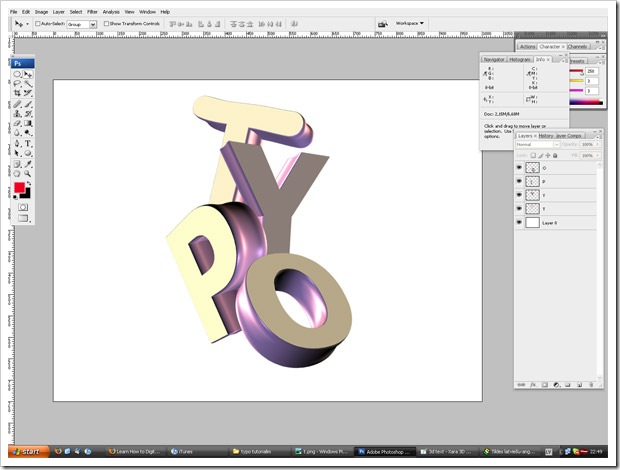
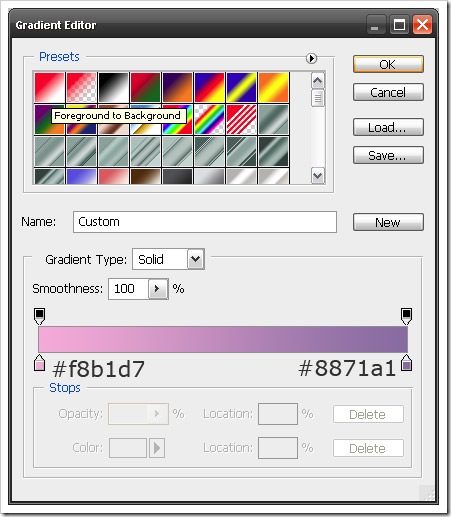
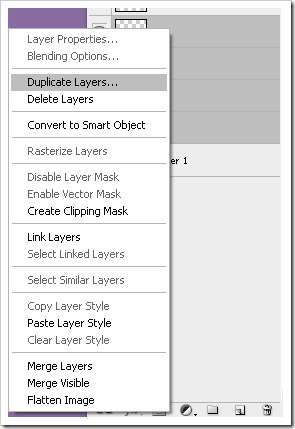
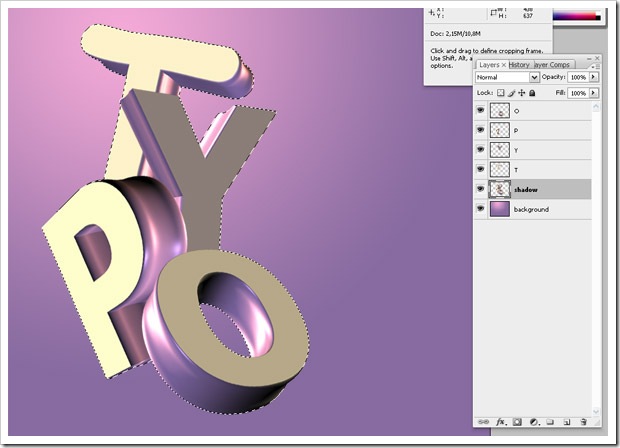
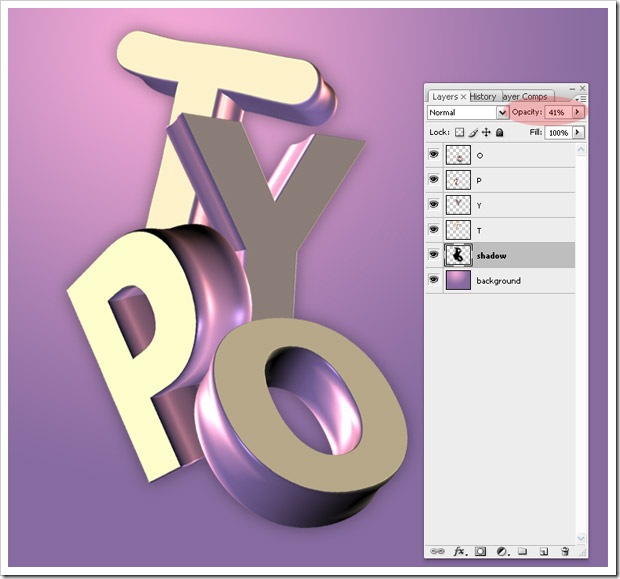
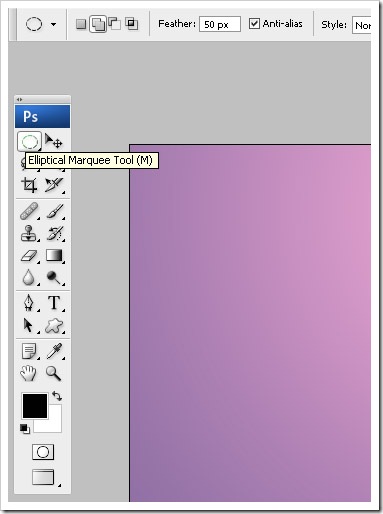
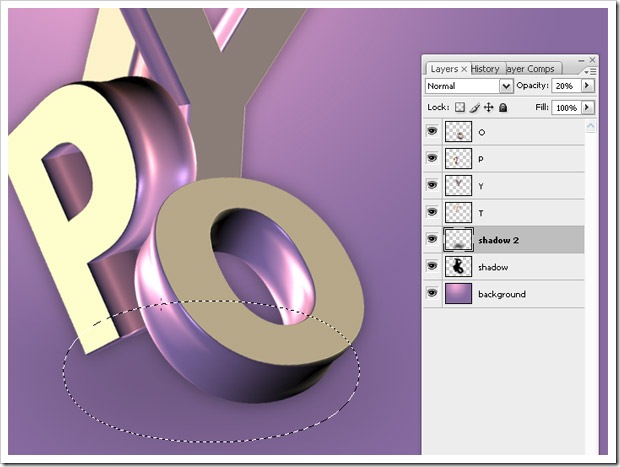
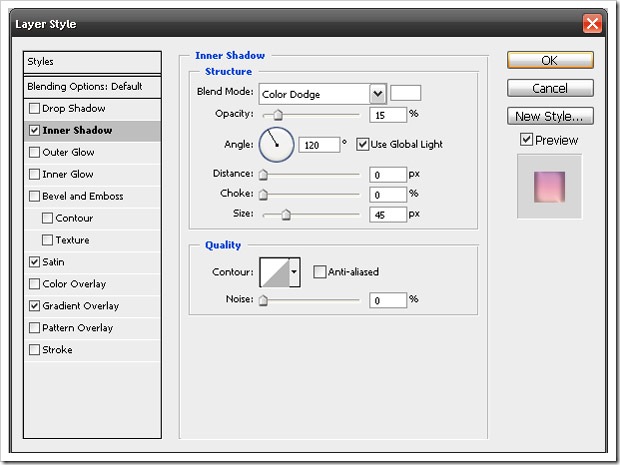
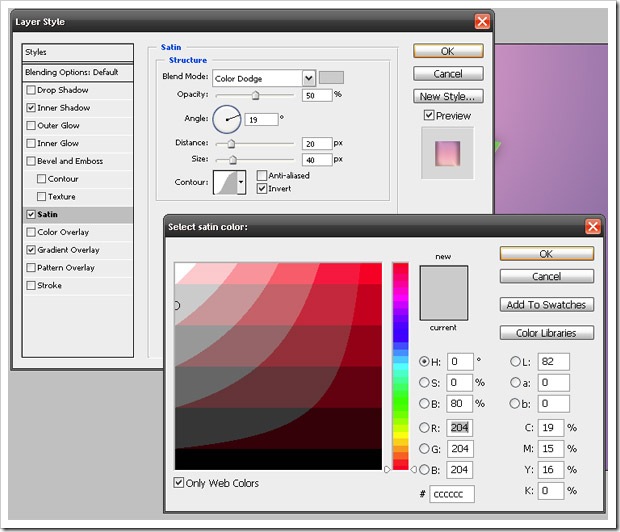
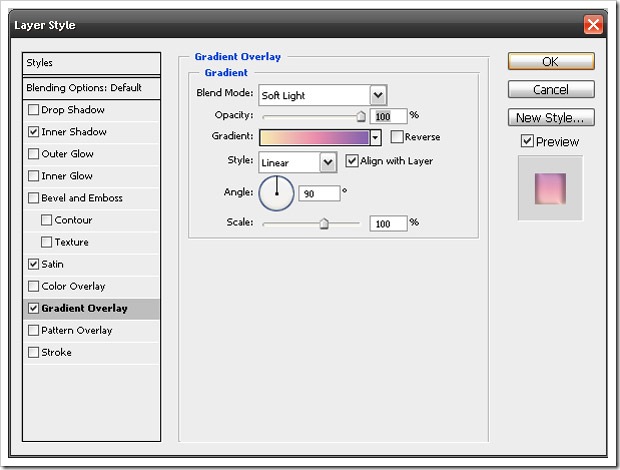
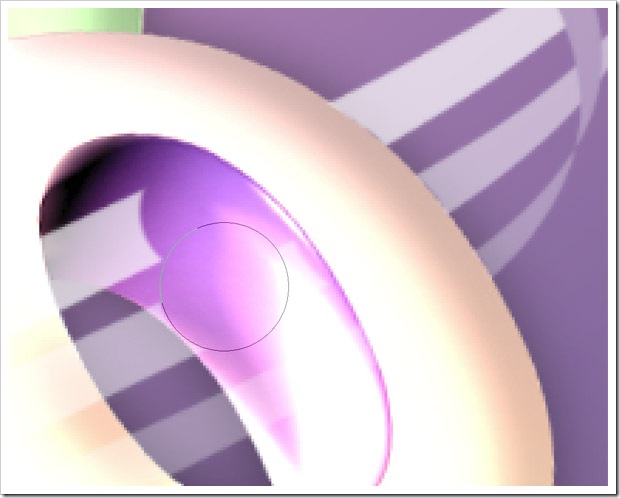
So hello again! It’s time for my first tutorial Ī’ve ever been made. I actually hope You will enjoy this one, and that will encourage me to do some more. We will use Xara 3D to get 3D text effect, then export text to Photoshop and add some style there. If You haven’t got Xara 3D, You can download demo for free ( 15 days trial) and You can read my review about Xara and their pros and cons. And yeah, If You don’t want to download program I will give You *.psd file with text elements, so You can skip Xara part and get straight to Photoshop retouching part. 1.1.Click on the Text options, press CTRL+A to delete existing text and type T, choose font, You like and press OK. 1.2. Now we will change text a little bit - 1. Click on Text toolbar, to get off that rounded circle; 2.Click on Bold - to make text little bigger; 3.Click on Lightning to show lightning arrows; 4. Click on Bevel options to change default Bevel settings; 1.3. 1.3.1. Change bevel shape to rolled to add little bit emboss effect; 1.3.2.Click to Round to round corners a little bit; 1.3.3. Change depth to 10 - to soften a little emboss effect; 1.4. Okay, now we will play with lightning and 3D effects. 1.4.1. Click on Text as shown and move Your mouse cursor to add any 3D effect while it is exactly as You want; 1.4.2. Click on the arrows and move them around to get glossy view and better lightning, if needed; 1.5.Okay, We are done in XARA, now let’s export text to Photoshop: 1.5.1. Click File-Export or CTRL+SHIFT+E to get export view; 1.5.2. Choose where to save file,then do check everything like picture below, to add transparency choose *.png format and in the options click Transparent checkbox; Do this with every letter, change 3D effects, maybe colors - play with options until You are satisfied. I got 4 png files at the end, one for every letter - T,Y,P,E. I will use many Photoshop keyboard shortcuts, if You want to learn about most useful ones, read my article - 48+ Greatest Adobe Photoshop Keyboard Shortcuts. 1.step 1.1.Create a new document, call it TYPE, I used 1000×750 size. 1.2.Open T document in photoshop, press CTRL+A to select all, then CTRL+C, open Your TYPE document and press CTRL+V to drop it in the document; 1.3. resize text with CTRL+T and holding ALT+SHIFT to resize from center point and to resize it proportionally, rotate it to get better result; 1.4. Repeat those steps for all 4 text documents until You got result similar like mine: 2.step Now lets create some background,click on background layer to make it active: 1. Press G to activate gradient editor; 2.Click on radial gradient; 3.And then double click on the gradient editor, to get gradient editor; 4.Choose Foreground to background; 5.Use color codes to get output as mine: copy those RGB codes and use them: #f8b1d7 #8871a1 Now click and pull Your mouse like in the picture to get same result: 3.step Now let’s add shadow to create more realistic effect: 1. Select all four text layers - easy technique is to select first layer, hold SHIFT and select on last layer You want to select, then right click and press duplicate; 2. Now press CTRL+E to merge those layers into one, rename it - shadow and move it below all text layers. 3. Hit D to reset foreground/background color; 4.CTRL+CLICK on the shadow layer to select it, then press ALT+DELETE to fill it with black color; 5. Hit CTRL+D to deselect layer; 6.Go to Filter–>Blur–>Gaussian Blur and type 10 to radius pixels, hit OK; 7. Change opacity to ~40% to soften shadow; 4.step I added more shadow to make it more realistic, You can skip this step if You want: 1.Click on Elliptical Marque tool and change feather to 50px; 2.Hit D to reset background/foreground color; 3. Click CTRL+SHIFT+N to create a new layer; 4.Click and drag marque tool below the letters, then change opacity to ~20-40%; 5. step In this step we will add some colors to actual text, I took idea here actually from Nick Ainley’s work - 1.Double click on T text layer to get blending options: Check everything as in the pictures below, to get different colors just play with gradient overlay: 2. Okay, now You have one text nicely colored. To copy layer style –> right click on the layer - click “copy layer style”; 3.Click on the other text layer - right click and “past layer style”, just change gradient overlay colors to get different results; My result is like this: 6.step Okay now lets add some more interesting background and styling: 1.Download those curvy line brushes - of course, better is to make those curves in Illustrator and then just import to Photoshop, but I will not bother You to do it now. I am sure You want to get faster to the final illustration. 2. Load brushes into just by double clicking and find them clicking F5 - to get brushes panel. 3.Click CTRL+SHIFT+N to create new layer and move it to top of all layers. 4. I used white background color. 5. Now change opacity to ~60-70% and click E, to grab eraser tool and erase few places to get effect that those lines are rambling through the letters: Do this in big zoom ( click ALT+ Mousewheel to zoom in/out), so You can erase lines more precise: Repeat those steps, add some blending options to get Your own unique results! This is my final result: If You couldn’t do something, check out my *.psd file - click here to download. If You couldn’t do anything - please ask, I will be here to help You! This is my first tutorial, so I want to ask You, or anybody wants to see tutorials like this in future? And after complains about tutorial freshness I’ ll link to Nik Ainleys post which is likely similar like mine. Didn’t meant to do so, but ok - You’ll better read his tutorial if You know Photoshop and Xara 3D good enough, You can read there nice techniques how to polish 3D text in Photoshop. I think my tutorial is more for beginners explaining and telling step-by-step what to do and also I am trying encourage You to download Xara and at least try it!

1.Xara 3D tutorial part:
1. Okay, let’s open Xara 3D programm. By default there will be “X3D Version 6″ 


2.Adobe Photoshop part
If You are starting just from now on - click here to get *.zip file with all 4 *.png files. 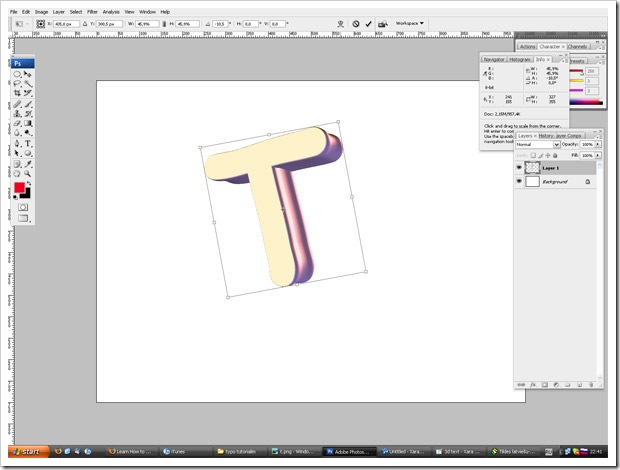

![]()


Post a Comment