

9:14:00 PM
Introduction
1. Loading the original image
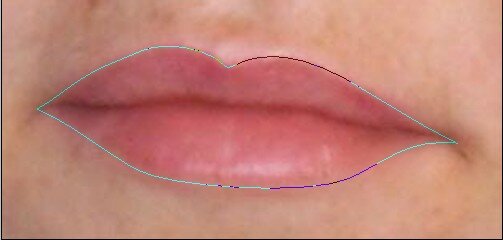
I’ve loaded here an image containing a pair of lips. The image is part of a bigger photo, so its quality is not very good (it happens very often to have to repair real life photos) so adding lipstick has to purposes: one is the lipstick effect itself, and one is to improve the photo’s quality.

2. Creating a path
Create a path that is going all around the lips.
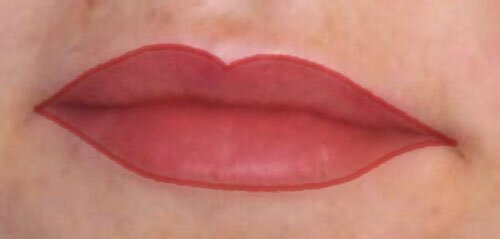
3. Adding lipstick
Now transform the path created on step 2 into a selection, create a new transparent layer and fill the new selection with a color of your choice (the lipstick color).

4. Making the contour line
Select a smooth brush, and select the contour color (usually more saturated than the lipstick color), make it’s width pretty small and proportional with your image size (6 px in my case) and then stroke the path created on step 2 with the new brush.
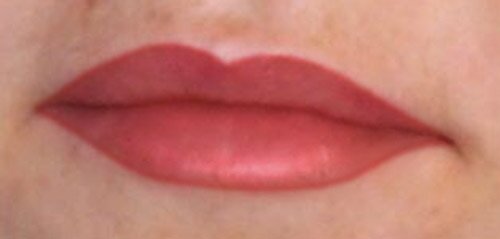
5. Finishing up
Now apply a “Gaussian Blur” on the lipstick layer to make it more realistic (I used a 3 px blur in my picture). Another adjustment may be made by using dodge and burn tool to define the lips more, and to add a little highlight if it’s a shiny lipstick ![]() .
.

Post a Comment