

12:37:00 AM
Step 1

Step 2
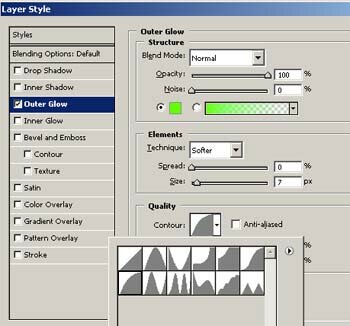
Select the layer which contains the text and apply the next effect using Layer > Layer Style > Outer Glow. Set the “Outer Glow” settings like in the next picture:
Step 3
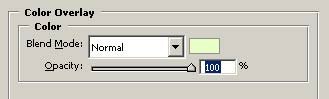
On the layer with the text apply the “Color Overlay Effect”. To do this select Layer > Layer Style > Color Overlay. Use the next settings to apply the effect:
Now you have a neon text for your cinema ![]() :
:

Step 4
You can use Adobe ImageReady to create a blinking text. In the Tools Tab select the option to jump to ImageReady:

Step 5
Open the “Animation Window” (if that is not opened) using Window > Animation. In this window select Duplicate Current Frame:

Step 6
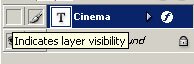
On the frame number two, in the Layers Tab, make the layer which contains the text invisible. Click on the “eye” like this:
Step 7
Export the picture as “.gif” file and you have a blinking neon text using the Photoshop CS 2 and ImageReady CS 2:


Post a Comment