

6:38:00 PM

Photoshop makes it very easy to create customized galleries from scratch. The Photo Gallery wizard is a automated task and it does not require you to have any prior knowledge of HTML coding, in fact it does all the HTML coding for you & within the moment the required files are generated by Photoshop & readies it for you to upload on your websites!
Preview of Final Results
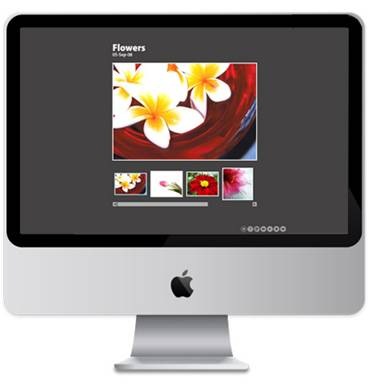
Web Photo Gallery Photoshop Tutorial
There are variety of settings that allows you to customize the style & looks of your photo gallery which includes colors, text, security features etc. It also allows you to add sound to your gallery to give it a more personalized feel.
In the following tutorial, I will guide you through the steps by which you can create a photo gallery for web.
Step 1
When you enter the Web Photo Gallery wizard you will be prompted to select the source folder from where your images will come from. So the first step obviously will be organizing all the photos that you want to include in your gallery in a folder & giving it a appropriate name. For this tutorial, I have placed all my images in a folder named “Flower photos”.
Alternatively, instead of making a folder you can select individual images from various locations in your computer to include in the gallery. To do that open up Adobe Bridge & choose the folder you want in the Folder window on the top left and then Ctrl/Cmd click to select the images you want.
Step 2
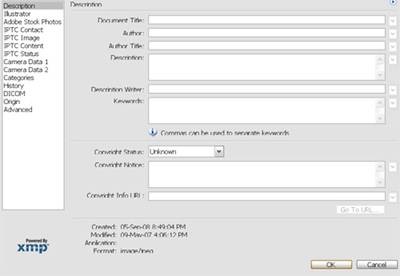
After you’ve selected & organized the images in a folder, you will decide whether you want the title & description of each of the images to be included in the photo gallery. Open your photo in Photoshop, go to File>File Info & enter the text in the Document Title, Author, Description etc. boxes.
Step 3
Alternatively, if you’re using Adobe Bridge, you can enter the file info as mentioned in Step 2, by opening up your Bridge, selecting a image & choosing File>File info, now you can enter the Document Title, Description etc. as mentioned in Step 2.
Step 4
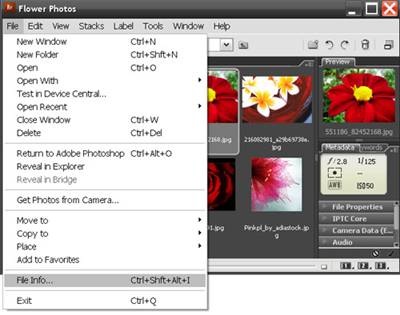
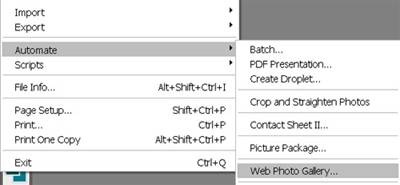
Now that we are done with initial preparatory stages of selecting, storing, naming & adding description & stuffs to the images, it is time to open Photo Gallery wizard to automate the task for creating a web gallery. For this, go to File>Automate>Web Photo Gallery.
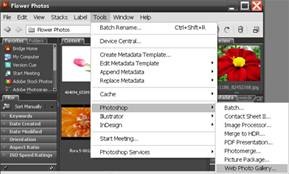
Alternatively, if you’re using Adobe Bridge, you can access it via Tools>Photoshop>Web Photo Gallery.
Step 5
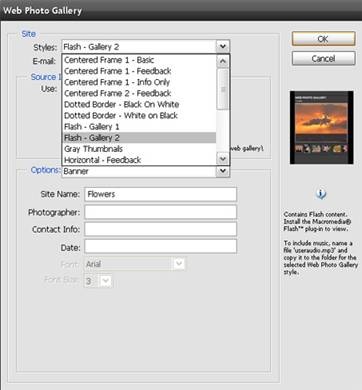
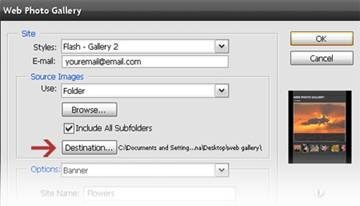
Now with the Web Photo Gallery dialog box open click the Styles drop down menu for various gallery template styles. I select, Flash Gallery Style, you can select any of them you like.
Step 6
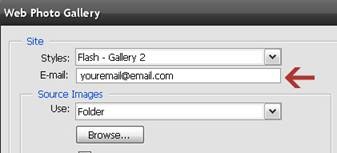
Now, if you wish, you can add your Email address, it will appear below the title of you web photo gallery to enable people to contact you. It will become a active link through which people can email you directly.
Step 7
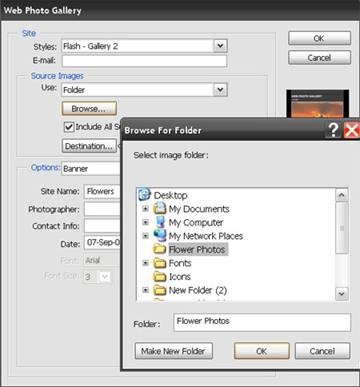
As mentioned in Step 1, whether you’ve made folder or you’re using individual images via Adobe Bridge, choose the suitable option for your Source Images clicking the Browse button. Since, I have made a folder named, “Flower Photos”, I choose that. Also, if your folder contains subfolders, which you want to include in your gallery, click the checkmark ON for Include All Subfolders.
Step 8
Since, Web Photo Gallery is an automated task, you need to tell Photoshop where you want all the files generated by Photoshop to be stored on your computer, so click the Destination button & select the location.
Step 9
In this & in the next few steps, I will give you a brief explanation as to what various Options Menus (which are basically the coding options) stands for. Some of the options will be grayed out or unavailable depending on the style of gallery you have selected.
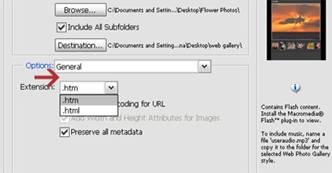
General: It gives you a option whether you want to save your files as .htm or as a .html coding extension. It also gives you a option whether you want to preserve all metadata (as determined in Step 2).
Step 10
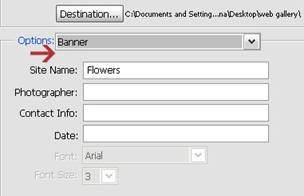
Banner: In the Banner option menu, the information that you enter in the Site Name box will appear as the title of your gallery. You can also add more personalized information as you name in Photographer box, Contact Info, Date etc.
Step 11
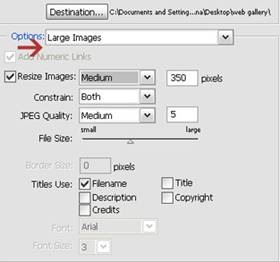
Then, Large Images: This gives you the option to customize the appearance of your main image, when the user clicks on the thumbnail in your gallery. You can resize the images, constrain its proportions, determine the quality of image, give a border to images etc. Also, by checking the corresponding boxes, you can choose which parts of information are to be displayed from the metadata you added earlier in the File Info window as in Step 2 above.
Step 12
Next, option is for Thumbnails: Which is quite similar to Large Images as mentioned above.
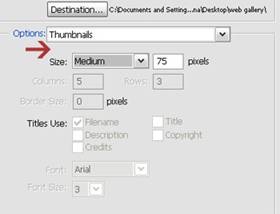
Step 13
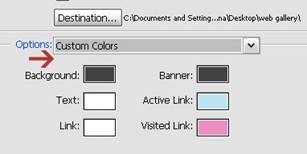
Now, the Custom Colors: Here you can customize the colors used for background, banner, text & links by clicking the color swatch to bring up the color picker, choose the colors that matches your gallery.

Post a Comment