

11:51:00 AM
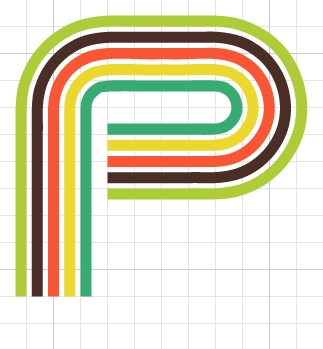
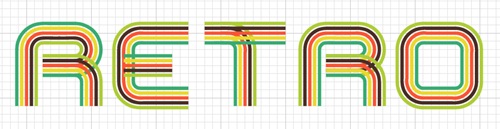
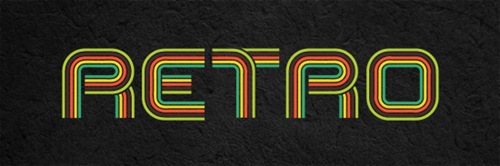
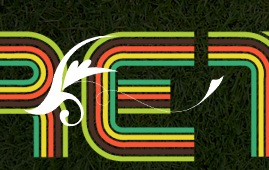
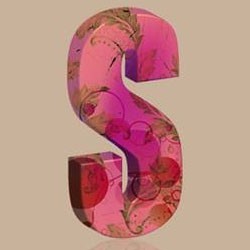
 Retro Text and Video Layers Retro text like this looks great but isn't easy to create in Photoshop alone so here we use a mix of Photoshop and Illustrator, raster and vector to create some unique text. The second part of this tutorial explains video layers, something which is relatively new to most people. The final result will be an animated image that could be used for a web header.
Preview of Final Results
Retro Text Photoshop Tutorial
This tutorial will kind of be split into two parts, the second part starting at step 19.The first part will cover the creation of the text and then editing this text in Photoshop. The first part will require 
Step 1
Start by opening Adobe Illustrator, there are two reasons why we want to use Illustrator here rather than Photoshop, firstly we can create vector files which gives us more flexibility when we export things to Photoshop and secondly there are a few nice things we can do in Illustrator which would take a while in Photoshop. Hit Ctrl+N to create a new document, I used a size of 800x600px but this doesn't matter as we are working with images that can be enlarged infinitely. Now hit Ctrl+' to show the grid. Now the default grid should have 8 subdivisions, if yours is different then go edit>preferences>guides & grid and change it. Next click on the view dropdown and make sure snap to grid is checked. Select the rectangle tool and draw a 2x2 rectangle, we will change the fill and stroke in the next step.

Step 2
With your rectangle still selected, go to the main toolbar and change the fill to one of the colors in your color scheme and set it to no stroke like in the image below. If you were wanting an outline round your text you would have to draw a line only at the left and right side of this rectangle for reasons that will become apparent later on.
![]()
Step 3
Create four more of these rectangles, each with a different fill and a 1 subdivision space between each.

Step 4
Hit V to use the selection tool then drag a box round all five rectangles then hit F5 to bring up the brushes panel. Inside this click the new brush button and select new art brush. Now change the settings to mimic the ones shown below. It should be fairly obvious why we changed it from a horizontal to a vertical direction.

Step 5
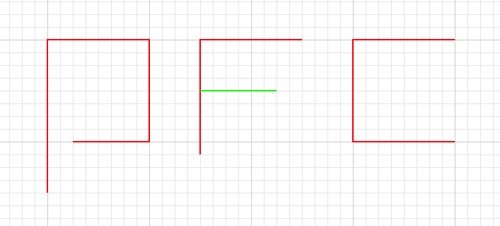
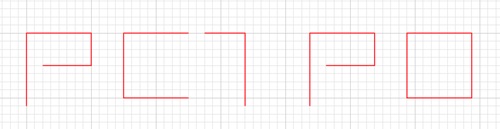
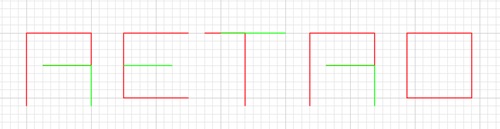
Next I worked out a rough typeface I was going to use, we are not using a real font here but rather, creating a path then stroking it with the brush we created. Below I've shown the path I would make if I wanted to make a P, an F and a C; the red lines being the first path and the green; the second path. From this you should be able to work out roughly how to create any letters. At the moment don't actually do this in Illustrator but maybe sketch out the kind of letters you want. I'll show more details on how I created the letters in RETRO. The main points here were to make most letters 1 major gridline in width and half a major gridline between the letters. Note that on the F, it extends 1 minor gridline below, this is to acount for the extra width from the brush on letters like the C. If this doesn't make too much sense at the moment; don't worry I'll go through a full example in the following steps.
Step 6
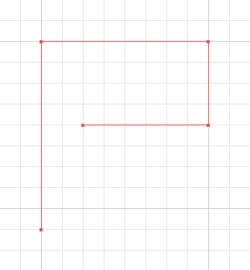
First I made a new layer, the plan was to have two layers as I needed two paths for some of the letters. This meant that I could export it to Photoshop as two layers also. We will create all of the first layer (red) then afterwards create the second (green). Hit P to select the pen tool, the pen tool in Illustrator works in the same way as in Photoshop. We don't want any bezier curves so click once at each point and don't drag the mouse. Draw this shape in your document; starting from the lower left point. We have to start at the right end or else the colors wont match up when we add layer 2.
Step 7
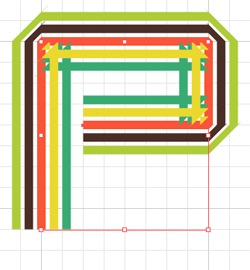
Hit V then click on the path and a bounding box should appear. In the main toolbar make sure we have no stroke or fill then just click on our brush in the brushes panel and it should look like the image below. If for example our brush was the wrong size we could click the small button to the left of new brush and change the size but since we set it at 20% already we should be fine.
Step 8
Now for quick bit of maths; go edit>preferences>guides & grid and take note of the 'gridline every:' number, now divide this number by 4, mine was at 72px so I got 18. This number is because we are going to round the corners and want the radius to be equal to two of the minor gridlines; the reason for this is obvious if you look at the examples of the letters I used but if you were to use different letters you could make it more or less rounded. Okay to round the corners, with the leter still selected, go effect>stylize (illustrator)>round corners and set it to the value you calculated.
Do the same for the other letters, so all my paths looked like the image below. You can either do the letters one at a time or create all the paths then add the styles to all of them at the same time. The image below that shows the completed first layer of the letters.
Step 10
Now for the second layer, do exactly the same as for the first, In green is the paths I used for the second layer, I then added the same styling to achieve a result like the one below. Note that here you could always just copy the R to save creating it again. You should have three layers; one with the brush shape in it, another with the first layer of our text (red) which we'll call T1 and another with our second layer of text (green) which we'll call T2.
Step 11
Create a new document in Photoshop; since these are vectors you can make it any size but I used 900x300px as I envisioned it as a good idea for a website header. Now in Illustrator, hide T2 then drag a selection on over the text then copy and paste it into Photoshop as a smart object if possible, if not then paste it as pixels and ignore the next bit. Hit Ctrl+T then change the height and width to 150%. Now do exactly the same with T1, hiding the T1 in Illustrator, then alaign it with the other layer. Below I've only shown one letter but that's only because I'll be demonstrating the techniques on this letter first.

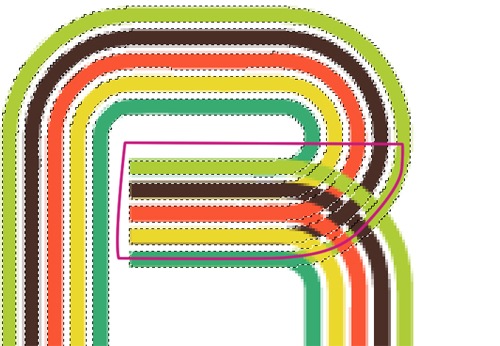
Step 12
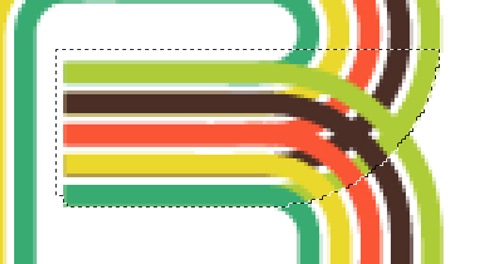
Ctrl+click on T1 to make a selection around it. There is a few steps that aren't required for the text I used but you may need to do all steps If you are doing this to a different shape or size of text so I'll show you all the steps then you can work out the shortcuts if you want. Select the polygonal lasso tool then hold Shift to change it to add mode, this will add to the selection we already have. Now draw around the parts of T2 that you want to hide (purple line), one letter at a time. So here I've made this selection which will keep the same curve at the right part of the R by staying within this line then drawing round everything else. The resulting selection is shown below that.
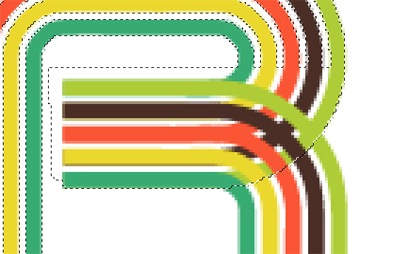
Step 13
Next, with the either the polygonal lasso or the marquee, hold Alt+Shift to change it to intersect mode which will select only the parts included in both selections. Now draw round the part of T2 which you want removed, there's no need to be neat, just draw a box like the one shown in purple. This is so that when we remove it it will only apply to this one letter then we can go on and do the other letters after. Again I've shown the resulting selection below.
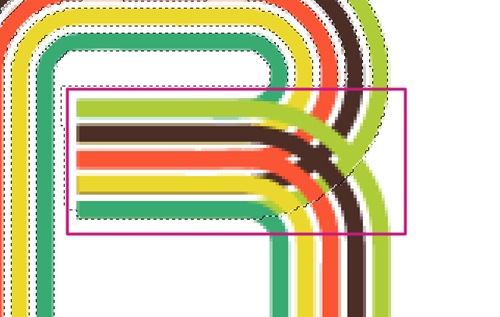
Step 14
Now go select>modify>expand and choose 3px as the value. Select the T2 layer and hold Alt and click on the add layer mask button in the layers panel, this will create a layer mask then fill the selection in black, if we were to just click on the layer mask button we would get everything except the selection filled black. Below is what your letter should now look like.

Step 15
Do this for any other letters that have two layers so for mine I had to do it to E.T, Note that after you've refined the selection you don't want want to make another mask so instead select the mask then hit D to reset the foreground and background colors then hit Alt+Backspace to fill the selection black. Alt+Backspace is a shortcut for filling something with the foreground color and is quicker than going edit>fill or Shift+F5.

Step 16
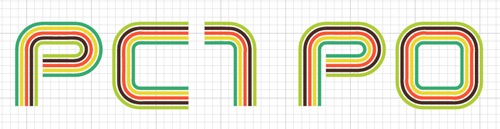
Now you can move certain parts of your text to get the spacing right. Lastly select T2 and hit Ctrl+E to merge it with T1 then right click and convert to a smart object. Below I've shown the finalized text.

Step 17
This next part shows how I created the background and is optional as I'm sure you can think of much more creative thing to use for a background. Well firstly I pasted in an Image of cardboard then desaturated it.
Next I made a very dark radial gradient then set it to 75% multiply.
Step 19
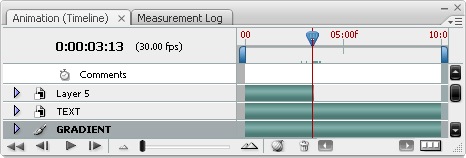
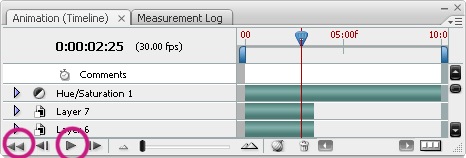
Now go layer>video layer>new video layer from file and choose one of the videos you downloaded. Now go window>animation to bring up the animation panel. You will now have what looks like a histogram of the time, all except one of the layers should have an infinite time, the one that doesn't is your video layer and should be at the top. Move the time slider to the end of this layer, see the image below for reference. You will see that the animation will move, the reason we moved the slider to the end was because if you watch it you will see that the last 10 seconds include every part of the animation.
Step 20
Now hit Ctrl+T to enter free transform mode, a warning should pop up just press convert and it should change to a smart object. Next move, rotate and scle it then put it above part of your text, here I put it above the first R.
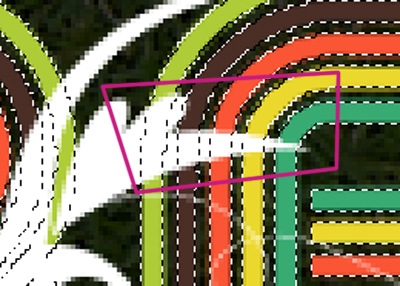
Step 21
Now we are going to mask it, I used similar techniques to what we used when masking the letters. Note that when you mask a video layer it does this in every frame. Ctrl+click on the text layer to make a selection then get the polygonal lasso tool out, hold Alt+Shift to go to intersect mode then draw roughly round the part you want to hide behind the letters like shown below; the purple line being the selection I made.
Step 22
Now mask the video layer in exactly the same way as in step 14 and 15. Do this for some other parts of the animation.
Step 23
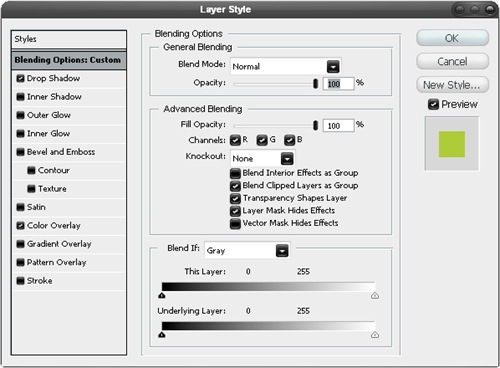
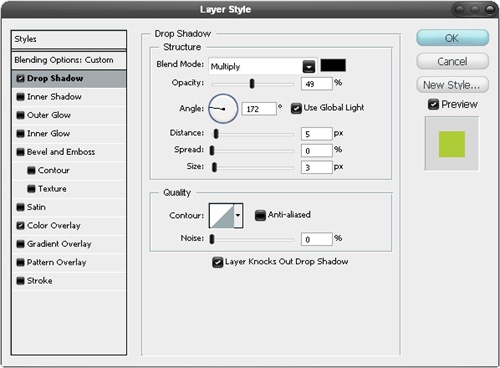
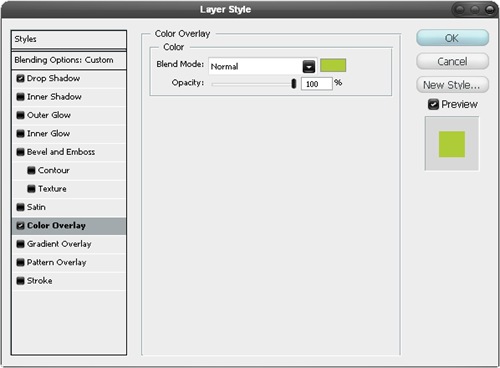
Right click on the video layer then go blending options, that's right you can add layer styles to a video. Use the settings shown below. Make sure that 'Layer Mask Hides Effects' is checked as this will make the shadow more accurate because the shadow won't follow the layer mask at all. For the color overlay, just select the color that the animation merges into with the eyedropper, so here mine merged into the green line.
Step 24
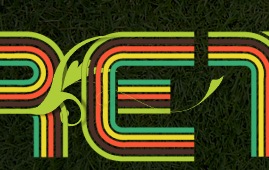
Do exactly the same with the other two movie files and just copy and paste the layer styles by right clicking on the layers then change the color overlay. They should vaguely resemble the image below.
Step 25
Try now playing your animation by clicking the rewind button then the play button in the animation panel.
Step 26
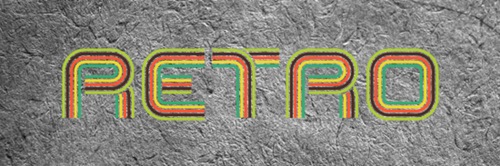
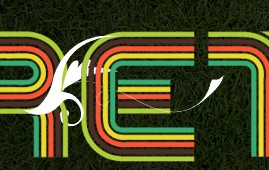
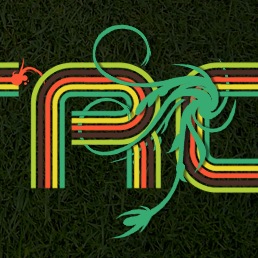
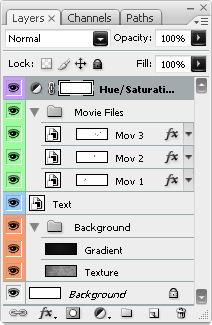
There's a few things you can do with this file, you could save it as an animated gif, export it to flash or save it as a movie file. Here I saved it as a gif by going file>save for web & devices. Depending on what you want to do with the file you can choose your settings. I knew I was going to upload it to this site so wanted it quite low quality, I also found that by cranking the lossy value up you get a grainy effect and a smaller file, I liked this effect so kept the lossy at about 85% then set the colors to 64. Below I've included my final layers panel and also the unanimated image. You may notice that the colors are different here this is because I added a hue/saturation adjustment layer at the top of the layer stack.
11:43:00 AM
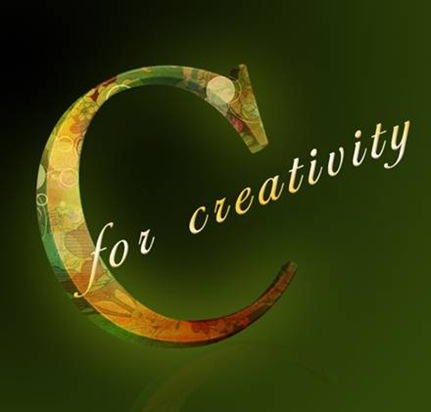
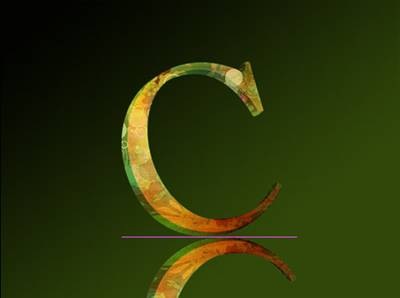
 In this tutorial, I will show you how you can make a stylized 3D textured text effect using various textures to give it a unique look with Illustrator & Photoshop. I will be giving you the step by step instructions along with the links to the resources & stuffs used.
Preview of Final Results
3D Textured Text Photoshop Tutorial
Step 1
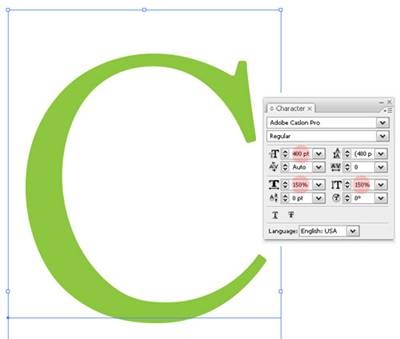
Open up Illustrator, and with the Type Tool type a letter or text, I typed the letter “C” I used the font
Step 2
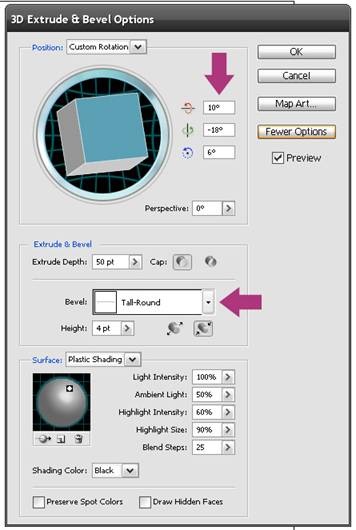
Now go to Effect>3D>Extrude & Bevel, make sure that Preview is on. Use the settings shown below, apart from specifying rotations for x, y & z axis, I chose Tall-Round from the Bevel drop down list. The settings will more or less depend on the font, so if you have used a different font play a bit, though I will advise to stay away from the fancier Bevel settings, mostly None setting works best. You can also make it more thick by increasing the Extrude Depth.
Step 3
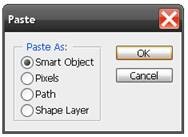
After you’re happy with your 3D effect, it will be time to move on over to Photoshop. Open a new document in Photoshop. Now, copy your 3D text/letter from Illustrator & paste it as Smart Object in Photoshop, press Enter key or checkmark to commit. You can now resize your text to whatever size you want, in fact, bigger the better, but for the purposes of this tutorial, I will stick to a small canvas.
Power Tip: If for any reason, you want to edit the pasted 3D Smart Object, just double click on the Vector Smart Object thumbnail in the Layer Palette, press OK on the resulting window, the Smart Object will automatically open up in Illustrator, do the changes or editing you want, then go to File>Save & close the file & tadaa the changes will reflect in your Photoshop file.
Step 4
 Now, lets begin with the Photoshop magic, we will be adding various texture on the different layers & will spice them up with the variety of blending modes, the key is to experiment & choose the settings that will best suit your purpose.
Open the texture image that you would like to use, for the first layer I used a texture, lets call it Texture 1 from a texture pack on deviantArt. Go to Select>All & then Edit>Copy to copy the entire texture image, Now we are going to paste this image into our letter, but you have to tell Photoshop where to paste it. So return to your 3D text document & pressing down Ctrl/Cmd Click on Vector Smart Object thumbnail, this will select the entire text/letter, in our case, the letter “C”, now go to Edit>Paste Into (Shift+Ctrl/Cmd+V) to paste the texture image on “C”. Change the blending mode of the texture layer to Overlay.
Now, your image & layer palette should look like so:
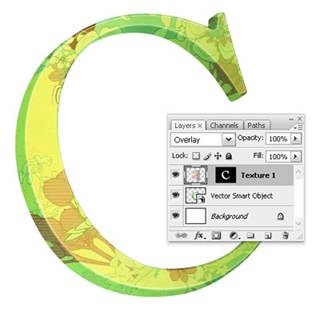
Look at your layers palette now. You see your texture image there and a mask has been made that allows only the letter part of the image to show.
If you’re using different images, play around a bit with blending modes, mostly Overlay, Soft Light, Hard light, Multiply will give the desired results.
Step 5
Repeat the procedure prescribed in Step 4, but with a different texture. I used one of the texture from this pack.
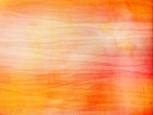
In brief, open the texture image, Select All (Ctrl/Cmd+A), Copy it (Ctrl/Cmd+C) & return to your original document, pressing down Ctrl/Cmd Click on Vector Smart Object thumbnail to select the letter/text & go to Edit>Paste Into (Shift+Ctrl/Cmd+V) to paste the texture in the letter “C”. And, change the blending mode to Multiply.
Step 6
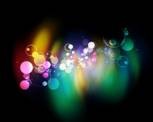
Now, its again time to do the same thing as mentioned in Step 4 & 5, but with the different texture image. This time I used a more colorful texture from a another texture pack over at deviantArt. And, this time I choose the blending mode to Soft Light.
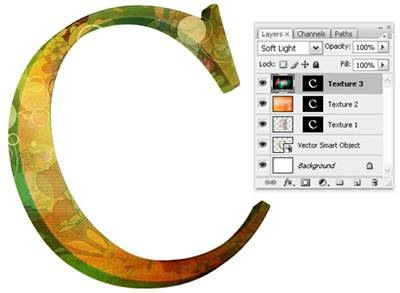
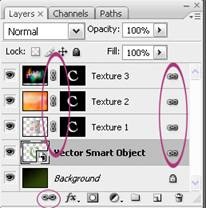
This is how my image & Layer Palette looks like after step 6.
Power Tip: If you need to edit the filler texture image or if you don't like how it looks within the letter, you can still change it! Just choose the Move Tool (V) & drag over with your texture layer selected. Also, if you need to resize the texture image select Edit>Transform to resize it.
Step 7
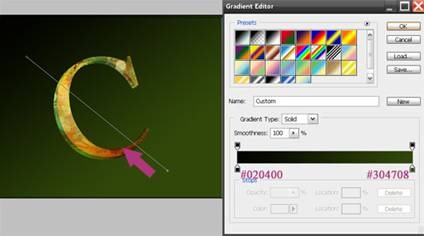
Now, select the Background layer & fill with a Gradient Tool (G). I used Linear Gradient & the colors for the two stops are as prescribed in the screenshot. Drag the gradient tool diagonally from bottom to top.
Step 8
Pressing down Shift key select all the layers in the Layer Palette except the background layer & Link all of them. Also make sure to link the Layer Mask thumbnails with their corresponding layer thumbnails by clicking once between them.
Step 9
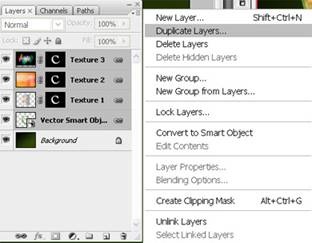
Now, we will do the reflection of our letter “C”. For that, select all the linked layers & duplicate them.
Step10
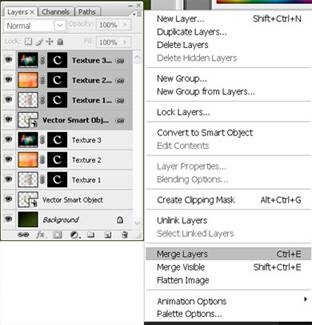
Merge all the duplicated layers & name it Reflection.
Step 11
On the Reflection layer, go to Edit>Transform>Flip Vertical & place it beneath the letter “C”. Adjust its perspective if the need be.
Step 12
The next step is to add a layer mask to the duplicate layer. To do this simply click on the add layer mask button in the layers palette.
![]()
Now pick the Gradient Tool (G) and draw a gradient (black to white) in the direction from bottom to mid top.
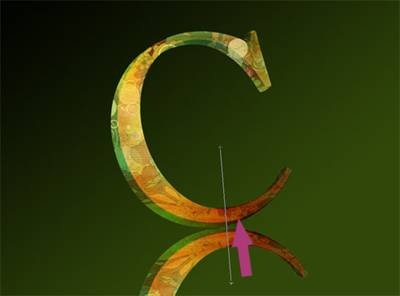
Finally just reduce the opacity of the duplicate layer and you are all done. I reduced the opacity to 20% , there is no golden rule about the opacity % , just play with the opacity setting & choose the one that suits your image.
Step 13
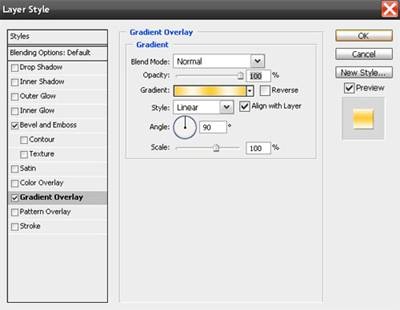
Finally, with the Type Tool, I wrote the words “for creativity” with the settings as shown in the Character Palette.
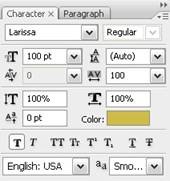
The font used is Larissa & can be downloaded from here. I also rotated the words a bit via Edit>Transform.
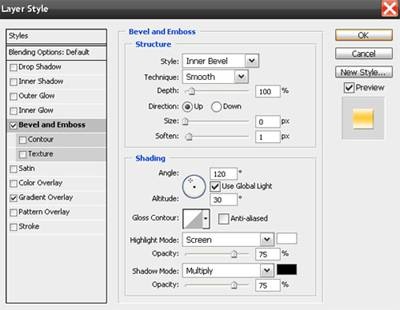
Then I applied the layer style, as shown in the screenshots below.
Step 14
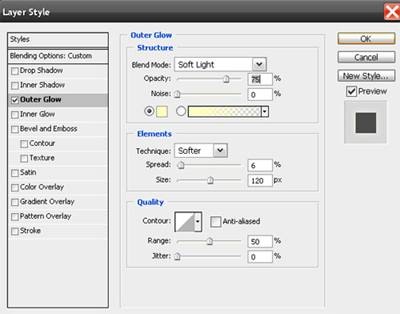
To add a bit of finishing touch, I added Outer Glow to the Vector Smart Object layer, as shown.
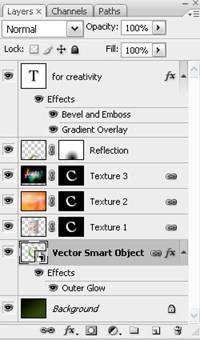
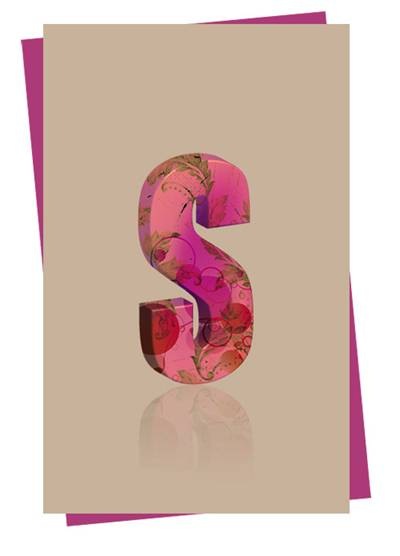
And, that’s how my Layers palette in end & final image looks like.
Here, is a another example of image, I made with the same technique.
To take it further, play & experiment with various textures, the blending modes, also changing the various Adjustments options like Invert, Posterize, Hue/Saturations settings etc. gives the different results. You can also make the text look grungy or rusty using grunge textures, its just the matter of exploring the powers of Photoshop & tapping your creativity!
10:51:00 AM
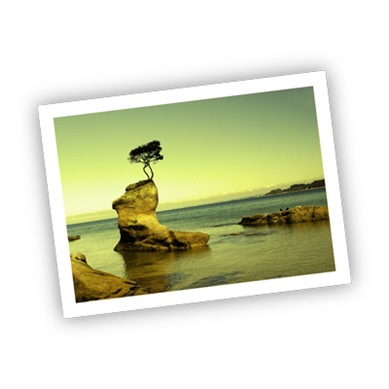
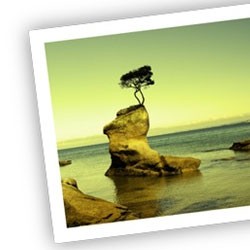 Scripting in Photoshop is something rarely touched upon in regular Photoshop tutorials, but is something definitely worth learning. Scripts are a much more powerful way to automate tasks than actions and can be used to do things which normally aren't possible in Photoshop. Here we create a script which will edit any image, giving a stylish way to show your photographs.
Introduction:
In this tutorial I will aim to show how to create this effect using scripts but will also show the corresponding steps in Photoshop, making it easy for you to understand how to alter your script to achieve different results.
Photoshop allows scripts in three different programming languages; VBScript, AppleScript and JavaScript, however JavaScript is the only cross platform script available so we will use it, it is also more useful to learn JavaScript. If you haven't ever programmed in JavaScript, you should still be able to understand this tutorial as I have explained all of the concepts in enough detail. When writing JavaScript you are free to use whatever text editor which suits you, however newer versions of Photoshop come with a program called ExtendScript Toolkit (ESTK) which makes scripting a lot easier. This is usually found hidden away in the same folder that contains Photoshop. If you don’t already have this program then you can download it here although it may not work for older versions of Photoshop. There are a few advantages of using this program, mainly the debugger and the fact that you can run scripts straight from the program.
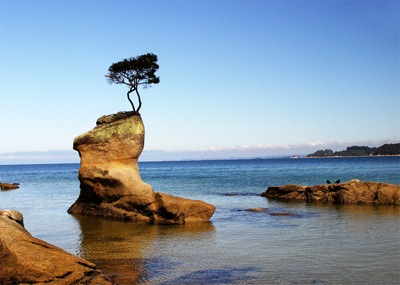
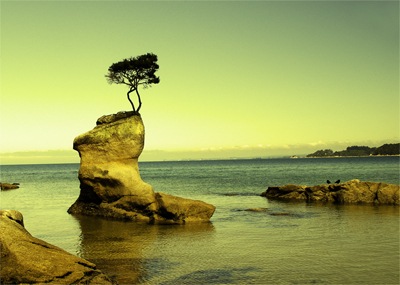
For most of the steps I will show what your image should look like after you have run the script. Throughout this tutorial I used this image from stock.xchng, optionally you can save a small size version of this image for the purpose of testing your scripts as the script will run faster this way. The script works for any image of any size.
Step 1
Open the editor you want to use, either ESTK or a regular text editor like notepad for Windows
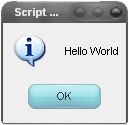
Now we will right a simple script to test we have the settings correct. Type the code shown below into your editor:
alert("Hello World") What this simple command will do is to bring up an alert box saying ‘Hello World’; we will use alert boxes throughout this tutorial in order to test parts of our script. By putting the quote marks in we are indicating that this is a string which is just a word.
Now run your script, If you are using a regular text editor like notepad then the easiest way to run your script is to save the file as ‘myscript.jsx’ then open Photoshop and go file>scripts>browse then select your script. If you are using ESTK then just hit the play button in the top right of the document window. Automatically you should see your alert box pop up. Before testing your scripts close any document that is open in Photoshop.
Step 2
Delete the alert code you had in the editor as we were only using it to test the settings. There are two settings we want to apply every time we run our script, these are to tell Photoshop to use pixels as the default unit and not to display dialog boxes unless we tell it to. If we wanted to do this within Photoshop we would go edit>preferences>units & rulers and change the rulers value to pixels, obviously turning off dialog boxes is limited to the scripting only. The code for doing this is:
preferences.rulerUnits = Units.PIXELS;
displayDialogs = DialogModes.NO
The first command is, simply telling Photoshop to access the rulerUnits within the preferences then change the units to pixels. You will notice that this is arranged in a hierarchical structure for example the rulerUnits is contained within the preferences, this is easy to visualise as Photoshop is arranged in exactly the same way.
The second command is basically telling Photoshop to change the value of displayDialogs to NO, if you wanted to have dialogs displayed while running the script then you would change the NO to YES.
Step 3:
Now we want to let the user select a file to open, for this we need to bring up an open dialog box, even though we turned dialogs off if we tell Photoshop to bring up a dialog it will do it. We then want to define a variable that references to this document then we want to duplicate the background layer. The code for doing this is:
open(File(openDialog()));
var docRef_1 = activeDocument
docRef_1.backgroundLayer.duplicate();
The first command is made up of three parts, the open() command which will open the file within the brackets, next the File() command which fetches the file path within the brackets but instead of adding a path we added the openDialog() command. So this is displaying a dialog box where the user selects a file then it will get the file path and open that file, if you were wanting to open the same file each time you could swap the openDialog() with the file path and name .
In the next command what we are doing is setting up a variable using var then the variable name which can be anything but here I used docRef_1, if I was to open another document I would make a variable named docRef_2. We are then setting docRef_1 to be equal to the active document.
In the last command what we are doing is telling Photoshop to duplicate the background layer in docRef_1 which is the only document we have open anyway. You will notice again that this is similar to what you would do in Photoshop, as in you would select the document which contains the layer you want to duplicate then you would select the layer you want to duplicate then you would duplicate it.
Try running the full script now and you will end up with a background layer containing the image you chose and also a layer above that containing the same image.
To do this step in Photoshop you would simply go Ctrl+O then choose your file then right click on the background layer and select duplicate layer.
Step 4:
Now I will show you how to define colors using hexadecimal codes, colors can be defined in other ways like by RGB values as we will see later. Here we will define a white color and a black color then set black as the foreground and white as the background. There is other ways of doing this but for the purpose of this tutorial I will show you this way. The code for this step is:
var white = new SolidColor();
white.rgb["hexValue"] = "ffffff"
var black = new SolidColor();
black.rgb["hexValue"] = "000000"
foregroundColor = black;
backgroundColor = white;
You will notice here that the first two lines are roughly the same as the second and third; what we are doing here is setting up a variable which can be named anything but here we use the color it will contain as the variable name. We are then saying that this variable is equal to new SolidColor() which is a function for creating a new color. The next line is setting the hexadecimal value for this color to whatever the color should be so for white this is "ffffff", what we are ultimately saying here is that white is the color white and black is the color black.
The last two lines set the foreground color to black and the background color to white, and are fairly easy to look at and understand straight away. In Photoshop the equivalent action for doing this would just be to hit D to reset the colors.
Try now, setting the foreground color and background color to a random color manually then running the full script which should give you the same result as we got in step 3 but now the foreground and background colors will be set properly.
Step 5:
Now we are going to fill the background layer white using the white color we set up in the last step. For this we first need to make a selection around the whole document then fill that selection. The code for this is:
docRef_1.selection.selectAll();
docRef_1.selection.fill(white);
docRef_1.selection.deselect();
The first line creates a selection using the selectAll() function, for any command that can be used on different documents we have to tell Photoshop which document we are working on even though we only have one open in this case.
The second line is telling Photoshop to fill this selection in with the white color. Sometimes it is confusing as it wouldn't be stupid to think that something like docRef_1.selction.fill = white would do what we are trying to do, but this isn't a real command and this is where ESTK comes in useful as it will point out the correct use of something like the fill command just by typing in fill.
The third line is fairly self explanatory, it will deselect the selection, exactly the same as hitting Ctrl+D in Photoshop.
Again test the script and you should end up with a white background layer and the image in the layer above. In Photoshop, all this could have been done using Ctrl+A then Shift+F5 to select all then fill the selection.
Step 6:
In the next two steps we will use a script to find the average color in the photograph; we will then use this information to decide how to edit the image. This part of the script could have lots of other uses for example you could use a similar script to create a color chart based on the colors that make up the image. In this step we will first duplicate the image layer then we will apply an average blur filter which will find the average color then fill the layer with that color. The code for doing this is:
docRef_1.layers[0].duplicate();
docRef_1.activeLayer = docRef_1.layers[0];
docRef_1.activeLayer.applyAverage();
The first line looks familiar, we used the same command in step 3 but here we have replaced backgroundLayer with layers[0]. To understand this we need to know a bit about arrays in JavaScript. Arrays are simply just variables which hold more than one value, where variables are like boxes with a single piece of information, arrays are like a big boxes with lots of smaller boxes labelled zero to infinity inside. For example if you wanted to create an array holding the first three days of the week you would type:
var days = ["Monday", "Tuesday", "Wednesday"]
Now if you wanted to use the first day of the week you would use the code:
days[0]
This would equal "Monday"
Obviously don't include these last two lines in your script. Now that you know a bit about arrays we can go back to the three lines of code we added. In the first line layers is an array which includes all the layers in our document. The top layer in the stack is always the first in the array, corresponding to layers[0] because arrays start at 0 instead of 1.
The second line sets the active layer to the top layer this is the same as selecting a layer in the layer panel in Photoshop. We didn't need to change the active layer but it makes things easier later on.
The last line applies the average blur, the format here is the same as most of the commands we have used so far and is what's called a method and usually takes the form of document.layer.function where the layer is the active layer and the function is applying the average blur. This can be done in Photoshop by going filter>blur>average.
Again, test the script and you should have a new layer above the image filled with a solid color.

Step 7:
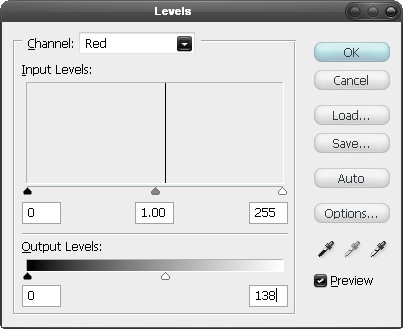
This step is slightly more complicated, what we want to do is find the RGB values of the color we have in this layer. There is no really simple way of doing this in a script but the method I use is to have the script select first the red channel then get the histogram of that channel then go through the histogram from 0 to 255 until it finds a value that isn't zero then that value will be the R value, it then repeats that for the green and blue channels. It is easier to explain this by going through this process in Photoshop. If you don't still have the document open from when you tested it in the last step then run your script again. Okay go to the channels by going window>channels and select the red channel this should now hide all the other channels and the image will look grayscale. Next hit Ctrl+L to go to the levels adjustments, you will see a histogram with one vertical line in it, now drag one of the output levels sliders to roughly below the line and the number in the corresponding box is the R value. Getting the G and B value is done in the same way. The script to do this for the R value is shown below, from this you should be able to work out the code for the G and B value.
for (RLevel = 0; RLevel <= 255; RLevel ++) { if (docRef_1.channels["Red"].histogram[RLevel]) { break; } } This block of code is a 'for' loop, what line 1 does is says to start RLevel at 0 and keep looping around while RLevel is still smaller or equal to 255 and also to increment RLevel by 1 each time it loops around. The part which says RLevel ++ means increment RLevel by 1.
The part inside this loop is an 'if' statement and it will execute the command inside the curly brackets only if the statement within the normal brackets is true. Lets look at the statement within the normal brackets, its telling Photoshop to get the red channel in document one then getting the histogram array. The histogram that we looked at didn't look like a row of boxes but in fact it is, for each each output value horizontally from zero to 255 is a corresponding vertical value. In the histogram we looked at there was only one output value which didn't correspond to a non-zero value so RLevel can be thought of as the output value. since we haven't included anything else in the brackets like an equals sign or a greater than sign then it will automatically only return true if the value returned from the histogram is non-zero and since there is only one non-zero value then this will be the R value. The command to execute if this is true is the break command, this will stop the loop so we won't go round again after we find the correct value. the two closing curly brackets are just to close the 'for' loop and the 'if' statement.
Step 8:
Below I have included the full code up to this point, including the G and B value checks:
preferences.rulerUnits = Units.PIXELS;
displayDialogs = DialogModes.NO
open(File(openDialog()));
var docRef_1 = activeDocument;
docRef_1.backgroundLayer.duplicate();
var white = new SolidColor();
white.rgb["hexValue"] = "ffffff"
var black = new SolidColor();
black.rgb["hexValue"] = "000000"
foregroundColor = black;
backgroundColor = white;
docRef_1.selection.selectAll();
docRef_1.selection.fill(white);
docRef_1.selection.deselect();
docRef_1.layers[0].duplicate();
docRef_1.activeLayer = docRef_1.layers[0];
docRef_1.activeLayer.applyAverage();
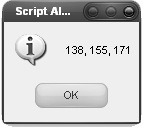
for (RLevel = 0; RLevel <= 255; RLevel ++) { if (docRef_1.channels["Red"].histogram[RLevel]) { break; } } for (GLevel = 0; GLevel <= 255; GLevel ++) { if (docRef_1.channels["Green"].histogram[GLevel]) { break; } } for (BLevel = 0; BLevel <= 255; BLevel ++) { if (docRef_1.channels["Blue"].histogram[BLevel]) { break; } } Now we are going to check to se if these last bits of code actually work, to do this we will use an alert box and make it display the RGB values. Insert this code below the rest of your code:
alert(RLevel + ", " + GLevel + ", " + BLevel)
The alert box should contain the RGB values check these by double clicking on the foreground color then using the eyedropper. If the colors match then delete this alert box code and move on, if they don't match or it's not working just copy and paste the full code above and try again.
Step 9:
From now on I won't go into much detail as most of the things coming up have been covered already. Now depending on the average color we want to edit it in different ways. The way we will edit it is fill this layer with a solid color change its blending mode to color. The color of this layer will depend on the average color; if the average color is mostly blue we will use the color yellow, mostly green we will use magenta and mostly red we will use cyan. I'm going to show a long way of doing this just to demonstrate some extra commands. In this step we will get the RGB values for this color. The code for this is:
var R = 0;
var G = 0;
var B = 0;
if (RLevel > GLevel && RLevel > BLevel) {R = 255;
}
if (GLevel > BLevel && GLevel > RLevel) {G = 255;
}
if (BLevel > RLevel && BLevel > GLevel) {B = 255;
}
Here we are first defining the variables R,G and B and setting them to 0 then we have three 'if' statements so for the first one it is basically saying if RLevel is bigger than GLevel and BLevel then set the R value to 255. The same goes for the G value and B value, if in the off chance any of the values are equal then all values will remain 0.
Step 10:
Now we will create a new color then fill the layer in with this color, using exactly the same commands that we used in step 4 and 5. The code for doing this is:
var color = new SolidColor();
color.rgb.red = R;
color.rgb.green = G;
color.rgb.blue = B;
docRef_1.selection.selectAll();
docRef_1.selection.fill(color);
docRef_1.selection.deselect();
The only difference is that we called the variable color, just because this could either be red, green or blue; in my case it was blue.

Step 11:
Now we want to invert the color of this layer then change its blending mode to color and its opacity to 50%. The code for doing this is.
docRef_1.activeLayer.invert();
docRef_1.activeLayer.blendMode = BlendMode.COLORBLEND;
docRef_1.activeLayer.opacity = 50;
docRef_1.activeLayer.merge();
Each command here explains itself fairly well, this process would be done in Photoshop by hitting Ctrl+I then changing the blending mode and opacity manually in the layers panel then hitting Ctrl+E.
Step 12:
Now we want to add the border, the way I did this was to have this script enlarge the canvas then create a new layer and do a select all and fill this layer white. Before we do this we need to have the script calculate the size of the border depending on the size of the image. After a bit of trial and error I found a good border thickness to be 7.5% of the smaller dimension; either the height or the width. To implement this we first need to find which is smaller the width or the height then to make the border size equal to 7.5% of this. Lastly we have to double this thickness then add it to the width and the height to get the new canvas size. To simplify this slightly I just took 15% rather than 7.5% then I didn't need to double it before I added it on. The code for this stage is:
var width = docRef_1.width;
var height = docRef_1.height;
if (width <= height) { var borderSize = Math.round(width * 0.15); } else { var borderSize = Math.round(height * 0.15); } docRef_1.resizeCanvas(width + borderSize, height + borderSize); Okay, the first two lines are easy; we are setting a variable for the width which is equal to the document width and a variable for the height which is equal to the document height.
Then we have an 'if' statement which says if the width is smaller or equal to the height then execute the command in the curly brackets. The first part of this command looks familiar; just creating a variable, the second part uses a Math function called round, what this does is to round whatever is in the brackets to the closest integer or whole number. We need this because some of the time 15% of the width will be a decimal number.
After this 'if' statement we have an 'else' statement which means if the width is larger than the height then it will execute the command contained within these curly brackets; which is similar to the other command.
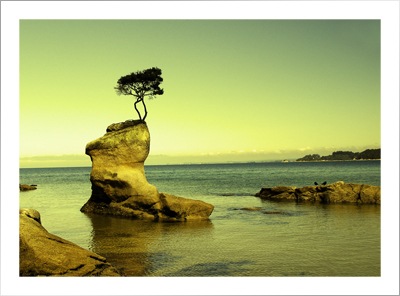
The last line resizes the canvas to a width and height equal to borderSize added to the width and height. Note that the 1px border around these images is just added in because the background is also white.
Step 13:
Now if you tested the script you might think it looks fine however the background layer will resize to fit any size of canvas so we need to have the script create a new layer with the border in it then merge this layer and the image layer. The code for this is:
docRef_1.artLayers.add();
docRef_1.activeLayer.move(docRef_1.backgroundLayer, ElementPlacement.PLACEBEFORE);
docRef_1.selection.selectAll();
docRef_1.selection.fill(white);
docRef_1.selection.deselect();
docRef_1.layers[0].merge();
The only part of this code that we haven't seen before is the move command which we are using on the active layer which will be the one we just created. The first part inside the brackets is the reference layer which we have defined as the background layer, the second part tells Photoshop to move the active layer to before the reference layer using ElementPlacement.PLACEBEFORE.
Step 14:
Now we are going to add what will become the shadow, at the moment this will just be a layer directly before the background layer filled with black. Here is the code:
docRef_1.artLayers.add();
docRef_1.activeLayer.move(docRef_1.backgroundLayer, ElementPlacement.PLACEBEFORE);
docRef_1.selection.selectAll();
docRef_1.selection.fill(black);
docRef_1.selection.deselect();
This code is nearly exactly the same as the code in the last step except that this is filled black and we don’t merge it yet. If you test it shouldn't look any different from what it did in the last step.
Step 15:
Okay now we want the script to resize the canvas so it can fit the image at any angle; this requires good old bit of Pythagoras. The code for this is:
var width = docRef_1.width;
var height = docRef_1.height;
var newSize = Math.round(Math.sqrt(width * width + height * height)) + borderSize;
docRef_1.resizeCanvas(newSize, newSize);
The first two lines create new variables for the width and height. The next line create a variable for the new size of the document, the Math.sqrt function in this takes the square root of the number in the brackets and we add the borderSize just to account for the shadow we will create. The last line is resizing the canvas.

Step 16:
Now to create the shadow, we want the script to add a gaussian blur to the black layer we created earlier. I found that the value for the gaussian blur should be a third of the borderSize and the opacity, 50%. Here's the code for this part:
docRef_1.activeLayer.applyGaussianBlur(borderSize / 3);
docRef_1.activeLayer.opacity = 50;
The first line is in the same for as the average blur which we made in step 5.
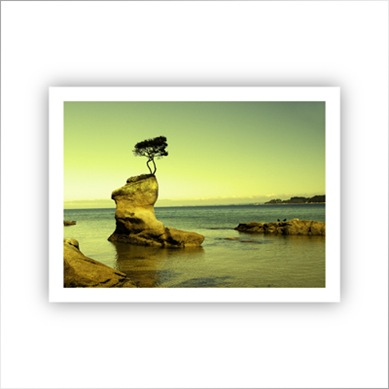
Step 17:
We now want the script to rotate both the image and the shadow then merge them, this gives a better result than merging them then rotating. We want the angle of rotation to be different each time but somewhere between -20° and 20°. The code for this is:
var angle = Math.round(Math.random() * 40) - 20;
docRef_1.activeLayer.rotate(angle, AnchorPosition.MIDDLECENTER);
docRef_1.activeLayer = docRef_1.layers[0];
docRef_1.activeLayer.rotate(angle, AnchorPosition.MIDDLECENTER);
docRef_1.activeLayer.merge();
The Math.random function will select a number between 0 and 1, so this number is not an integer, this is why we have the rounding function in the first line. To manipulate this number so it is between -20 and 20 we have the script multiply it by 40 then subtract 20 from the rounded number. This number is stored in a variable named angle.
We then have the rotate command used on the active layer which is still the shadow layer, her define the angle to be our angle variable and the anchor to be in the middle. The rotation can be done in Photoshop by hitting Ctrl+T.
The last three lines select the image layer, rotate it then merge them.
Final Script:
preferences.rulerUnits = Units.PIXELS;
displayDialogs = DialogModes.NO
open(File(openDialog()));
var docRef_1 = activeDocument;
docRef_1.backgroundLayer.duplicate();
var white = new SolidColor();
white.rgb["hexValue"] = "ffffff"
var black = new SolidColor();
black.rgb["hexValue"] = "000000"
foregroundColor = black;
backgroundColor = white;
docRef_1.selection.selectAll();
docRef_1.selection.fill(white);
docRef_1.selection.deselect();
docRef_1.layers[0].duplicate();
docRef_1.activeLayer = docRef_1.layers[0];
docRef_1.activeLayer.applyAverage();
for (RLevel = 0; RLevel <= 255; RLevel ++) { if (docRef_1.channels["Red"].histogram[RLevel]) { break; } } for (GLevel = 0; GLevel <= 255; GLevel ++) { if (docRef_1.channels["Green"].histogram[GLevel]) { break; } } for (BLevel = 0; BLevel <= 255; BLevel ++) { if (docRef_1.channels["Blue"].histogram[BLevel]) { break; } } var R = 0; var G = 0; var B = 0; if (RLevel > GLevel && RLevel > BLevel) {R = 255;
}
if (GLevel > BLevel && GLevel > RLevel) {G = 255;
}
if (BLevel > RLevel && BLevel > GLevel) {B = 255;
}
var color = new SolidColor();
color.rgb.red = R;
color.rgb.green = G;
color.rgb.blue = B;
docRef_1.selection.selectAll();
docRef_1.selection.fill(color);
docRef_1.selection.deselect();
docRef_1.activeLayer.invert();
docRef_1.activeLayer.blendMode = BlendMode.COLORBLEND;
docRef_1.activeLayer.opacity = 50;
docRef_1.activeLayer.merge();
var width = docRef_1.width;
var height = docRef_1.height;
if (width <= height) { var borderSize = Math.round(width * 0.15); } else { var borderSize = Math.round(height * 0.15); } docRef_1.resizeCanvas(width + borderSize, height + borderSize); docRef_1.artLayers.add(); docRef_1.activeLayer.move(docRef_1.backgroundLayer, ElementPlacement.PLACEBEFORE); docRef_1.selection.selectAll(); docRef_1.selection.fill(white); docRef_1.selection.deselect(); docRef_1.layers[0].merge(); docRef_1.artLayers.add(); docRef_1.activeLayer.move(docRef_1.backgroundLayer, ElementPlacement.PLACEBEFORE); docRef_1.selection.selectAll(); docRef_1.selection.fill(black); docRef_1.selection.deselect(); var width = docRef_1.width; var height = docRef_1.height; var newSize = Math.round(Math.sqrt(width * width + height * height)) + borderSize; docRef_1.resizeCanvas(newSize, newSize); docRef_1.activeLayer.applyGaussianBlur(borderSize / 3); docRef_1.activeLayer.opacity = 50; var angle = Math.round(Math.random() * 40) - 20; docRef_1.activeLayer.rotate(angle, AnchorPosition.MIDDLECENTER); docRef_1.activeLayer = docRef_1.layers[0]; docRef_1.activeLayer.rotate(angle, AnchorPosition.MIDDLECENTER); docRef_1.activeLayer.merge();
