

12:17:00 AM
Step 1

Step 2
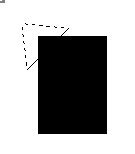
“Rasterize” the layer; to do this, right click on the layer in the Layers Tab and choose Rasterize Layer. Now make a selection like here, using the Polygonal Lasso Tool:
Step 3
Use the key combination CTRL+C, CRTL+V to copy and paste the selected area. Apply color overlay to the new layer selecting Layer > Layer Style > Color Overlay. Set the white color in the window which appears and adjust the position of the new layer to be in the upper left corner of the rectangle, like here:

Step 4
Right click on the layer “layer 1 copy”, in the Layers Tab, and select Duplicate Layer. On the new layer apply the color overlay effect and set the color to grey. Flip the layer horizontal and vertical. To do this step select first Edit > Transform > Flip Horizontal and then Edit > Transform > Flip Vertical. This is the result:

Step 5
Duplicate the first layer and set the color overlay to black. Delete an small area like in the next picture, using a small brush like “Soft Rounded 20 pixels” and set the opacity to 30% in the Layers Tab:

Step 6
Select the layer “shape 1” and duplicate it. Set the color overlay to white, delete an area with a “soft rounded brush 155 pixels” and set the opacity in the Layers Tab, for this layer, to 62%. Move this layer one pixel up and one pixel to the left:

Step 7
Above of the layers draw a horizontal line with white color:

Set the opacity to 50% and make others like here:

Step 8
Link the layers in the Layers Tab and rotate all these layers like here:

Step 9
Apply other elements on your icon and that’s all:


Post a Comment