12:16:00 AM
Website Button
design
Step 1

Step 2
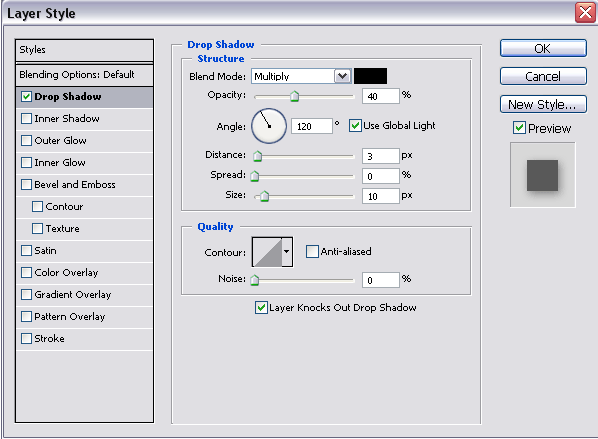
Select Layer > Layer Style > Drop Shadow to apply the drop shadow effect. When applying the effect use the next settings:
Step 3
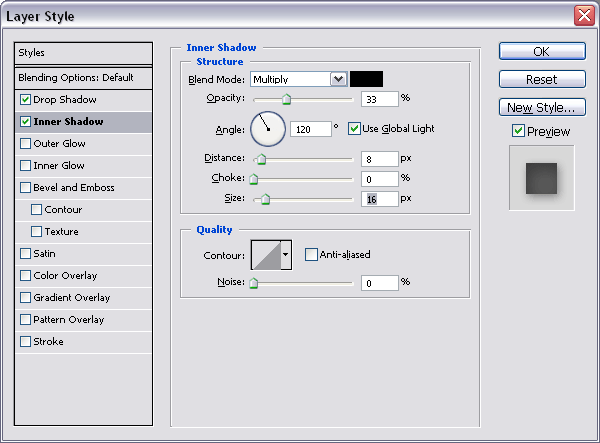
Apply the inner shadow effect on your layer. To do this select Layer > Layer Style > Inner Shadow and set the next settings in the window which appears:
Here is an intermediary result:

Step 4
Draw another rectangle, like in the next picture, with a white color and “rasterize” it. To make this step choose your layer in the Layers Tab and select Rasterize. Now you can work better on this layer:

Step 5
Using the “Polygonal Lasso Tool” (find it in the Tools Tab) make a selection like in the next picture (make this selection on the last rectangle that you drew, the white rectangle):

Using the DELETE key delete the selected area:

Step 6
Select a small brush in the Tools Tab, like “Soft Rounded 45 pixels” and delete the bottom corners of the white polygon like here:

Set the “Opacity” to 50% in the Layers Tab:

Step 7
Draw another rectangle with a white color and place it in a position like here:

Set the “Opacity” of this layer to 12%, and the result should be something like this:

Step 8
Select the layer “Shape 1” in the Layers Tab. In the Tools Tab select the Horizontal Type Tool and type a text on your button with a grey color:

Step 9
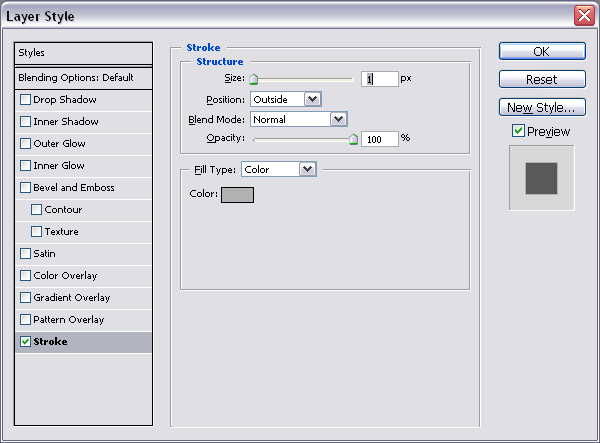
Set a stroke to your text. To do this select, on the layer with the text, Layer > Layer Style > Stroke. Apply the next settings to the stroke:
And another intermediary result:

Step 10
A little bit more color on your text and that’s the result:

0 Responses to "Website Button"


Post a Comment