

12:14:00 AM
Step 1

Step 2
Select Layer > Layer Style > Drop Shadow to add shadow to your layer. Apply the next settings for this effect:
Step 3
Apply the “Inner Shadow” effect. To do this, select Layer > Layer Style > Inner Shadow with the next settings:
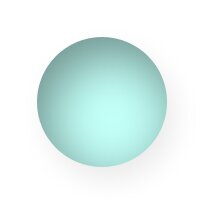
After these two steps the result should be something like this:
Step 4
Create a new sphere with a white color and “resterize” the layer which contains this sphere:
Step 5
Make a selection on this sphere like this:

Delete the selected area and set the opacity for this layer to 25%:
Step 6
Duplicate the layer, resize it and rotate it, move it like below (to make these actions check the Edit options menu):

Step 7
Duplicate the layer “Shape 1” and set the “Blending Mode”, in the Layers Tab, to “Pin Light”:
Step 8
Duplicate it again and set the “Blending Mode” to “Multiply”. Make this step again and this is the result:
Step 9
You can now play with the details and obtain a nice translucent ball:

Post a Comment